Introduction[]
Hello, and welcome to Part 31 of MystRay's Final Fantasy XII Walkthrough! We're really trucking now!
A Dark Rumor[]
Our next hunt is a unique one and you'll see why when we get to the monster. First, go to Montblanc and get all the rewards you can. Make sure you don't ever sell the Gemsteel and Empyreal Soul that he gives you. Especially if you want the best sword in the game, the Tournesol. Then, accept all the hunts. Once you've accepted the hunt, go to the Ogir-Yensa Sandsea. There, go to the Central Junction and go down the cave there. In the Zertinan Caverns, take the only other exit into the Nam-Yensa Sandsea. Go up the stairs and meet Monid. And there we find out the real mark is...
| Mark Battle:"Belito"/Elite Mark 5 | |||
| Level: 49 | |||
| HP: 115,659 | |||
| MP: 999 | |||
| Steal: Elixir, Dark Matter | |||
| Diffuculty: Easy | |||
|
This is easy. Take out the siblings and then just pummel him into the ground. | |||
Afterwards, Monid gives you your reward of 5100 Gil and 1 Megaelixir. Now we get to trek all the way back to the teleport place. Meet you there.
The Dead Land[]
Now we're going to go to two seperate areas that are connected and are completely optional. First though, we need to talk to some petitioners. All three of them are found at Nalbina Town. Go there. We need to talk to Morgen, Popol, and Barrong, to accept the hunts for the Roblon, Goliath, and Deathscythe. Once you've done that, teleport to the Salikawood. From the crystal, go north to the Piebald Path. Go through that exit.
This is the first of two annoyingly hard areas that we're gonna traverse. From the Greencrag, go through the other exit.
You may recognize this area as the area where we saw Ashe and Vaan and Ghost Rasler. This is The Muted Scarp. There's a save crystal and a Nu Mou. That Nu Mou will come into play for another Esper quest later on. For now though, go through to the next exit.
This is the Vale of Lingering Sorrow. Go to the dead end to the west and get the urn. This will give you the map of the area. Now go north.
This area is Hope's Reach. Just kill the Baknamys and go on.
The big area that you're in now is The Slumbermead. Go to the northwest and find the hidden path. Follow until you get to the next area.
This is The Fog Mutters. You'll meet up with some old Foobar friends here. Just go towards the other exit.
In this area, Overlooking Eternity, we have something for you...
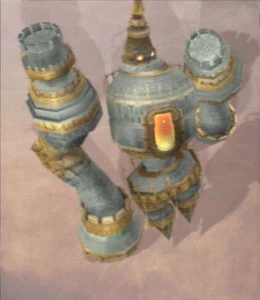
| Mark Battle:Roblon/Mark 26 | |||
 |
Level: 47 | ||
| HP: 177,365 | |||
| MP: 999 | |||
| Steal: Fire Stone, Iron Ore, Fire Crystal | |||
| Diffuculty: Medium | |||
|
This guy isn't hard by himself, but the only reason that he gets a Medium rating is because of his helpers. This area has infinitely spawning Dead Souls. By the time you get to the Roblon, you'll be swamped. Just target the Roblon and when you've gotten around a quarter of his HP gone, just spam Quickenings. Keep switching in characters and doing Quickenings and hopefully he'll go down fast. | |||
Once he's defeated, go back to The Slumbermead and walk over to the Succor Midst Sorrow area.
Here you'll find a Teleport Crystal, so save up and take a breather. This is unfortunately the last break you'll get before the end of these two areas. I would recommend grinding around here until you're around level 60, then continue on.
The next two areas are pretty easy. Just go through them and walk into the next location. The Necrohol of Nabudis...
The Dead Hollow[]
This is easily the hardest area in the game, enemywise. The first thing you'll notice is that we have a Mark right off the bat...
| Mark Battle:Goliath/Mark 27 | |||
 |
Level: 47 | ||
| HP: 224,294 | |||
| MP: 999 | |||
| Steal: Holy Magicite, Iron Ore, Holy Crystal | |||
| Diffuculty: Easy | |||
|
This guy is easy. As soon as you see him, cast Dispel since he'll put up a Magick Barrier. Use Penelo with the Fomalhaut + Dark Shot and you're golden. | |||
After that, we begin our run through the annoying, yet cool area. There may only be five zones in the Necrohol, but they're somewhat long and filled with dangerous monsters. This first area is the Hall of Slumbering Might. The exit is in the south.
In the Hall of the Ivory Covenant, just keep heading south and you'll find the exit.
The next room is the Cloister of the Highborn. As soon as you're in an open area without any enemies, press R1 and attack one of your characters until...
| Mark Battle:Deathscythe/Mark 28 | |||
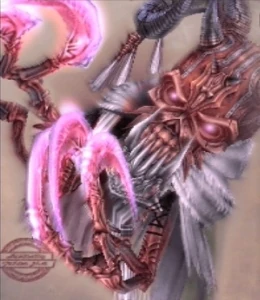 |
Level: 44 | ||
| HP: 125,601 | |||
| MP: 999 | |||
| Steal: Book of Orgain-Mille, Book of Orgain, Capricorn Gem | |||
| Diffuculty: Easy | |||
|
This guy is pretty easy. The only things that you need to watch for are Annul and when he puts up a physical paling. When he does this, you should start spamming Holy with all 6 characters. Once the paling falls, things start getting a little hectic, but nothing you shouldn't be able to manage. | |||
Later on in this same zone, you'll find a room full of chests. If you were smart boys and girls and listened to my earlier warnings and didn't open the forbidden chests, one of these will contain the fabled Zodiac Spear. Once you have it in your grasp, give it to Basch. Then, keep going south to go to the next area.
In the Cloister of Distant Song, just keep heading south and you'll find the exit.
In the Hall of Effulgent Light, go to the far north and kill the mimic disguising itself poorly as a chest. Then, you'll notice a hidden path. Take it and examine one of the pillars. This is the hidden Baknamy Shop. Here, sell all of your allowed loot. Buy 2 Maximillians and 2 Magepower Shishaks for Fran and Basch and a Demon Shield for Fran. Then get Telekinesis and Scathe. When you're done, you can leave and go back to the Salikawood. Now, we need to go back and get our rewards!
Rewards[]
From Popol, we get 2800 Gil, 2 Hi-Ethers, 1 Soul of Thamasa. Don't sell the Soul of Thamasa. It's also important for the Tournesol. From Barrong we get 3600 Gil, 1 Save the Queen, 1 Einherjarium Loot, and from Morgen we get 3100 Gil, 1 Giant's Helmet, 1 Mythril. That does it for this part! See you guys next time! This is Myst signing out. Have a good day!