Unquantulatable Quest - Day 113:
I'm a Mommy, Space Monkies! Yes, ol' BlueHighwind has reproduced, though in the most horrible way imaginable. Those eggs my tentacle arm gave birth to have hatched. If you want to know why my young look like, just imagine my face, only in the middle of hideous swirling mass of flesh. They also only seem to communicate by screaming. They're hungry creatures, but luckily there's plenty of food since my arm keeps on giving birth to new eggs. The older ones eat their little brothers. Okay... this is pretty gross. I'm going to shoot all this garbage out the airlock. This arm of mine is never going to get right again. The only option is to amputate. ...if it lets me.
More Sidequests[]
If you haven't bought the Niho yet, do so sometime during this sidequest round.
We're going to start off by killing two birds with one stone. First of all, enter the Hunt for Marilith. The bartender of the Sandsea in Rabanastre is the Petitioner, making our job finding him pretty easy. Finding the Mark, however, is not so easy. We need to enter an optional dungeon called the Zertinan Caverns. Go in through the Westersand entrance to the cave. Go around in this location and clear every single enemy. The enemy will appear only after a long wait in the Southeast corner of the area. Its a little nook in the wall with some bushes and a view outside to your right. Sometimes a Chest appears here. It took about two minutes for me, dear me that was boring. After that's done, the fight will begin:
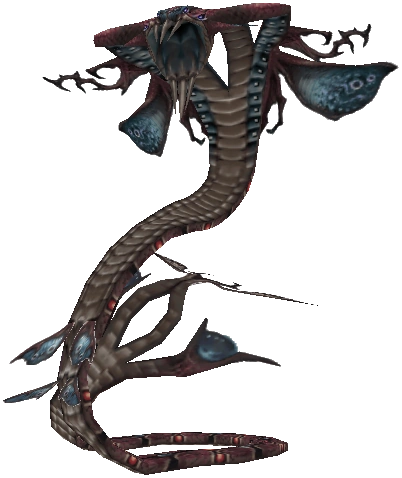
Mark Battle: Marilith
HP: 54921
Steal: Fire Stone, Prime Tanned Hide, Fire Crystal
Difficulty:Easy
Strategy:
Not only does this look nothing like the Fire Queen, Marilith, its not even the right species. Maybe its just an homage, but I say its lazy programming.
All this enemy can do is use regular attacks over and over again. Sometimes you'll also get Tail Spear, but that's it. I really have next to nothing to say about this Mark, because its just so simplistic. Fight, fight, fight. You really don't need to do anything special here, its like a longer battle with a regular enemy. The enemy is weak to Water and absorbs Fire. There, done.
After the Mark is slain, we're going to continue down into the dungeon. Go East through the top of the next area. You'll see a blank space in your map where there isn't one as you move in that direction, the game is screwing with you. In the area called "Balamaka Fault" you'll find a Map Urn in the bottom section near the South exit. By the way, going that way will lead us to an optional boss that I want to fight here. If you're worried about health, there's a Save Point in the Undershore area, though navigating over there can be a little long. Adrammlech is hiding in the central crossroads of the dungeon, thus making finding him a cinch. Unfortunately, there seems to be a bit of sandstorm going on inside.
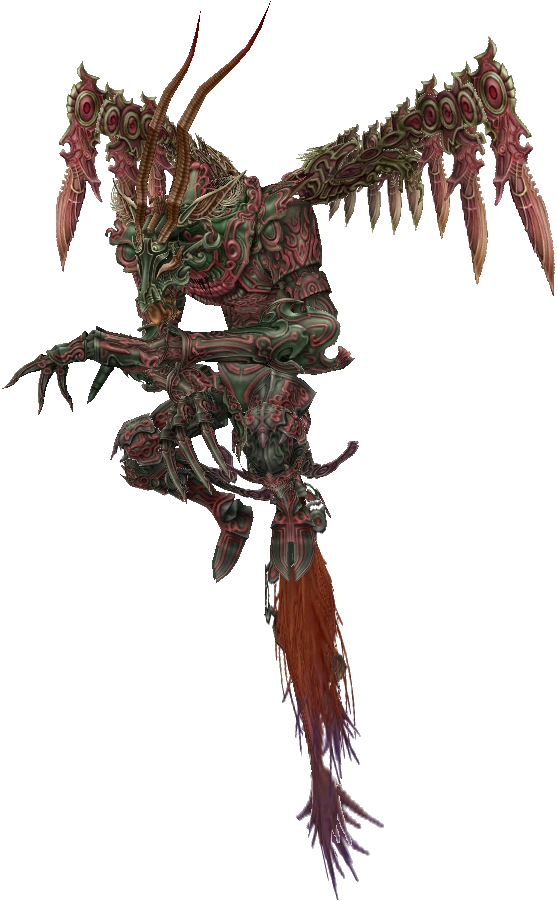
Optional Boss Battle: Adrammelech
HP: 39630
Steal: Pebble, Capricorn Gem, High Arcana(needs Canopic Jar)
Difficulty:Medium
Strategy:
Its Dyce! My favorite FFT character! Oh wait, this game takes place in FFT's past, so this creature will be Dyce in about 1000 years. Adrammelech doesn't fare much better in Ivalice's Middle Ages than he does in Ivalice's Antiquity. You'd think that once humans have evolved beyond noses that a demon this old would grow more powerful, right?
This is the Esper of Lightning, in case you didn't know. I would advise buying three Rubber Suits to block his attacks, but they cost 14000 Gil. That's way too much money just to make yourself feel better. This is by far the easiest of all the optional Espers since his HP is so incredibly low. So its definitely doable right after Cid, or before probably. All the optional Espers have "gimmicks" in their battles, some being really dangerous. Adrammelech's only gimmick is that undead zombies keep on popping up out of the ground. Some of those can use "Cloying Breath" a status effect attack that is intentionally a bigger problem than anything the boss himself can throw at you. "Bleed" will hit your entire party with Sap, that's really all you have to worry about from Adrammelech at the moment.
By the way, this boss is Flying. Yeah, its a load of horse shit, I know. Use ranged weapons, that's your only way to deal damage normally. Any weapons will do, it doesn't make that much difference. It would be nice to use "Telekensis", but some moron in the development team (you know who you are) made it so that you can't find that Technick until you're 99% of the way through the game. You might also want to use "Blizzaga" from Balfonheim if you're into Magic.
When his HP gets low, he'll use "Thundaja", his cinematic attack. Expect heavy damage and an occasional Stop. Remedy that, or use a Chronos Tear. After that, Adrammelech will use "Perfect Defense", a very annoying move that blocks all damage of every kind. If you somehow manage to pull off a Quickening before "Thundaja" you might end the battle early. Though I would just run off into a corner and wait until Adrammelech's barrier is down, then attack again.
Interesting note, you can actually flee from this battle by entering another area. Thus you can use Adrammelech to steal the rare Loot High Arcana over and over again. NEVER sell those, ever. If you just manage to steal one from all thirteen Espers, you'll be fine.
With Adrammelech beaten, we get another useless Esper. There's nothing left to do here in this cavern but hunt for Treasure in the Chests.
Return to the barkeep in Rabanastre to recieve your reward for Marilith. He'll give you 2200 Gil, a Serpent Eye, and three Teleport Stones. Save that Serpent Eye, that's a good tip right there.
Now for more Hunts! Let's do a double again. Take both Ixtab and Mindflayer this time since they're both hanging in the Henne Mines. The Petitioners for both are is in Jahara, so go over to there to find them. Ixtab's petitioner is a High Chief in the farthest area named "Zalaya" or something similar to that. Turns out there's some kind malevolent spirit of Garif ancestors that's really becoming a nuisance since it keeps on killing people. Well, you got the right people here! We're the best monster slayers in the world! The petitioner for Mindflayer is a Warrior named Goromu in the South side of the first area. Mindflayer, a creature the Garif fear for some reason, is in the Phase 1 Dig.
Take a Chocobo over to the Mines and enter. Go over to that switch room, and enter the long path that loops around, the Phase 1 Shaft. In the corner there, Ixtab should appear:
Mark Battle: Ixtab
HP: 22562
Steal: Dark Crystal, Book of Orgaine-Mille, Flame Shield
Difficulty:Easy
Strategy:
Here is another easy Mark. The enemy likes to start off by using "Doom" on the party leader, but we can easily deal with that. Just attack normally until he falls, you can take anything he gives. Or to save yourself some trouble Niho a Chronos Tear to Stop him, thus ending the fight really quickly. Even a mediocre Quickening can blow through half his HP, so this battle is no trouble at all.
Ixtab does know, however, the most annoying attack in the entire game. "Annul" will instantly destroy all your MP in a single blow. I hate that attack. You have no idea!
You'll probably want to return to Jahara and heal up before going after Mindflayer, who is slightly more difficult. Return to the High Chief dude to get our reward: 1300 Gil, an Ether, and Soul Powder. That last item is something you want to hold onto, trust me. That will be very important later.
Now go back to the Mines and go a bit deeper than you did before. Mindflayer is hiding in the confusing maze of the Phase 1 Dig. Go straight South to a three-way intersection, he should be standing there. Your MP has to be full when you enter this area, so I hear:
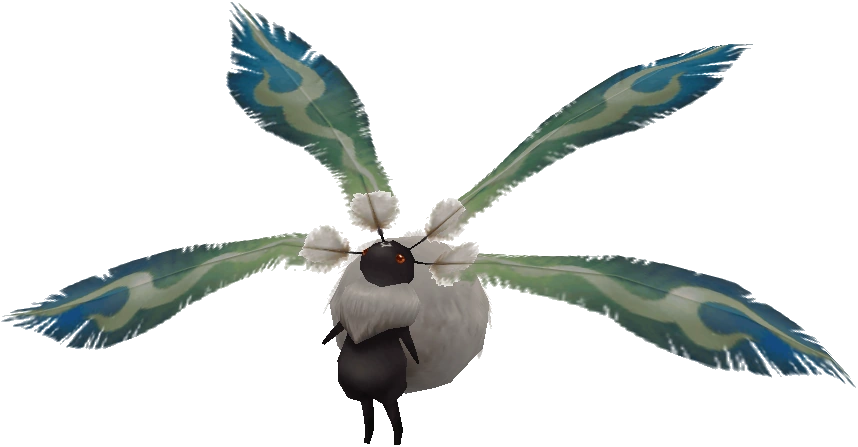
Mark Battle: Mindflayer
HP: 31161
Steal: Pebble, Float Moat, Vanishga Mote
Difficulty:Easy
Strategy:
Not really the most accurate Mindflayer, but I guess I have no choice but to take it. Hell, at least it isn't as bad as that sad sack they tried to pass off as an Ahriman.
This guy can hit a lot better than Ixtab, since he can Stop you or use this annoying attack called "Dark Shock" that can cause a multitude of status effects. Just be ready to use Chronos Tears or "Esuna". He'll also use this attack called "Invert" which replaces your HP values with your MP. So if you had 4000 HP and 300 MP, your HP is now down to 300 and your MP is fully filled since you don't have space for 4000 MP. Its just a strong attack, not even that bad since it fully restores your MP, which is actually a bit more important since you can revive your characters with "Raise".
When Mindflayer's HP is low, he'll fully restore himself with "Soul Etude" (FUCK!) and then give himself a ton of good status effects with "Hero's March". How come the bad guys know all the cool moves? "Dispel" that nonsense and just fight the battle over again exactly the same as the first time. If you're fast enough, he might not even get to use it. Really, is another thirty thousand that much more of a burden?
The other Petitioner will give you 2200 Gil and a Carmagnole for your trouble.
Let's continue on our slaughter of the Marks: Feral Retriever. Go over to Mt. Bur-Ominsace and look for a priest named Hymmas. Turns out there's a giant Coeurl running around the ice fields, and we have to get rid of it. You bring the cash, we kick the ass, padre. The Mark is found in the Spine of the Icewyrm, a location you'll usually go through on the way down to the Stilshrine. Its just South of the Save Point. The Mark can usually be found trudging around the Northwest side.
Mark Battle: Feral Retriever
HP: 22559
Steal: Pebble, Quality Pelt, Prime Pelt
Difficulty:Easy
Strategy:
Yet again, an easy Mark. Perhaps I'm overly cautious in this Hunting thing, since it seems like all the enemies here are total pushovers.
First strategy: Niho + Remedy. Dear God, this puppy gets fucked up by that combo. Along with everything else, Disease means that he can't use his worst attack. "Balance" takes away HP equal to his max HP minus his current HP. But when his current HP is his max HP, it does nothing. He might be able to heal it with "Purify" though, but you'll probably be done with him before that. He knows it, but I don't really know if he'll use it, since he never survived that long against me.
For those who hate cheap moves like that, here's the regular strategy. Simply attack wildly until the boss falls. He's a Coeurl so get used to really annoying attacks like "Blaster" that blow to pieces with status effects. The only serious danger is the aforementioned "Balance", but that only appears when his HP is really low. Just use a Quickening when he's down to a quarter and you'll be fine.
The priest will give you 1500 Gil, a Recurve Crossbow, and a Teleport Stone for getting rid of his Coeurl problem. Always glad to help, padre. Tell your friends about us!
Now for a something a little more adorable - the Vorpal Bunny. Take the Hunt, then go down to the Viera village. We're looking for Nera, who is hanging in the lunchroom in the Spiritwood area. The Bunny it turns out, is an ingredient in Vision Dust, a narcotic that is necessary for Viera potion makers to get their licenses. Nera's girlfriend, Alja, is too slow to catch the hare, so we have to do it for her. Nera tells you that the bunny is "somewhere in the Golmore Jungle". Thanks for being specific. Go down to the Rustling Chapel area, which happens to be the Southernmost spot of the Jungle, just North of the Feywood. The bunny should appear somewhere around the second big square area, right in the middle of the Rustling Chapel. The enemies here are a tad stronger than the rest of the Golmore Jungle, just a warning:
Mark Battle: Vorpal Bunny
HP: 20010
Steal: Drab Wool, Hi-Potion, Blood Wool
Difficulty:Easy
Strategy:
Awww... Mom, can I have one? No? Darnit, Mom! Okay, Whatever... Time to die! HAHAHAHAHAHAHAHAHAHA!!!
As soon as you spot it, the bunny will run away. If she disappears from your sight, she'll hide underground and fully restore her HP. Just don't let that happen. To stop her from running, use the "Berserk" spell or throw Bacchus Wine. (Make sure to use "Dispel" before that. This bunny has some scary statuses, like Faith.) That will increase the intensity of the bunny's attacks, but it will also keep it in one place. After that, surround and destroy it. There really is no trick beyond that.
When you return to Eruyt Village, Nera and Alja have a frank discussion about something or other... I can't say I was listening. I just noticed that Vieras wear thongs with bunny tails. I wonder what would happen if I slipped a $10 in there. How badly would I be slapped? Well, Alja and Nera don't kiss or anything, so frankly I'm not interested. Reward time: 2000 Gil, Lightning Arrows, and Gillie Boots.
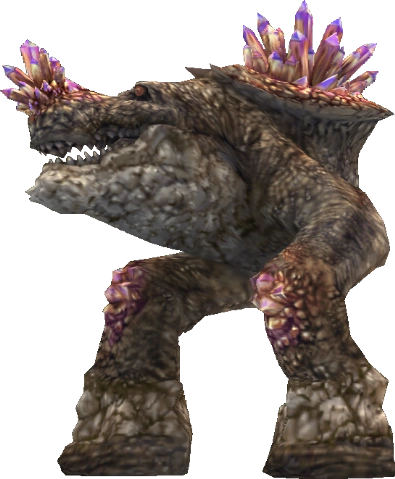
Let us end this seemingly endless run of Hunts with just one more for good luck: Atomos. Don't expect this to look anything like the monster from FFV or the FFIX Summon. Just a warning. The Petitioner is in Nalbina, some guy hiding behind a counter in the market. This monster is causing trouble with the caravans, so its up to the Markbusters to get rid of it. You'll find the enemy trouncing around the Northern Skirts area in the North side (duh) of the Mosphoran Highwaste.
Mark Battle: Atomos
HP: 40020
Steal: Potion, Tanned Giantskin, Gemini Gem
Difficulty:Easy
Strategy:
I warned you. Its not a giant gaping mouth that will suck you into a dirac sea, instead its just a rock giant. Weirdly, it doesn't even look the same in FFXII's sequel, where Atomos transforms into a flying dragon creature. Is it so hard to keep this shit straight?
By the way, this is probably the easiest Hunt of the entire page (though Marilith is healthy competition). Atomos knows absolutely no tricks at all, instead he just likes to attack physically and heal himself. Every so often you'll get positive statuses like "Protect" which you can easily "Dispel". "Protect" was a sight of joy for me, because during the load time you get free hits where you don't need to heal. Atomos is also really slow. He might use "Restore" to bring back 25% of his HP, but he'll only use it once, if at all. A purely defensive strategy will do nothing against our power! DIE DIE DIE!
Return to the guy in Nalbina to get our reward: 1800 Gil, a Diamond Shield, and an Earth Rod.
Okay, I've had enough of this. Its starting to get a bit boring. This is probably a record here for the most number of Easy bosses I've fitted on a single page. And anyway, I want to get to Giruvegan before I'm ancient, right Space Monkies?