This is Hamfruitcake's Final Fantasy X-2 walkthrough. Feeling nostalgic today, just found out Tim Curry voices Nigel Thornberry. Am in a state of delirious shock for some odd reason.
Fiend Colony[]
Head over to the Calm Lands and pop in to say hi to Clasko and ensure you have some Chocobos captured before you go in. It's time to raise some! Well... One hopefully... Head in and mess about with the chocobo feeding menus, hit the 'Nutritive Greens' menu and ensuring you have a load of Mimmett Greens by increasing the percentage by a fair bit. Next go to the raise Chocobos bit and give one of your runners a whole load of them until they reach level 4 or 5. Then Dispatch the Chocobo the Mi'ihen Highroad and pop back to the Calm Lands, engage in 7 random battles and then go back to talk to Clasko. If the Calm Lands are quiet equip the Lure Bracer to instigate 'More Encounters', a useful ability for when you intend to grind those levels; or now...
Once inside Clasko will look nervous but everything should be fine, he's just trying to worry you. He'll tell you that incredibly the Chocobo uncovered some 'mysterious cave', the Chocobo 'says' it's on the Old Road where it's all big and terraced and you shouldn't have any trouble finding it... Well if the chocobo says... We'd best be off then!
If this doesn't work just try again, it shouldn't take up too much of your time.
On the Mi'ihen Old Road, around the big open area, you'll find a glowing green cloud and hop in the portal to see what has been uncovered! A bog standard FFX-2 cave, or so it seems. Straight ahead you'll find a chest with a tutorial on how to blast the walls away with some S-bombs. This is where it all gets interesting and head-achey.
| Bomb | Power | Wall | Hardness |
|---|---|---|---|
| S-Bomb | 1 | Soft | 5 |
| M-Bomb | 2 | Medium | 10 |
| L-Bomb | 3 | Hard | 25 |
As I guide you to the big bad boss at the end of here I'll be telling you to blast different types of walls as you go. You'll win different strengths of bombs from the battles you encounter around here, you'll have more than enough to get through as you travel so don't worry about that. As the table to your right displays you'll have S-Bombs, M-Bombs and your big L-Bombs which will deal 1, 2 and 3 damage respectively.
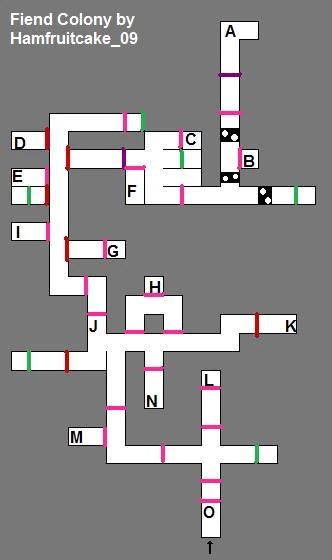
Around the cave will be walls you can blast through, if in doubt about whether you can or can't blast it you'll see Yuna's skirt float about in the wind coming from behind it so there is your clue. There are different levels of walls, and essentially you'll need to combine the bombs you throw in order to add up to the walls strength and then hey presto you're through? Still with me? So for a Medium wall you'll need 5 M-Bombs because they add up to 10. I'll keep you right of course. I've provided you with a map to find your way around and see where all the treasures are but I'll be leading you straight to King VERMIN! at the top corner for now and then you can pop back in later to pick everything else up.
- The wall straight ahead is a warm up for you, it's a Soft Wall so it needs 5 S-Bombs to blow away and you'll recieve some M-Bombs here.
- The next wall is the same so same as before.
- Once through head to the left and it's the same again, a Soft Wall! Dull!
- Keep heading left until you reach a dead end then go north and blast the Soft Wall in front of you, you can also use one M-Bomb plus one L-Bomb if you wish to maintain some variety.
- Head upwards to another dead end and then left and find a dead end to your right with a bunch of empty chests. There is a Soft Wall behind these.
- Now head up and blast the Soft Wall to the left. So far, so boring.
- Once through head left and you'll find a very long corridor; this is the tricky part. Run all the way to the end and touch the back wall run back down on the right and you'll need to blast the third archway down, this is a Medium Wall so your combo of bombs should add up to 10.
- Then head along and you'll find a wall Hard Wall with a thickness of 25.
- Keep heading along to find a crossroads. You'll need to head down to the right and take the bottom path on the left and blast the Soft Wall.
- Head along and there'll be some jumping platforms to the left and keep heading up to find another Soft Wall.
- Keep going and you'll find a Hard Wall and at the end equip your party for a certain King Vermin!
Before you enter ensure you have protection from Fire and Sleep if your party is under level 50. Otherwise this should be a relative walk in the park.
Boss Box!
| Boss Battle : King VERMIN! |
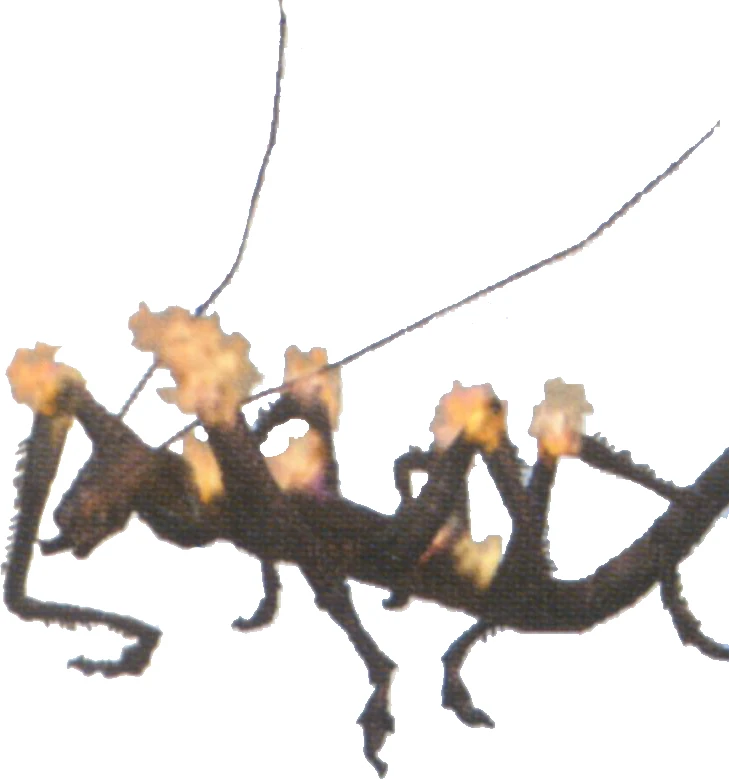
Of course you can't stay mad at a beastie who's name is based on a Barret quote. Shame the fiend is quite as awesome as the person it's voice came from. He's big, he's bad, he's bloody ugly looking but all you need to do is whack him! With a slightly lower magic defence than standard defence you could take advantage of this but it's such an easy battle anyways there is little need to be concerned. It's a case of healing and hammering. Or just hammering. |
For your success you'll recieve the Font of Power Garment Grid, a useful Garment Grid which gives the Half MP Cost ability when equipped, marvellous! Then you'll find yourself slap bang outside again.
| Letter | Treasure | Letter | Treasure | Letter | Treasure |
|---|---|---|---|---|---|
| A | King VERMIN! | B | Arcane Lore | C | Turbo Ether |
| D | Elixir | E | Mega Phoenix | F | Sword Tome |
| G | Elixir | H | White Tome | I | Fiends |
| J | Empty Chest | K | Elixir | L | Mega Phoenix |
| M | Black Tome | N | Fiends | O | S-Bomb |
Now you pop back in thecave if you wish and grab all the remaining treasures, use the map to find everything you could possibly need. The green lines are walls which have powerful fiends behind called Epitaphs which have that game ending move which may petrify your whole party so have your Ribbons at the ready and they provide you with a healthy dose of EXP too. But lower levels be warned, they are best avoided. And there is the list of the treasures you can find. Keeping in mind that a couple of the chests do contain random encounters and you'll also come across a bunch of empty ones it's also quite a good haul in here.
Cave Ruins[]
To open up this special area you'll once again need the use of Clasko's Chocobo Ranch, check here for more information on getting those chocobos to work as your feathery slaves for you. I have already listed on the page how to get to the Cave Ruins but I'll reproduce the instruction here just so you don't have to hop from page to page.

- Dispatch all thise Bold Max Level 5 Chocobos at lvl 1 to the Calm Lands.
- Go fight 7 RANDOM BATTLES
- Head back to the Ranch and SAVE before talking to Clasko. Hopefully all the Chocobos will have returned. If not reload your game.
- Restore your Chocobos HEART and Raise them one level each.
- Dispatch to the Calm Lands, fight 7 battles, save and raise them a level.
- Always sending them to the Calm Lands and raise them a level up each time til you reach level 5 for them all.
- Once you've done this send Choco Runners 1, 2, and 3 to the Calm Lands. Leave 4 behind. Go out fight your battles and return.
- Now send out Choco Runners 2, 3, and 4. Leave 1 behind.
- Go out and fight your battles and return to a scene which will reveal the cave containing The Amazing Chocobo. Hey presto!
Paine will rightly assume Clasko is going to beg for our help to get the Chocobo in the cave. This will involve a lovely imitation of him. Once inside the cave I'd recommend sticking the Charm Bangle on if you have it to prevent random encounters. For your first trek you'll be heading straight down the middle to find the Anything Eater behind the wall.
| Boss Battle : Anything Eater |
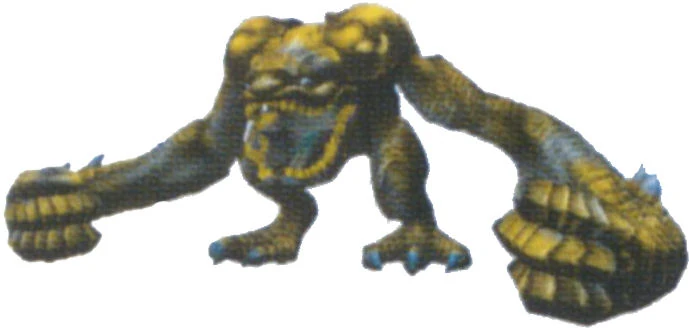
A high magic defence is necessary in this battle so your standard 2 Dark Knight/1 Alchemist dream team should work wonders here. Heal and attack with Darkness or any other powerful attacks you may have. The battle shouldn't take long due to the fiends paltry HP so just play it cool. |
Once that's done the idea is to simply open up all the walls (the red lines on the map) and this will open up the way to the Amazing Chocobo. A scene will follow with an elated Clasko and that will all add to your percentage. Once you've picked up the treasures you can pretty much leave and never look back. The best item in here is the AP Egg which will triple the AP earned for your girls, great for mastering those dresspheres if that's what you're into.
Here's the treasure you'll find in the ruins:
|
|
|
Once you're finished here there is one more trial to complete before finishing this game. And it's a long one... A very long one.