Hamfruitcake is oh so sleepy whilst writing this Walkthrough so would likes lots of oohs and aahs for the effort it takes her to keep her head straight.
Bevelle[]
| 100% Note
You must partake in the following top secret sequence of events in order to get 100% at the end of the game. There is no hint in the game you should come here or any prompting but it's here right now so hop to it. |
In a shock turn of events I am not sending you back to Kilika (yet) or to our final Hotspot Djose. No I am in fact sending you to Bevelle. Once you arrive a short scene will occur and we will get a glimpse of none other than Gippal standing on a very high peak looking very pleased with himself. Whatever could it mean?
At this point reguardless of who you gave the Sphere to you can view this scene so I urge you to now and follow me. Head into the Bevelle Headquarters and make the lift go down (yes that means going in the room on the left and making it go down again by touching the lower pedestal).

Back in the Cloister of Trials head on up to the Antechamber, collecting the newly restocked chests as you go of course. Head toward the Chamber of the Fayth to the right and watch Gippal entering to become slightly confused, then who sent that distress signal?
It's basically a case of hopping down the hole and following him back down the way you went last time but luckily all of those puzzles are finished now. And of course you can grab all the respawned chests. You will have to do that lift trick again to get into limbo but it's not too hard to remember I hope.
Back to where you beat Baralai and onwards to where you beat Bahumut you'll see the threesome meet up. Sounds quite mad. The three are in on something here... It seems all very sinister. They have abandoned their gangs and Baralai has lost Vegnagun, how he can lose such a massive thing like that? How does it even move? We learn a bit more about this giant gun. Why is Nooj's hair so rubbish? Man I really don't like that guy. Him and Paine would get on like a house on fire. Wait... They were all friends, it's getting quite confusing.
Oh my they are pointing guns at each other. Nooj shot his friends? See there is a reason that Nooj guy can't be trusted. Wait a second... Looks like he's possessed... And what does Paine have to do with this? And now Baralai is possessed, this is all so confusing! Bet you're glad you came now, how juicy is this?
Paine tries to stop the madness and you're attacked by a Malboro, talk about your bad timing! Use and abuse Firaga here to ensure your victory. Looks like Paine knew the three of them previously, she claims getting shot by Nooj was an accident, how can someone ask something like that Paine? Hey Paine? Ever been shot? Now you mention it...
Pick up the Crimson Sphere 1 and be on your merry little way via the Save Sphere back along the passageway.
Commspheres[]
Now just one more thing before we complete this chapter. Check your Commspheres. Overall Shinra should have planted 20 across Spira so ensure he has by checking this handy dandy table I'm just about to stick up. The only place you may not have been so far would be the Calm Lands and Clasko's little den so double check there just in case to ensure the Commspheres are placed. Luckily if you can't see him placing the sphere you'll hear him plodding along electronically so just listen out for that. If you intend to do 'Detective Rin' in Chapter 4 (you will be) ensure you head along the Mi'ihen Road and spot Shinra dropping the sphere down onto the ledge by talking to him. This will help later on. Honest.
|
|
Once you've done with that we can enter our final Hotspot, ignore Bikanel for now, we'll finish that mission later. From this point on there is no turning back, you'll be hurtled through this section straight into Chapter 4 and Chapter 4, I warn thee now, is notoriously pointless. You will spend ALL of it on the Celsius looking at Commspheres apart from a short-lived soujorn into the Thunder Plains to organise a concert. Oh yes. The excitement is tantamount to me sticking pins in my eyes. If you're into that sort of thing... Anyhoo let us wait no more and move on.
Djose[]
So Gippal hasn't returned yet and the Al Bhed are having some real issues here without him. What is it with Spirans? Are they so spineless they all need some big hoity toity male figureheads to tell them what to do all the time. Grow up and get on with it you lazy louts! Oh well, all the more gil for us!
No Way Djose![]
For accepting this mission, having not had a choice in the matter, you will recieve the Al Bhed Primer XIV. Let's enter that Temple! Shinra will dash past and hopefully place his final Commsphere if you're lucky. Into the Cloister of Trials up the big staircase in the middle to view the deceased Al Bhed, they really don't mind killing those buggers in this game...
Running into the cloisters and jumping over to the chest will net you a Stamina Spring. In the Temple you'll be faced with the foe Tomb who like to inflict various status effects such as Confuse, Petrify and Poison. Be prepared against this and chain your attacks in order to succeed against them, they are particularly weak to Ice and Holy so use Blizzaga and Holy to take them down with ease. Take the lift in the middle of the big room to head up and find the next area.
The Al Bhed to your left upon your arrival will tell you to push the altars in the room ahead to open the entrance to the Chamber of the Fayth up. Snatch the Wristband from the chest and push the altars inwards until you open the entrance up the stairs. The fiends vary but be aware that Parika (or whatever they are called) are weak to Water, use and abuse my friends. The ghosts are very much greatly harmed by Excalibur, use this also to your advantage.
Atop the stairs you'll find Ixion causing havoc only he's merged with Al Bhed machina and he's not happy.
| Boss Battle : Ixion |
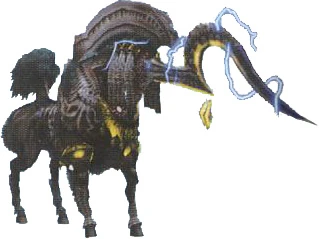
Ixion is fast, faster than you would prefer. Haste is a good spell to cast here with your White Mage. Also being a Thunder favouring pony it's a very good idea to use Wateraga and Liquid Steel to punishing effect. Keep up your healing with Cura/Mega Potions depending on your preference and a Dark Knight's powerful Darkness will cut My Little (Machina/Lightning) Pony down to size. |
For winning you will recieve a Soul of Thamasa and the Unwavering Guard Garment Grid and the girls will enter the fayth. Unfortunately Ixion will follow and blast Yuna into that giant hole where the fayth used to be. Cue an incredibly dramatic and awe-inspiring scene. Fun times ahead folks!
Just Whistle, I'll come Running[]
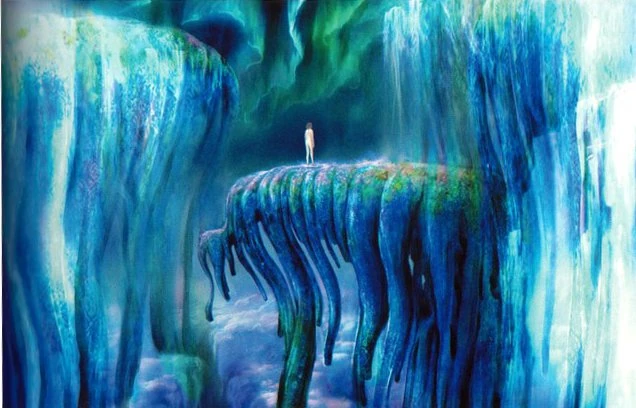
So Yuna falls through nothing for what feels like... Forever. A voice that sounds vaguely familiar will talk to her and she will wake up in one of the best scenes this game has to offer. Enjoy it. It's very creepy. If only Yuna got rid of that damn hair plait thing... she would be beautiful. Now doesn't he look familiar...
Ewww it was Baralai all along! Well looks like we've found the gang anyways... Where are we? Nooj and Gippal will give you Crimson Sphere 2 and Crimson Sphere 3, not their wills, but it does contain a connection between Paine and the trio.
Run around once Yuna finishes ranting and she'll scream.
| 100% Note
When Yuna utters the phrase 'I'm all alone' you must hit If you do not get this sequence right then you will not be able to see Tidus again or get the much sought after 100% on your first playthrough. |
We wake up in Bevelle where we last left the Testosterone Trio and it is now the end for Chapter 3. Save up and I'll see you on the next page!