DTN here, and I would like for everyone to be aware that this chapter of my walkthrough will show you just how height-biased Square-Enix is, regarding the intelligence of life forms. LONG LIVE THE TALLEST!
Taking Tiny Treasure[]
Hooray, more alliteration. NOTE: All of my party was at Level 16 when they finished raiding everything with the Mystic Key. Please get your party entirely to Level 16 before proceeding, as we have an extremely difficult dungeon coming up soon.
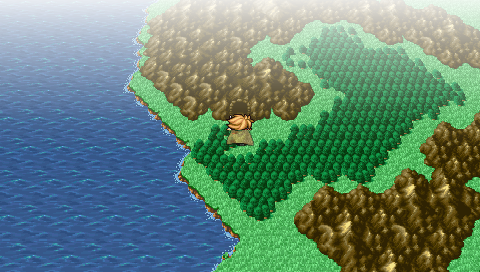
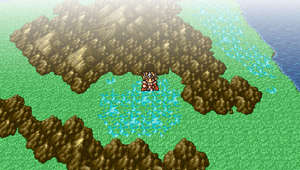
Return to your ship in Cornelia. Sail along the continent's west coast until you get to a small port in between two mountain groups. Dock here, and move southwest past a sparkling lake, and you'll eventually find a ring of mountains with a forest inside, and a cave entrance. Enter the cave, and welcome to Mount Duergar! The short people with pointy hats all will tell you some seemingly random bits of information that actually allude to later events. More importantly, get the treasure in the room just north of the entrance for 450 gil and 575 gil. Now, move to the west to find a long southern trail. This leads to a room formerly bound by the Mystic Key. Inside are eight chests, looting you a sum of a Tent, Great Helm, Wyrmkiller, Ether, Potion, Mythril Mail, 575 gil, and Cottage. The Great Helm and Wyrmkiller go to Warrior, and do not equip the Mythril Mail; your Iron Armor is stronger.
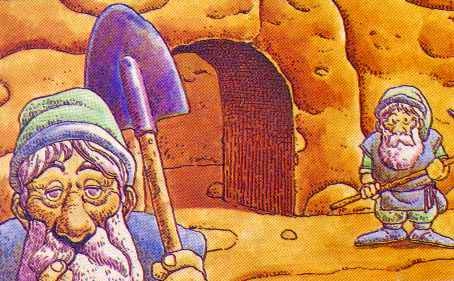
Now, exit this treasure room and speak to the dwarf with a green hat to the east. He'll take that lovely Nitro Powder of yours, and create a grand explosion, portrayed on the PSP by showing a part of the continent being destroyed. Now, you might be thinking "He just blew up a land bridge! How are we supposed to advance NOW!?" Actually, he blew open a small waterway that formerly blocked you off from some new land, which you can now sail your ship through. Now, is it not offensive how these dwarfs are portrayed? "That pouder's set tae blaw! Unless ye plan on goin wi it, ye'd better gie oot whilst ye can!" Horrendous.
Journey to Melmond[]
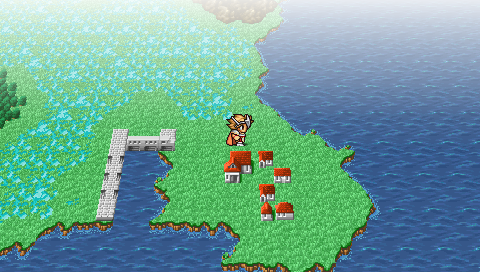
Return to your ship, and sail south to find the new opening the dwarf blew open, near the whirlpool. Sail east past the small central island, and the town of Melmond and its western port will be in your sights. Dock and enter Melmond. Melmond is a bit different than our last few towns; its condition is rather horrendous. Follow the tile path south to find the White Magic Shop. Sadly, all four spells are great choices--of great prices, 4000 gil a pop! Luckily, all that Mystic Key raidin' we did nabbed us a hefty sum; I have nearly 25000 gil. So, let's start buy purchasing Lif--WHAT DO YOU MEAN NOT A HIGH ENOUGH MAGIC LEVEL? Apparently, and I'm just discovering this too, your mages gradually increase their magic level as the story progresses, so you aren't supposed to have these great spells yet.
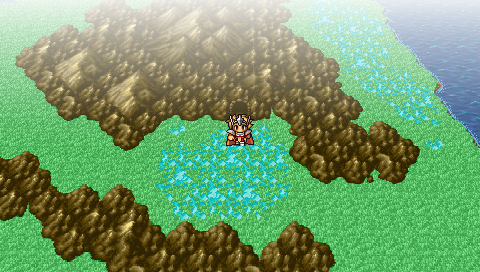
From the entrance, head northeast to find the Weapon Shop. All you want from here is the Longsword for your Warrior; pass the Wyrmkiller to Thief. Across a bridge north of the Weapon Shop is the Armor Shop. KNIGHT'S ARMOR IS 36000 GIL!? Don't worry, even I am not going to buy that. Purchase two Silver Armlets, for Thief and White Mage. Heal up at the Inn, and exit Melmond. Follow the marsh (blue grass) to the southwest, and continue straight south when it stops, even through a narrow land bridge, which lets out into two mountain ranges. Between them is a small passage, which leads to the Cavern of Earth. Save outside of it, and enter.
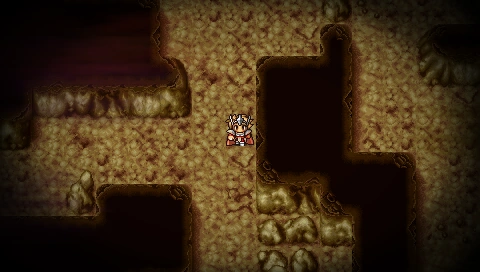
Cavern of Earth[]
HINT: Follow my instructions especially carefully. A copious amount of spaces in this cavern are encounter points with deadly enemies, so do not stray from my course.
Honestly, the enemies in the Cavern of Earth are not incredibly powerful. The problem is that this is a long dungeon, enemies spawn very often, and they appear in large numbers. Not many have weaknesses, but your usual group of Undead enemies are here again: Ghast, Mummy, Wight, and Wraith, but nothing new (I think), so just remember Fire and Dia.

You have six paths to choose from, only a few of which are safe to pass. Take the northeastern path, the north path in alignment with the stairs. Follow it to find a treasure room! Enter to find a hefty sum of 1975 gil. Return to the central entrance of this floor, and walk a few steps heads. Head south instead of further east, and take the left path at the three-way crossroad. Follow the path down to a treasure room containing a Potion and 880 gil. However, guarding the Potion will be a powerful Earth Elemental; kill it with fire, literally. Return to the three-way crossroad and now take the right path, leading to a treasure room with an Antidote and 795 gil, the former also guarded by an Earth Elemental. Return north to the south and east crossroad, and head east to B2. Save, also.
Travel a bit south, then a tad east, and around the pile of boulders. Head south and then east through that one space by the rock. Follow the path just under you as east as you can, and you will hit a red door leading to a treasure room. 330 gil, a Tent, and the powerful Coral Sword await, though don't equip the sword. Now leave the treasure room and back into that square area just before the narrow passage between two one-space rocks. From here, move a bit south and then west, until you find a southern path. Follow this southern path as south as it goes, then west to find another treasure room. Fight off the Earth Elemental, then claim 575 gil, a Leather Shield, and 5000 gil (woo!) from the room. Fight the Earth Elemental again to leave the room, and make your way back up the long, vertical path. Head a bit east then, and follow another southern path that curves at the end to descend to the next floor.
B3 and the Cullen[]

I will never die! Bwahahaha!
Head east out of the long alcove. Take the right path to find an eastern deviation, which leads to a Sleeping Bag. Follow the path up north until you hit a fork, with a red door to your left. Move to your right, and down the southern path. Follow the path to eventually hit a treasure room with a Gold Needle--good for Cockatrice encounters, just fight off the Earth Elemental guarding it. Now head back up and take the left path with the red door. Enter the red door to claim 3400 gil, guarded by a--you guessed it!--Earth effking Elemental (MOAR ALLITERATION). Exit, and the path to your west is extremely straight forward, and don't be fooled by the fake treasure room in the corner; follow the path west and then south until you come to the crossroads. Head east and enter the treasure room. Fight another bloody Earth Elemental to claim 1020 gil. Exit, and continue south and east to the final chamber.

Now, a battle is in this chamber with Edward Cullen, a bloodthirsty vampire. No longer having Bella, he has retreated into the Cavern of Earth, returning to his primitive ways of blood sucking. He won't be too hard, but make sure everyone is at good health. MP shouldn't be too bad--my Black Mage only has 46 MP now, and White Mage has a measly 10 MP. THIS WAS A MISTAKE. DO NOT LET WHITE MAGE'S MP FALL BELOW 12 MP. EVER. Use the Ether if needed, but I don't think you will need it. Speak to the blue bat to face...
| |||||||||||||||||||
 | |||||||||||||||||||
|
Strategy AHHH, IT'S EDWARD CULLEN! LOOK AT THAT HAIR, THOSE PE--wait. Er, Edward's not lookin' too good these days. As you could tell by his opening monologue, he's depressed too. The Vampire is an undead, so Fira and Diara (if you didn't blow White Mage's MP like me) are your best friends. The Vampire has a high attack stat, so end the fight quickly with these spells. Again, nobody can die, a hefty amount of EXP awaits your victorious party. Have your two fighters crush Eddie's body, White Mage casting Protect if she isn't using Dia or Diara, and have Black Mage on Fira duty. This is truly an extremely easy fight, if you know how to inflict major damage. | |||||||||||||||||||
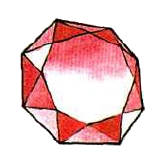
All done! Now claim Edward's treasure, the Star Ruby, which is what those movie executives were paying Robert Pattinson to portray his character until the real Edward killed him in his sleep. This is the part you are going to hate: you cannot advance anymore, a stone boulder will stop you. YOU HAVE TO WALK ALL THE WAY OUT. Pokemon trainers are lucky; they had Repels! Keep everyone strong with whatever White Mage has left in her MP pool, and don't blow Black Mage's MP either. Use Potions and a Hi-Potion, if you have one, to heal if necessary. Save, and let's ditch this cave.
Follow the path as north as possible, and then east until you hit the treasure chamber that had 3400 gil in it. From here, head as south as possible, then west. NOTE: By the time I left B3, I was out of MP. I would suggest using your Ether on White Mage, to keep everyone alive and Dia possible. On B2, head a tad south and west, then as north as you can go. Now head a bit west through two passages, then up north when you get the change in the large, open area. From here, move around the pile of boulders, and the exit to B1 is to the northwest. On B1, head northwest and then west, and the stairs are all yours.
On the surface, Save and use a Sleeping Bag/Cottage/Tent to give you enough strength to get back to town. 'Til next time, this is DTN, signing off!
| DoorToNothing's Final Fantasy Walkthrough | |||||||||||
|---|---|---|---|---|---|---|---|---|---|---|---|
|