Final Fantasy lacks a lot of wonderful things, y'know? Moogles, Chocobos, Frocobos, TONBERRIES too! However, the Dragon King is something it isn't missing a bit of....
To the Citadel[]
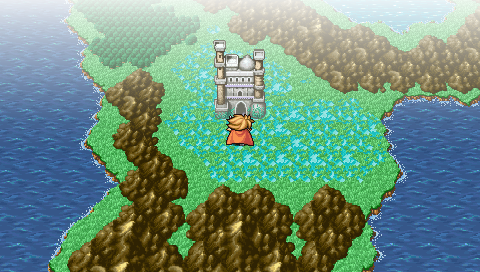
Now that we have that nifty airship and are all set with items, we're heading to the Citadel of Trials, a tower that houses great power... let us acquire it! This is going to be extremely difficult, because the Citadel is all the way across the world! But, you have a map. Press O + Select to open it, and you can see where you, the airship, the ship, and everywhere you have visited is. The map will show that the world is made up of three continents, and the Citadel of Trials is way far up on the northeastern one, on the western edge. To get here, fly the airship into the central desert of the northeastern continent, right on that yellow square on the map actually, where a tower is. Now, look back at the map; on the same continent, there is a yellow dot on the western protrusion's peninsula. That is the Citadel of Trials. Fly to it, but you can't land by it! Unfortunately, you are going to have to land your airship on the edge of the peninsula just to the northwest of the Citadel.
Once you have landed here, we have to walk to the Citadel. The battles can be truly harrowing and difficult, so pull out all your best Black Magic, and we'll just heal before the Citadel. Follow the straight path through the forest, and through the marsh when it lefts off into the marsh. Eventually you'll be back in the forest, and alternating between short portions of marsh and forest; do not enter the desert to the southeast. A mountain will split the path to be left and right; take the left, and enter the river with your Canoe to cross it to the west ever so shortly. Follow the path to the Citadel.
Now heal with a Tent, save, and enter.
The Citadel of Trials[]
The enemies here are nothing to boast about, even for a short dungeon. HINT: Save as much MP as possible! At the end of the dungeon, we're going to blow almost all of it for EXP. There are ten enemies you can find in this lovely little tower, and four are weak to Fire/Dia; they are undead. A lone one, the Nightmare, is weak to Ice. Your best move is to give the Flame Sword back to Warrior, to help against the undead enemies. Other than that, the top row are the undead, and the bottom enemy is the Blizzard-vulnerable Nightmare. Enemies for some reason do not spawn often at all in the Citadel, so you really don't have much to worry about here.


Also! There's a nasty little fiend called Medusa, based on the woman from Greek mythology. As you could expect, Medusas can turn fighters to stone, and that means no EXP for them, and we're running low on Gold Needles! Get rid of Medusas quickly.

The first floor is nothing difficult; no treasure, just walk straight forward to meet a sage who sees you have a crown. WHAT CROWN!? I don't remember any smegging crown!! Anyway, because we have an imaginary crown, we get to undergo harrowing trials. Then, the sage is beamed up by Scotty, so let's move to the room to the northwest to begin the trials. Touch the throne, and the trials BEGIN, with AWESOME TELEPORTING ACTION!
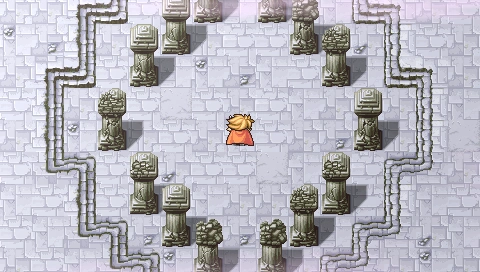
This is going to be confusing, I'll tell you that right now. This floor contains fifteen warps, a la Scotty, which beam you to other areas on this floor. Goodness, this is like a Pokemon game maze, specifically Saffron City. Anyway, don't take any portals I do not tell you to take, or you will be lost forever in the Citadel of Trials. Exit the small room you enter from, and take the warp just outside. Then, take the warp just above you. You then have two warps to choose from; take the lower from. Now take the warp just below you. Again, you have two warps to choose from, take the lower. Now, walk a long ways south to find the next warp. Then, you have two warps to choose from; take the warp closer to you, on the right.
The final warp is a little tricky. Take the lower eastern path, and follow it all the way to the treasure room. Three Clay Golems guard the treasure chest; they have no weaknesses, but very low Defense, so Warrior and Thief can obliviate them easily. Then, claim the Gauntlets! Nobody can wear them, oddly. Now, if the Gauntlets were not here, they will be in a chest on the next floor. Don'cha just LOVE multi-location treasures? No. Now exit the room, and there are two southern paths. Take the left of the two paths, the one that is more west. You'll be led to two warps. Take the further away along the western wall of the dead-end to leave this floor, and the warp system! Take the stairs to 3F.
Treasures and Dragons[]
This is pretty straight forward, since this floor is one square path looted with treasure. Head straight north and through the door. Just north of you will be a chest containing a Healing Staff; don't equip it. Head west now to find a Ruby Armlet, Ice Brand, and Steel Gloves. Thief needs that Ruby Armlet, since he gets hit so often and not that great Defense, and equip nothing else. Now head south to claim possibly Gauntlets, and for sure a Cottage, 1455 gil, and 7340 gil. Now head east, but don't approach the treasure or throne yet. Instead, heal up everyone, and give Ethers to your mages to get them as close to full MP WITHOUT wasting an Ether. Make sure your Warrior has the Flame Sword equipped, save, and then claim the Rat's Tail in the treasure chest. Disgusting, yes. Useful, no! Now, the throne warps us back to the entrance. But upon approaching it, you meet a...
| |||||||||||||||||||
|
| |||||||||||||||||||
| |||||||||||||||||||
|
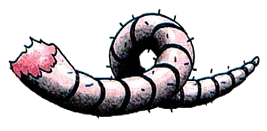
Strategy You gotta be kidding me. We've fought an undead king and a combination between serpent and woman, and our next challenge is an enemy with less HP than the Lava Worms back in Mountain Gulg? This is pathetically easy. Fighters attack, White Mage goes for Diaga, Black Mage blasts with Firaga. This is no challenge, but they do not produce great EXP and gil. It is possible to encounter one or two Dragon Zombies, but it's just easy either way. I went and redid this battle a few times by abusing the encounter point to make sure and to gain bonus EXP (you should too), and I can assure you that one enemy shows up much more often than two do. | |||||||||||||||||||
When you're done destroying these excuses for enemies as many times as you would like, make sure you have claimed the Rat's Tail, and then walk on the throne. Back on the first floor, there's nobody here, so just leave.
Dragon Caves[]
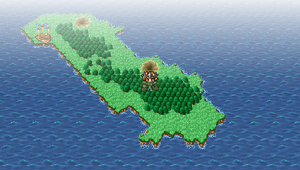
Don't burn a mini-Inn unless if you really burned out in this dungeon or fighting Dragon Zombies many times. Then, use a Sleeping Bag or Tent to restore your MP. Now we need to get back to the Airship... ugh. Save, then head north through the forest, cross the river, and continue northeast through marsh and forest. The path will force you turn in the north west direction; just follow it through the marsh and forest to the Airship. Once in the air again, open up the map. You'll notice that barely southwest of you is a chain of islands. Land on the western most of these caves, the one closest to the continent to the west's eastern coast. Enter.

Oh no, another dungeon! Relax, no enemies, only treasure. The treasure room to the north has a Tent, and the treasure room to the south, which has an entrance near the southwestern corner, contains a Dry Ether and Gold Needle. Okay, now leave! Get back in the Airship, and flying to the small, marsh-covered island to the southeast. On the eastern end of this island, you can land. Enter the western cave first; the treasure room below contains an Elixir, Cottage, and 500 gil. The dragons inside are friendly, and advise you to speak with their king, Bahamut. Ignoring the Charizards, do not enter the eastern cave. Now the island just above you with two caves has no purpose yet, nor does the tiny plain island to your right, so fly to the small foresty island to your right.


This cave has two treasure chambers. Walk barely west to find the first, containing 1455 gil, 2000 gil, and 2750 gil. Walk further west to find a treasure chamber with a Charizard, three pots, and the following treasures: X-Potion, 9500 gil, 2750 gil, and 1520 gil. Now, let's head back to that island with two caves and covered in forest, above the island with two caves covered in marsh. Go into the eastern cave, and head all the way south. On the next floor, head all the way north through the door to meet the mighty Dragon King, Bahamut. Bahamut collects swords and Charizards, the former of which you can see in his Sword Garden right by his throne. Speak to Bahamut, and he will realize your valor and courage because you have a Rat's Tail... I know, it's odd, but just roll with it. Pink magic is released from all around, and the Warriors of Lights TRANSFORMINATE!!
Class change Details[]
The Warriors of Light have now been upgraded--this is the Class change mentioned back in Part 1. All of them have upgraded stats, new clothes, new weapons they can wield, and new spells they can cast. All of your classes that you specifically chose can now cast magic. Below I'll list the major changes:
- Warrior to Knight: The Knight dons different armor than the Warrior. The Knight can also wield one hammer, one knife, and four swords he could not previously use, as well as two armors, one shield, two helmets, and three gloves. In addition, he can use White Magic up to half of Level 3.
- Thief to Ninja: Ninjas get the biggest bonus, in stats, magic, and weapons. Ninja can use four axes, three hammers, five staffs, two nunchaku, one knife, and twelve swords the Thief could not, plus five armor, six shields, four helmets, and five gloves. In addition, Ninja can use Black Magic up to Level 4. Also, Ninja sprites are awesome, changing from green to red.
- White Mage to White Wizard: The White Wizard can use all the White Magic in the game, as well as one new body armor and one new hammer. She also lets her hood down, exposing her hair and donning a slightly more ornate robe.
- Black Mage to Black Wizard: The Black Wizard can learn every Black Magic in the game, and can wield one new armor, staff, and knife. His new sprite is not as cool as his former one, let's face it, but at least he keeps the pointy hat.
The only major equipment you need to change is your Ninja's; have him equip the Ice Brand, Flame Shield, Mythril Helm, Flame Mail, and Mythril Gloves. Knight should wield an Ice Brand, and the Black Wizard should wear the Ruby Armlet. Enjoy the new classes! We'll cover what spells you need to go purchase now to give them the best possible, but for now, I'm out!
| DoorToNothing's Final Fantasy Walkthrough | |||||||||||
|---|---|---|---|---|---|---|---|---|---|---|---|
|