Template:Sideicon Template:Location
This region's known as the Veldt. Monsters migrate here from all over the world, so it can be quite dangerous outside of town. You never know what you might run into.
Mobliz citizen
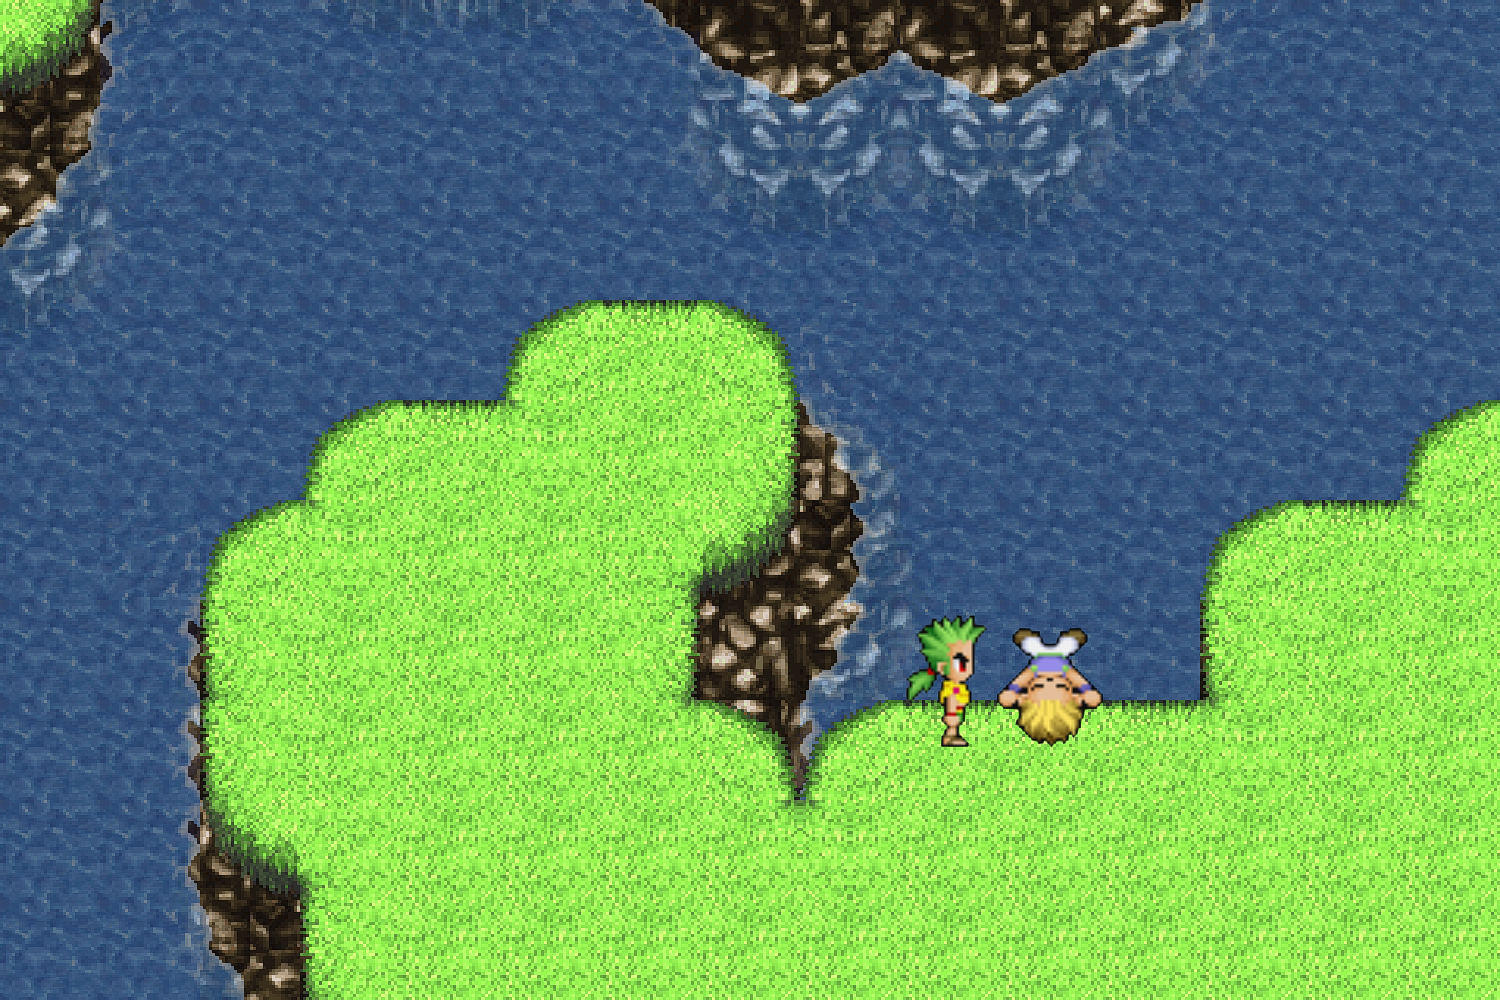
The Veldt is a region in Final Fantasy VI. It is a seemingly endless plain which attracts monsters. Gau lives here, and learns his various Rages here. The Veldt lies to the south of Baren Falls, the town of Mobliz lies on the eastern coast while Crescent Mountain is near the southern tip of the plains.
Story
Gau found Sabin and Cyan washed onto the Veldt.
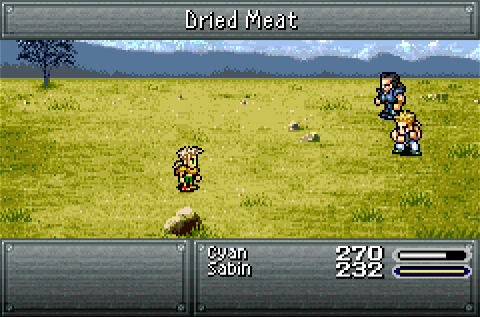
Sabin and Cyan wash onto the Veldt and are saved by Gau, who runs away after the two come to. After purchasing some Dried Meat in Mobliz, the party can give it to Gau to have him join them. As his thanks for the food, Gau tells Sabin and Cyan about a "shiny, shiny treasure" he has kept in the Crescent Mountain Cave to the south. The treasure turns out to be a diving helmet, and the three use it to dive into the Serpent Trench to swim to Nikeah.
In the World of Ruin, Gau has returned to the Veldt, and will again join the party. There is a Cave on the Veldt, but other than that, it is just an empty plain.
Quests
Enemies on the Veldt
This makes the Veldt useful for fighting enemies that are found in places the player cannot revisit, especially in the World of Ruin when most of the monsters from the World of Balance vanish. All enemy formations here yield the same amount of gil and Magic Points they normally do, but yield no EXP, making it a good place to train to learn magic if the player wishes to keep their level low.
Encounters with Gau
Gau given Dried Meat.
Gau appears on the Veldt whenever he has used the Leap command to leave the party. Gau's stats vary depending on what level he's at along with what piece of equipment he's equipped with before he left. When Gau appears, any commands issued to the party are cancelled.
The first time the player meets Gau in Sabin's scenario, using a Dried Meat on him will begin a cutscene, after which Gau joins the party. All times after this when Gau appears after using Leap, he will rejoin the party after being left alone for a few seconds. Attacking him, even after earning his allegiance, causes him to flee and not rejoin. This will not affect future appearances by Gau, and he will continue to attempt to rejoin the party.
In the World of Ruin, wandering the Veldt in a party of fewer than four people will cause Gau to appear and rejoin the party. He will not appear if the party is full as there must be an empty slot for him to occupy when he rejoins.
Learning Rages on the Veldt
Gau can only learn new Rages on the Veldt. Once an enemy formation is encountered (it does not have to be defeated), it will show up on the Veldt. Once Gau encounters a monster which the player wants to learn a Rage for, a special command that only appears on the Veldt, Leap, must be used. Gau leaves the battle and the battle ends there. Gau will randomly return at the end of another battle, and he will have learned the Rages of not only the enemy he jumped on, but also those that were defeated in the battle he came back on. Gau will not appear if there are four members in the party, or if the fight was a Back Attack, Pincer Attack, or Side Attack. He will also escape if he is damaged by a party member while he is returning. Gau also can't leap if he's the only member in the party.
Not all enemies appearing on the Veldt have Rages. The enemy Tonberries has a Rage that was dummied out. Its Rage can be obtained and added to Gau's Rage list on the GBA version, but it cannot be selected during battle.
Several enemies that have Rages—Typhon, Siegfried, and Death Warden—do not appear on the Veldt in the game's SNES version. This is corrected for Death Warden in the GBA release; however, even in the updated release, Siegfried and Typhon will never appear on the Veldt, meaning players cannot obtain these two Rages without a cheat device.
Enemies
When fighting on the Veldt, the monsters the player can encounter are not completely random. They can encounter 1 formation from a group, and then the next encounter, they enter a battle from the next group. When the player first start a new game, the first group they'll run into a formation from group 1. To determine which formation in the group they can encounter, the game picks a random number from 0 to 7, and that determines which formation they'll encounter.
The player can only run into a formation that they've seen prior, they don't need to have won the battle; such as if they escape from it, they can encounter it on the Veldt. If the game determines that the player should run into a formation they haven't encountered, then they encounter the next formation in the group instead. It does this until it finds a formation that they've encountered. If they're on formation 7 of a group and haven't encountered that formation, it starts over at formation 0 from the group and keeps checking.
Some formations can't be encountered on the Veldt, but these are mostly special and boss formations. These are marked as None in the list. If a formation doesn't contain a monster, it's treated exactly the same as if the player has never encountered it. After the player fight a formation, the next time they fight on the Veldt they'll fight a formation from the next group, or if they're on group 64, then the next fight will be from group 1. If a group is entirely empty and/or they haven't encountered any formation from the group, it skips that group and moves on to the next group. It keeps doing this until it runs into a group which has 1 or more formations that they have encountered. When the player reload a game, it adds 13 to the group number that they'll encounter next.
The two Behemoth King formation found in group 54 and 57. After the player defeats the Behemoth King (Living) inside the Cave on the Veldt. It is advise that the player shouldn't cast Vanish and Banish on it (SNES and PS versions), because the game turns on a flag that causes the Behemoth King (Undead) formation to be loaded whenever an encounter on the Veldt tries to load the Behemoth King (Living) formation. When the player defeats the undead one in the Cave on the Veldt, the game marks the living formation as encounterable on the Veldt. This works because one variable still holds the first formation number, but all the enemies in the current formation have a value <= 255.
So the player can now encounter the Behemoth King (Undead) formation in group 57 on the Veldt, in place of Behemoth King (Living). Once they've fought it, they'll also be able to encounter the Behemoth King (Undead) battle in group 54.
- Group 1
- 0 - Silver Lobo
- 1 - Silver Lobo x2
- 2 - Guard x2
- 3 - Foper x2, Urok
- 4 - Silver Lobo x2, Guard Leader
- 5 - Hornet x2, Foper x3
- 6 - Leaf Bunny
- 7 - Leaf Bunny x2, Darkwind
- Group 2
- 0 - Leaf Bunny x2, Darkwind x2
- 1 - Sand Ray, Alacran x3
- 2 - Sand Ray x2
- 3 - Alacran x3
- 4 - Sand Ray, Alacran x2
- 5 - Hornet x2
- 6 - Wererat x3
- 7 - Hornet, Urok x2
- Group 3
- 0 - Gorgias x2
- 1 - Megalodoth, Silver Lobo
- 2 - Urok x3
- 3 - Belmodar
- 4 - Belmodar, Mu x2
- 5 - Mu x2, Unseelie
- 6 - Belmodar, Unseelie, Mu x2
- 7 - Unseelie x2
- Group 4
- 0 - Mu x4
- 1 - Imperial Soldier x2, Magitek Armor
- 2 - Bandit, Spritzer
- 3 - Magitek Armor
- 4 - Trillium, Gorgias, Cirpius x2
- 5 - Cirpius x3
- 6 - Trillium x2
- 7 - Gorgias, Cirpius x3
- Group 5
- 0 - Zaghrem x2
- 1 - Zaghrem, Trillium, Spritzer x2
- 2 - Magitek Armor x2
- 3 - Lesser Lopros x2
- 4 - Zombie Dragon x2
- 5 - Nautiloid, Exocite, Lesser Lopros
- 6 - Nautiloid, Exocite
- 7 - Lesser Lopros, Exocite x2
- Group 6
- 0 - None
- 1 - Silver Lobo, Guard x2
- 2 - None
- 3 - None
- 4 - Wererat, Bandit
- 5 - Wererat x2
- 6 - Doberman x2
- 7 - Actinian x3
- Group 7
- 0 - None
- 1 - Stray Cat x3
- 2 - Nettlehopper x2, Stray Cat x2
- 3 - Nettlehopper x3
- 4 - Chippirabbit x5
- 5 - Aepyornis
- 6 - Aepyornis x2, Stray Cat
- 7 - Aepyornis, Chippirabbit x2
- Group 8
- 0 - Chippirabbit x3
- 1 - Aepyornis, Stray Cat, Nettlehopper x2
- 2 - Templar x2
- 3 - None
- 4 - None
- 5 - Satellite, Imperial Soldier x4
- 6 - Doberman x3
- 7 - None
- Group 9
- 0 - Heavy Armor
- 1 - Ghost
- 2 - Ghost x3
- 3 - Actinian x3, Aspiran x2
- 4 - Ghost, Poplium x2
- 5 - Ghost x2, Poplium x3
- 6 - Angel Whisper x2, Cloud
- 7 - Spritzer x2
- Group 10
- 0 - Bomb x2, Cloud x2
- 1 - Provoker x2, Lich x2
- 2 - Angel Whisper x4
- 3 - Oversoul x2
- 4 - Bomb x3
- 5 - Bomb
- 6 - Oversoul, Living Dead x2
- 7 - None
- Group 11
- 0 - Angel Whisper, Living Dead, Cloud x2
- 1 - Angel Whisper, Cloud x3
- 2 - Anguiform
- 3 - Anguiform x2
- 4 - Megalodoth x2, Guard x2
- 5 - Living Dead x3
- 6 - Anguiform, Actinian, Aspiran
- 7 - Hell's Rider
- Group 12
- 0 - Heavy Armor, Corporal x2
- 1 - Fidor, Corporal
- 2 - Angel Whisper
- 3 - Corporal x4
- 4 - Hunting Hound, Corporal x2
- 5 - Fossil Dragon
- 6 - Bloodfang x2
- 7 - Paraladia, Vulture, Iron Fist
- Group 13
- 0 - Iron Fist x2, Rock Wasp x2
- 1 - Bloodfang x2, Vulture
- 2 - Paraladia x2, Rock Wasp x3
- 3 - Vulture x2
- 4 - Vulture, Iron Fist
- 5 - Rock Wasp x4
- 6 - Hill Gigas
- 7 - Crawler
- Group 14
- 0 - Gobbledygook x4
- 1 - Veil Dancer
- 2 - Veil Dancer, Gobbledygook x3
- 3 - Harvester
- 4 - Veil Dancer, Harvester x2
- 5 - Harvester, Gobbledygook x2
- 6 - Hill Gigas, Harvester
- 7 - Magna Roader (Purple)
- Group 15
- 0 - Goetia, Stunner x2
- 1 - Stunner x3, Goetia x2
- 2 - Crawler x4
- 3 - Belzecue x2, Sergeant x2
- 4 - Belzecue x2, Sergeant
- 5 - Magna Roader (Purple), Magna Roader (Red)
- 6 - Trapper x3
- 7 - General x2
- Group 16
- 0 - General, Onion Knight x2
- 1 - Onion Knight x4
- 2 - Chaser, Trapper x3
- 3 - Chaser, Onion Knight x3
- 4 - Lenergia
- 5 - Commander x3
- 6 - Death Warden
- 7 - None
- Group 17
- Group 18
- 0 - Bomb x6
- 1 - Io
- 2 - Cancer x3
- 3 - Fossil Dragon x2
- 4 - Fossil Dragon, Bug x3
- 5 - Bug x3
- 6 - Bug x6
- 7 - Don x2
- Group 19
- 0 - Don, Wyvern x2
- 1 - Don, Wyvern, Litwor Chicken x2
- 2 - Grasswyrm x3
- 3 - Don, Joker
- 4 - Joker x3
- 5 - Litwor Chicken x5
- 6 - Zombie Dragon
- 7 - Zombie Dragon, Outcast x2
- Group 20
- 0 - Outcast x3
- 1 - Provoker x2
- 2 - Antares x3
- 3 - Lich, Provoker, Antares
- 4 - Lich x3
- 5 - Imperial Elite x3
- 6 - Balloon x3
- 7 - Balloon x6
- Group 21
- 0 - Briareus
- 1 - Chimera
- 2 - Devourer, Briareus
- 3 - Devourer x3
- 4 - Adamankary, Bonnacon x2
- 5 - Adamankary x2
- 6 - Bonnacon x5
- 7 - Mandrake x3
- Group 22
- 0 - Mandrake, Land Grillon x2
- 1 - Venobennu x2
- 2 - Gigantos
- 3 - None
- 4 - None
- 5 - None
- 6 - None
- 7 - Sky Armor x2, Spitfire
- Group 23
- 0 - Sky Armor, Spitfire
- 1 - Behemoth
- 2 - Apocrypha, Misfit x2
- 3 - Apocrypha
- 4 - Ninja x2
- 5 - Platinum Dragon x3
- 6 - Apocrypha x3
- 7 - Brainpan x2, Misfit, Apocrypha
- Group 24
- 0 - Brainpan x3
- 1 - Dragon
- 2 - Behemoth, Misfit x2
- 3 - Behemoth x2
- 4 - Ninja x2, Platinum Dragon
- 5 - Grenade
- 6 - Chimera, Devourer x2
- 7 - Briareus x2
- Group 25
- 0 - Peeper x2
- 1 - Peeper x3
- 2 - Land Ray, Peeper x2
- 3 - Black Dragon
- 4 - Daedalus, Ahriman
- 5 - Fafnir x2
- 6 - Fafnir x4
- 7 - Killer Mantis, Fafnir
- Group 26
- 0 - Killer Mantis x2, Fafnir
- 1 - Murussu, Gigantoad x2
- 2 - Luna Wolf, Rukh
- 3 - Luna Wolf x2
- 4 - Rukh, Murussu, Gigantoad
- 5 - Cherry, Ahriman x2
- 6 - Ahriman x3
- 7 - Zokka x2, Nightwalker
- Group 27
- 0 - None
- 1 - Scorpion x3
- 2 - Intangir
- 3 - Nightwalker x4
- 4 - Vector Chimera x2
- 5 - Devoahan
- 6 - Devoahan, Delta Beetle x2
- 7 - Vampire Thorn x2, Lizard
- Group 28
- 0 - Vampire Thorn x2
- 1 - Delta Beetle x4
- 2 - Vampire Thorn x2, Delta Beetle
- 3 - Devoahan, Lizard
- 4 - Cancer x2, Desert Hare x2
- 5 - Cactuar
- 6 - Sandhorse x2
- 7 - Sandhorse, Cancer x2
- Group 29
- 0 - Oceanus
- 1 - Oceanus, Desert Hare x3
- 2 - Fiend Dragon x2
- 3 - Landworm
- 4 - Humpty x3
- 5 - Cruller, Humpty x2
- 6 - Humpty x4
- 7 - Neck Hunter x2
- Group 30
- 0 - Neck Hunter, Cruller, Humpty x2
- 1 - Dante
- 2 - Dropper x3
- 3 - Tonberries x3
- 4 - Marchosias
- 5 - Slagworm
- 6 - Marchosias, Deepeye x2
- 7 - Bogy x2
- Group 31
- 0 - Deepeye x6
- 1 - Deepeye x2, Mousse x2
- 2 - Mousse x3
- 3 - Mousse
- 4 - Borghese x2
- 5 - Borghese, Cloudwraith x2
- 6 - Skeletal Horror
- 7 - Cloudwraith
- Group 32
- 0 - Cloudwraith, Exoray x2
- 1 - Exoray x3
- 2 - Malboro, Exoray
- 3 - Malboro
- 4 - None
- 5 - Tonberry
- 6 - Knotty x4
- 7 - Tzakmaqiel, Illuyankas
- Group 33
- 0 - Tzakmaqiel, Knotty x3
- 1 - Illuyankas x3
- 2 - Anemone x2, Onion Dasher
- 3 - Anemone x4
- 4 - Illuyankas, Onion Dasher x2
- 5 - Luridan x3
- 6 - Punisher x2, Devil Fist
- 7 - Glasya Labolas
- Group 34
- 0 - Glasya Labolas, Mugbear, Devil Fist
- 1 - Mugbear
- 2 - Luridan x6
- 3 - Mugbear, Punisher
- 4 - Twinscythe
- 5 - Twinscythe x2
- 6 - Gorgimera
- 7 - Vector Lythos x4
- Group 35
- 0 - Primeval Dragon, Great Malboro
- 1 - Garm x3
- 2 - Test Rider
- 3 - Lukhavi, Garm x2
- 4 - Wizard x3
- 5 - Wizard x2, Psychos x3
- 6 - Garm x2, Psychos x2
- 7 - Psychos x6
- Group 36
- 0 - Magna Roader x2 (Yellow), Magna Roader (Brown)
- 1 - Magna Roader (Yellow), Magna Roader x2 (Brown)
- 2 - Primeval Dragon x2
- 3 - None
- 4 - Blade Dancer x2, Crusher x2
- 5 - Caladrius x2, Coeurl Cat, Crusher x2
- 6 - Caladrius x2
- 7 - Blade Dancer, Coeurl Cat x4
- Group 37
- 0 - Misty x2
- 1 - Rafflesia x3
- 2 - Still Life
- 3 - Aspidochelon x2
- 4 - Mahadeva
- 5 - Aspidochelon, Moonform, Creature
- 6 - Moonform x3
- 7 - Moonform, Medusa Chicken x3
- Group 38
- 0 - Sorath, Warlock, Creature
- 1 - Sorath x2
- 2 - Warlock, Medusa Chicken x2, Creature x2
- 3 - Great Behemoth, Vector Lythos x2
- 4 - Fiend Dragon
- 5 - Devil x2
- 6 - Devil, Figaro Lizard x2
- 7 - Lunatys x2, Figaro Lizard x2
- Group 39
- 0 - Lunatys
- 1 - Armored Weapon
- 2 - Enuo x2
- 3 - Enuo, Devil, Figaro Lizard
- 4 - Lunatys x4
- 5 - Al Jabr x2
- 6 - Samurai, Al Jabr x2
- 7 - Pluto Armor x2
- Group 40
- 0 - Coco, Alluring Rider
- 1 - Pluto Armor, Schmidt
- 2 - Weredragon, Parasite x3
- 3 - Alluring Rider, Pandora x3
- 4 - Weredragon
- 5 - Coco, Samurai, Suriander
- 6 - Suriander, Pandora, Parasite x2
- 7 - Crawler x3
- Group 41
- 0 - Tyrannosaur x2
- 1 - Tyrannosaur
- 2 - Brachiosaur
- 3 - Greater Mantis, Sprinter, Lycaon x2
- 4 - Leap Frog x4
- 5 - Greater Mantis x2
- 6 - Basilisk x2, Leap Frog
- 7 - Tumbleweed x4
- Group 42
- 0 - Sprinter x2, Lycaon x2
- 1 - Great Behemoth, Great Malboro, Vector Lythos
- 2 - Great Malboro x3
- 3 - Vasegiatta
- 4 - Vasegiatta, Purusa
- 5 - Purusa, Gloomwind
- 6 - Gloomwind x3
- 7 - None
- Group 43
- 0 - Face x2
- 1 - Clymenus x3
- 2 - Face, Zeveak, Necromancer
- 3 - Clymenus x2, Necromancer
- 4 - Seaflower x5
- 5 - Ouroboros, Seaflower x2
- 6 - Chaos Dragon, Ouroboros, Seaflower x2
- 7 - Galypdes, Chaos Dragon x2
- Group 44
- 0 - None
- 1 - None
- 2 - Kamui x2
- 3 - Covert, Kamui
- 4 - Wartpuck x2
- 5 - Shambling Corpse x2
- 6 - Amduscias, Covert x2
- 7 - Amduscias, Baalzephon
- Group 45
- 0 - Baalzephon x2, Shambling Corpse x2
- 1 - Wartpuck, Kamui
- 2 - None
- 3 - Magic Urn x2
- 4 - Flan x6
- 5 - Flan x4
- 6 - None
- 7 - None
- Group 46
- Group 47
- 0 - None
- 1 - None
- 2 - None
- 3 - None
- 4 - None
- 5 - Vector Hound x2, Commander
- 6 - Vector Hound x2
- 7 - Cartagra, Acrophies x2
- Group 48
- 0 - Gold Bear, Acrophies
- 1 - Cartagra x3
- 2 - Acrophies x2
- 3 - Darkside x2
- 4 - Darkside, Specter, Eukaryote x3
- 5 - Valeor, Wild Rat
- 6 - Valeor x3
- 7 - Valeor x2, Wild Rat x3
- Group 49
- 0 - None
- 1 - None
- 2 - None
- 3 - None
- 4 - None
- 5 - None
- 6 - None
- 7 - None
- Group 50
- 0 - None
- 1 - None
- 2 - None
- 3 - InnoSent, Fortis
- 4 - Fortis x2
- 5 - None
- 6 - Duel Armor x2, Death Machine
- 7 - Gamma
- Group 51
- 0 - InnoSent x3
- 1 - Junk x3
- 2 - None
- 3 - None
- 4 - Proto Armor, Onion Knight x2
- 5 - Onion Knight x5
- 6 - Magna Roader x2 (Purple)
- 7 - Magna Roader x4 (Red)
- Group 52
- 0 - None
- 1 - None
- 2 - Templar x2, Imperial Soldier x2
- 3 - Balloon x4
- 4 - Imperial Soldier x2
- 5 - Death Machine, Metal Hitman x5
- 6 - Metal Hitman x3
- 7 - Duel Armor, Fortis
- Group 53
- Group 54
- 0 - Behemoth King (Undead)
- 1 - Dark Force x2
- 2 - Yojimbo x2, Dark Force
- 3 - Demon Knight, Yojimbo
- 4 - Outsider x2, Cherry
- 5 - Mover x3
- 6 - Muud Suud
- 7 - Daedalus x2
- Group 55
- 0 - None
- 1 - None
- 2 - None
- 3 - None
- 4 - None
- 5 - None
- 6 - None
- 7 - None
- Group 56
- 0 - None
- 1 - None
- 2 - None
- 3 - None
- 4 - None
- 5 - None
- 6 - None
- 7 - None
- Group 57
- 0 - None
- 1 - None
- 2 - None
- 3 - None
- 4 - Behemoth King (Living)
- 5 - None
- 6 - None
- 7 - None
- Group 58
- 0 - None
- 1 - None
- 2 - None
- 3 - None
- 4 - None
- 5 - None
- 6 - None
- 7 - None
- Group 59
- 0 - None
- 1 - None
- 2 - None
- 3 - None
- 4 - None
- 5 - None
- 6 - None
- 7 - None
- Group 60
- 0 - None
- 1 - None
- 2 - None
- 3 - None
- 4 - None
- 5 - None
- 6 - None
- 7 - None
- Group 61
- 0 - None
- 1 - Holy Dragon
- 2 - None
- 3 - None
- 4 - None
- 5 - None
- 6 - None
- 7 - None
- Group 62
- 0 - None
- 1 - None
- 2 - None
- 3 - None
- 4 - None
- 5 - None
- 6 - None
- 7 - None
- Group 63
- 0 - None
- 1 - None
- 2 - None
- 3 - None
- 4 - None
- 5 - None
- 6 - None
- 7 - None
- Group 64
- 0 - None
- 1 - None
- 2 - None
- 3 - None
- 4 - None
- 5 - None
- 6 - None
- 7 - None
Musical themes
Template:Listen
"Wild West" is used as the background theme for the Veldt, and as a battle theme for all battles that take place inside it.
Other appearances
Final Fantasy Airborne Brigade
Template:Sideicon

Gallery
")
")
")
")
")
")
")
")
Etymology
Veld, also spelled veldt, is a type of wide open rural landscape in Southern Africa. Particularly, it is a flat area covered in grass or low scrub, especially in the countries of South Africa, Lesotho, Eswatini, Zimbabwe, Botswana, and Namibia.
Template:FFVI