Template:Dissidia Character
A lady of noble birth and revered as the ultimate mage. Prideful with a rough temperament, not a single mandragora will sprout in the wake of her anger.
Dissidia 012 Description
A war hero with immeasurable magical power.
Description
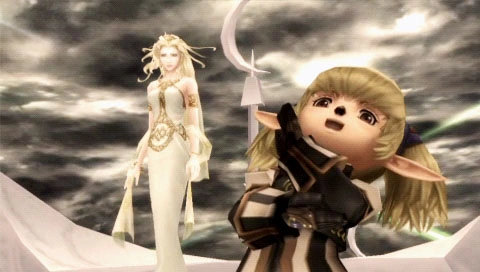
Shantotto is an extra character in Dissidia Final Fantasy and Dissidia 012 Final Fantasy. A hero who fought in the Crystal War, Shantotto is a famous Tarutaru professor of magic from Windurst. She is well-known for her high-pitched, haughty laughter and overall arrogant nature. Shantotto is respected for her great power, but she refuses to admit it when she finds someone who could be better than she.
Although appearing to be seemingly frail and helpless, her aggressive, cunning, destructive and unpredictable nature coupled with her unsurpassed magical prowess caused her to gain a reputation among all warriors, both from Chaos and Cosmos alike, as the most fearsome of them all during her time as an active warrior.
In battle, she fights using powerful spells that level up and become stronger as she gains Bravery. As an extra character in the game, Shantotto has no impact on the main storyline and has no villain opposing her, although she's had a long-standing rivalry with Gabranth in both games.
In Dissidia Final Fantasy, Shantotto is unlockable by completing the Distant Glory - The Lady of Legend storyline and purchasing her as a playable character in the PP Catalog for 1,000 PP. In Dissidia 012, she is available as a purchasable character at the PP Catalog from the start and costs 100 PP.
Profile
Appearance
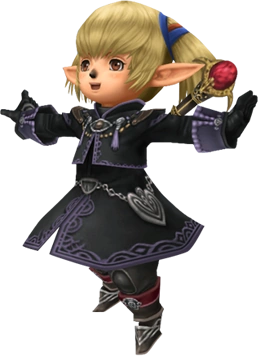
Shantotto's outfit is based on her original design in Final Fantasy XI, a robe with black and white stripes, gold linings, and two gauntlets, known as the "Tactician Magician's Cloak Set" in the game. She has almost the complete set, except for the head gear that goes with it. Her EX mode outfit is the "Cobra Unit Robe Set" also from Final Fantasy XI.
Shantotto's first alternate outfit, "Wizard's Coat", is the Wizard's Attire, the Black Mage Artifact Armor from Final Fantasy XI. She wears a faded blue and brown robe with gold buttons. Her EX Mode in this outfit is the Sorcerer's equipment set, the Black Mage Relic Armor, a black robe with bright purple linings.
Shantotto's second alternate outfit is the "Black Cloak," player-crafted garments fundamental to the wardrobes of Black Mages in Final Fantasy XI. She wears a black cloak with a hood and red linings, a silver design on the front and a sash around the waist. Her EX Mode grants her a pair of glasses and a robe in various shades of brown and yellow, the vestments of a Windurstian Minister, the position Shantotto occupied before her retirement.
Shantotto's DLC outfit, "Wedding Dress", is a set of armor worn by females during weddings. It features frilly white clothing and a Lilac Corsage in her right pigtail. Her EX Mode for this outfit is based on the Goetia Armor Set, a set of powerful Black Mage armor which consists of a long black coat with several golden accessories. Shantotto's use of the armor is based on her museum profiles in Dissidia and Dissidia 012, which state she regrets she never married.
Shantotto's manikin counterpart, Lady of Antiquity, is brown.
Personality
Template:See Also Shantotto is a proud and arrogant Tarutaru, fighting only to test out her powerful magic against her foes. A certain thing about Shantotto is that she always makes her sentences rhyme at the end.
Story
Early Cycles
Template:Sideicon Despite her great pride, Shantotto was not bothered by the fact she is merely Cosmos's pawn, and is surprisingly loyal to Cosmos. She often used battles as an excuse to research and perfect the "ultimate spell". She guarded Order's Sanctuary singlehandedly while Prishe went out to explore the world under the pretense of "patrols". Shantotto battled Gabranth on one occasion when he came to Order's Sanctuary intending to kill Cosmos and end the cycles of war.
When Prishe finds the Warrior of Light and brings him to Cosmos's throne, Shantotto helps Prishe convince Cosmos to endow the Warrior with her power and turn him into a Warrior of Cosmos.
Light to All
Template:Sideicon
Cosmos's flashback of Shantotto keeping Gabranth at bay.
When all the warriors have obtained their crystals, a flashback shows the confrontation between Shantotto and Gabranth. In a Report in Dissidia 012 the flashback is expanded to show the battle between the two, players taking the role of Shantotto to fight Gabranth.
In Dissidia's Distant Glory The Lady of Legend, and in Confessions of the Creator in Dissidia 012 at the "Curses and Hopes of Yore" gateway, the player can find Shantotto. Shantotto resides in another realm cut off from the cycles, and the manikins she has been using as test subjects in her magical experiments have begun to run wild. Shantotto tasks the player with dispatching them, and in return grants them a "private lesson" and battles them. Once defeated, Shantotto departs to duel with Garland (though she cannot remember his name).
Official Quests
Several official quests elaborate on Shantotto's role in the early cycles and her fate once she escaped them. In "Gilgamesh's Quest 000: From the Interdimensional Rift", Prishe reports to Shantotto about her encounter with Gilgamesh, and how Prishe saw him being engulfed by a portal to the Rift. "Gabranth's Quest 000: One Who Faces Hell" reveals that Gabranth left his duel with Shantotto when he attacked Order's Sanctuary, telling Shantotto to ask Cosmos about the cycles and purification of fallen warriors.
In "Shantotto's Quest 000: The Seeker's Destination", Shantotto is now aware of the true nature of the cycles and decides to leave Cosmos as her amnesia is a detriment to her magical studies. Wishing Cosmos luck with the cycles, Shantotto departs Order's Sanctuary and destroys a gateway rather than just freeing it. Garland finds her and questions this act, and Shantotto explains she wishes to escape the cycle of war. As the gateways are unstable space that act as portals to other worlds, destroying one may cause a portal to open to the Rift.
An enraged Garland tells Shantotto escape is impossible and attacks her. In the aftermath of the battle a portal appears as Shantotto suspected, and Garland warns there is no escape from the Rift if she enters it, but Shantotto laughs he said the same about the cycle, and leaps into the portal. The ending narration alludes to the gateway in Confessions of the Creator, stating Shantotto was never seen in the cycle again, but fluctuations in space occasionally allow a portal to open in World B, allowing others to cross over to the dimension she came to reside in after her escape.
Gameplay
In battle Shantotto is a Chainspeller. Her HP attacks are unique in that they change in power depending on her Bravery, each tier having higher power and larger areas of effect. Shantotto is able to chain up to three of her HP attacks, increasing the Bravery damage dealt before damaging the opponent's HP. Her second tier Firaga, Thundaga and Blizzaga spells stagger opponents, and her third tier spells crush all guards, even Exdeath's High Block and Jecht's Jecht Block.
Unlike most magic-based characters, Shantotto is one of the most agile characters in the game, and she is fast enough to be able to chase down speedy characters such as Tidus or the Onion Knight. Shantotto is the smallest character in the game, making her evasive and difficult to pin down with attacks. Most of her Bravery attacks inflict status ailments, like Paralysis or Poison, and her attacks are slow and have a long recovery time. It is best to use Shantotto's attacks after paralyzing the opponent with Bind, or blocking and attacking them while they stagger.
In Dissidia, Shantotto's attacks level up to their second tier versions when she has at least 3000 Bravery, and reach level three at 6000 Bravery. In Dissidia 012, her spells reach the second tier at 2000 Bravery and third tier at 4000 Bravery.
Boss
In Dissidia, Shantotto is faced as a boss at the end of Distant Glory and Inward Chaos. In Dissidia 012, Shantotto is faced at the bottom of the "Curses of Hopes and Yore" gateway in Scenario 000.
Attacks
Template:See Also
Bravery Attacks
| Move | Type | CP (Mastered) | AP | Priority | Effect | Damage type | Obtained | Image |
|---|---|---|---|---|---|---|---|---|
| A Couple Attacks | Ground | 30 (15) | 90 | Melee Low | Chase Wall Rush |
Physical | Initial | 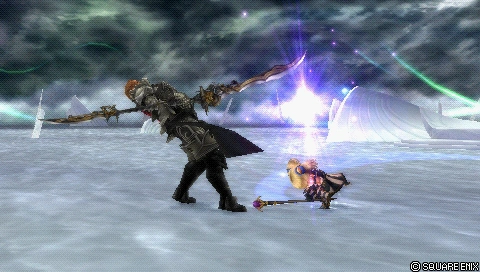
|
| Strike the opponent with scepter 3x, knocking them back. | ||||||||
| Bio (ground) |
Ground | 30 (15) | 120 | Ranged Low | None | Magical | Level 3 | 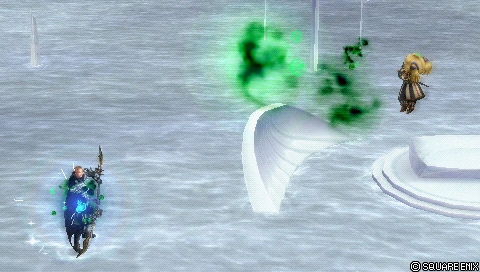
|
| Fire a cloud that poisons the opponent, causing Bravery damage over time for fifteen seconds. | ||||||||
| Bind (ground) |
Ground | 20 (10) | 120 | Ranged Low | None | N/A | Level 13 | 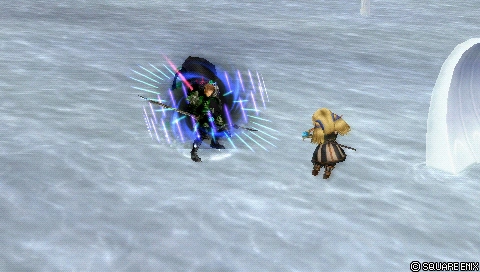
|
| Trap the opponent, making them unable to move. Does no damage. | ||||||||
| Stun (ground) |
Ground | 20 (10) | 120 | Ranged Low | None | N/A | Level 29 | 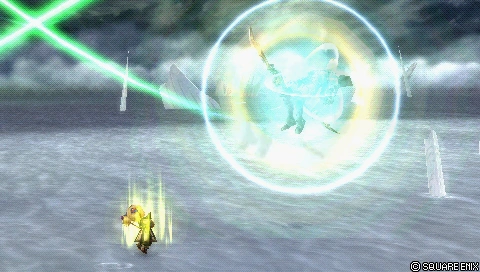
|
| Stun the opponent, interrupting their current action. Does no damage. | ||||||||
| Retribution | Aerial | 30 (15) | 180 | Block Low Melee Low |
Magic Block Wall RushInitial throw ChaseOn return |
Physical | Initial | 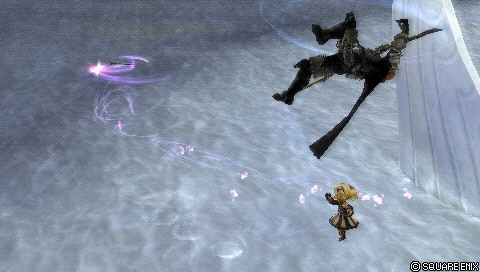
|
| Throw scepter at the opponent. If the first hit misses, it will boomerang back and strike the opponent again to start a Chase sequence. | ||||||||
| Bio (midair) |
Aerial | 30 (15) | 120 | Ranged Low | None | Magical | Level 3 |
|
| Fire a cloud that poisons the opponent, causing Bravery damage over time for fifteen seconds. | ||||||||
| Bind (midair) |
Aerial | 20 (10) | 120 | Ranged Low | None | N/A | Level 13 |
|
| Trap the opponent, making them unable to move. Does no damage. | ||||||||
| Stun (midair) |
Aerial | 20 (10) | 120 | Ranged Low | None | N/A | Level 29 |
|
| Stun the opponent, interrupting their current action. Does no damage. | ||||||||
| Move | Type | CP (Mastered) | AP | Priority | Effect | Damage type | Obtained | Image |
|---|---|---|---|---|---|---|---|---|
| A Couple Attacks | Ground | 30 (15) | 90 | Melee Low | Wall Rush | Physical | Initial |
|
| Strike the opponent with scepter 3 times, knocking them back. Can combo without hitting. | ||||||||
| Bio (ground) |
Ground | 30 (15) | 120 | Ranged Low | None | Magical | Level 3 |
|
| Fire a cloud that poisons the opponent, causing Bravery damage over time for ten seconds. Can be reflected back at Shantotto. | ||||||||
| Bind (ground) |
Ground | 20 (10) | 120 | Ranged Low | None | N/A | Level 16 |
|
| Trap the opponent, making them unable to move. Does no damage. | ||||||||
| Stun (ground) |
Ground | 20 (10) | 120 | Ranged Low | None | N/A | Level 28 |
|
| Stun the opponent, interrupting their current action. Does no damage. Can combo into other attacks if it hits. | ||||||||
| Retribution | Aerial | 30 (15) | 180 | Block Low Melee Mid |
Magic Block Wall RushInitial throw ChaseOn return |
Physical | Initial |
|
| Throw scepter at the opponent. If the first hit misses, it will boomerang back and strike the opponent again to start a chase sequence. | ||||||||
| Bio (midair) |
Aerial | 30 (15) | 120 | Ranged Low | None | Magical | Level 8 |
|
| Fire a cloud that poisons the opponent, causing Bravery damage over time for ten seconds. Can be reflected back at Shantotto. | ||||||||
| Bind (midair) |
Aerial | 20 (10) | 120 | Ranged Low | None | N/A | Level 20 |
|
| Trap the opponent, making them unable to move. Does no damage. | ||||||||
| Stun (midair) |
Aerial | 20 (10) | 120 | Ranged Low | None | N/A | Level 32 |
|
| Stun the opponent, interrupting their current action. Does no damage. Can combo into other attacks if it hits. | ||||||||
HP Attacks
| Move | Type | CP (Mastered) | AP | Priority | Effect | Damage type | Obtained | Image |
|---|---|---|---|---|---|---|---|---|
| Spirit Magic: Fire | Ground | 40 (20) | 260 | Ranged MidFire and Firaga Ranged HighFlare |
Wall RushFlare only | Magical | Initial | 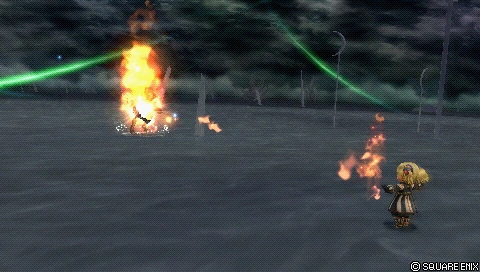 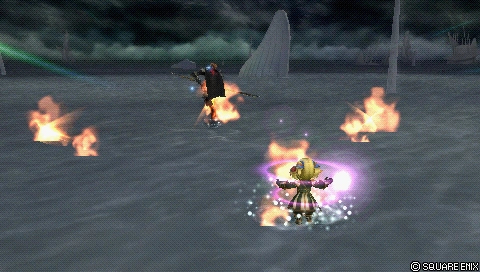 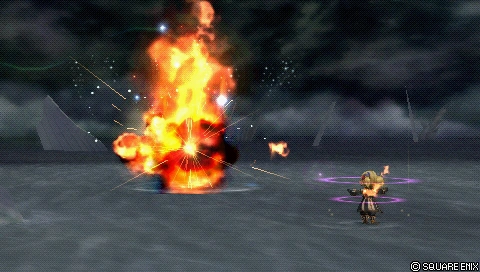
|
| Launch multiple fireballs at the opponent. Casts Fire, Firaga or Flare, depending on Bravery. Stronger versions fire even more fireballs in all directions.
| ||||||||
| Spirit Magic: Earth | Ground | 40 (20) | 200 | Ranged MidStone and Stonega Ranged HighQuake |
Wall Rush | Magical | Initial | 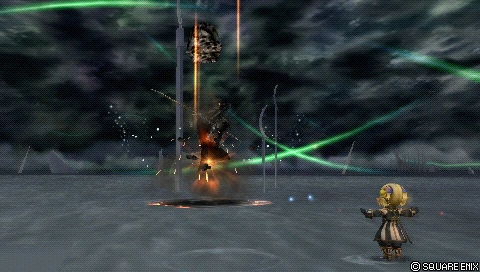 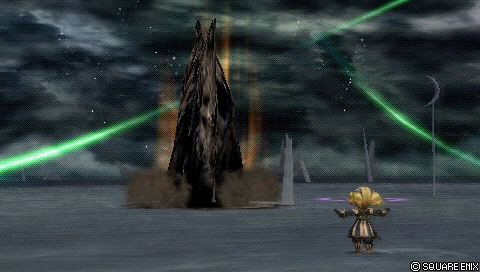 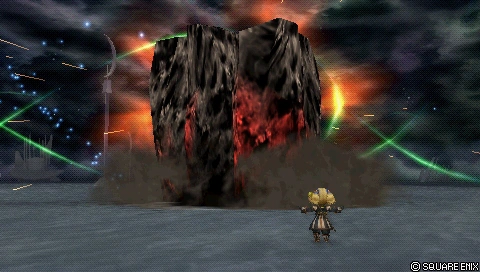
|
| Summon multiple rocks from the ground that stab upwards. Casts Stone, Stonega or Quake, depending on Bravery. Stronger versions summon much larger rocks that stab higher.
| ||||||||
| Spirit Magic: Thunder | Ground | 40 (20) | 300 | Ranged MidThunder and Thundaga Ranged HighBurst |
Wall Rush | Magical | Initial | 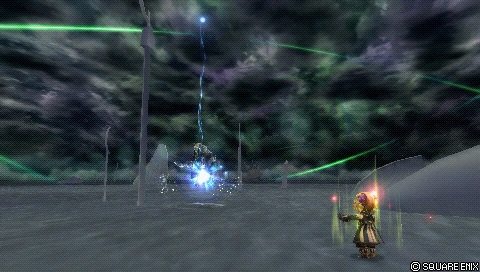 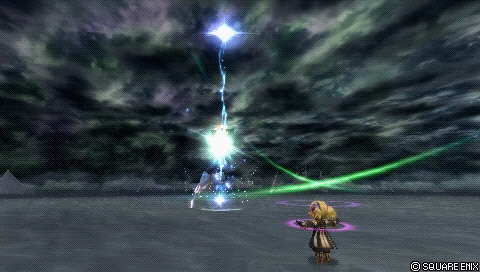 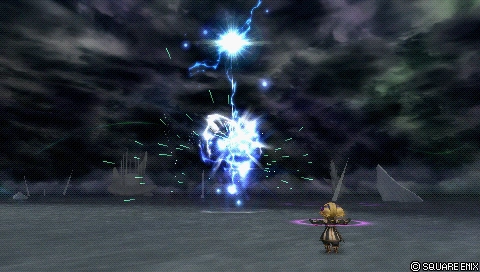
|
| Create lightning strikes that hit the opponent from above. Casts Thunder, Thundaga or Burst, depending on Bravery. Stronger versions summon much larger strikes.
| ||||||||
| Spirit Magic: Air | Aerial | 40 (20) | 240 | Ranged MidAero and Aeroga Ranged HighTornado |
Absorb | Magical | Initial | 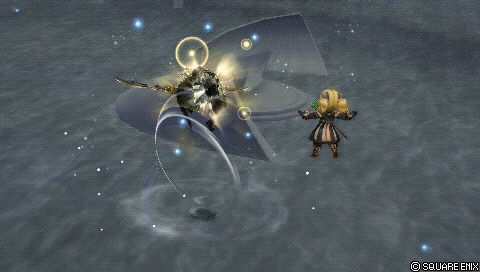 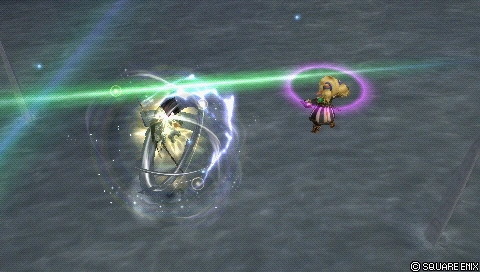 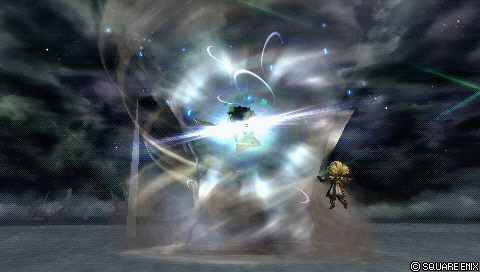
|
| Create winds that draw in the opponent. Casts Aero, Aeroga or Tornado, depending on Bravery. Stronger versions summon much larger winds.
| ||||||||
| Spirit Magic: Water | Aerial | 40 (20) | 220 | Ranged MidWater and Waterga Ranged HighFlood |
Absorb | Magical | Initial | 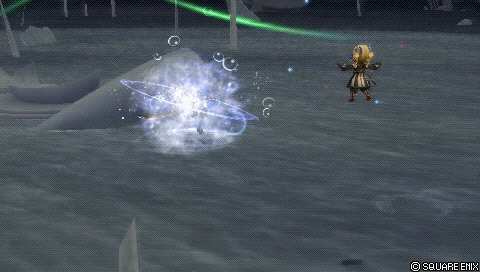 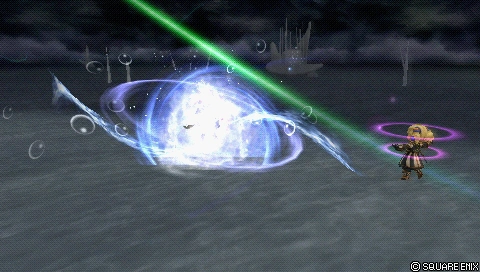 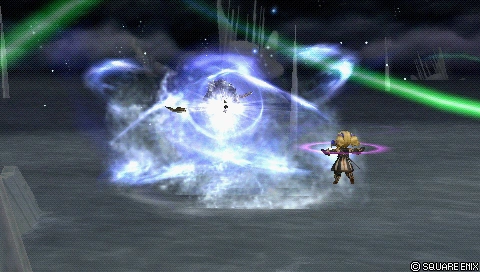
|
| Summon streams of water that circle and converge on the opponent. Casts Water, Waterga or Flood, depending on Bravery. Stronger versions summon much larger streams.
| ||||||||
| Spirit Magic: Ice | Aerial | 40 (20) | 280 | Ranged MidBlizzard and Blizzaga Ranged HighFreeze |
Absorb | Magical | Initial | 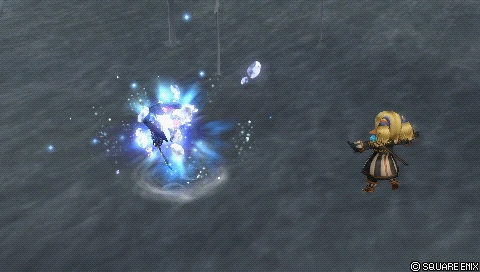 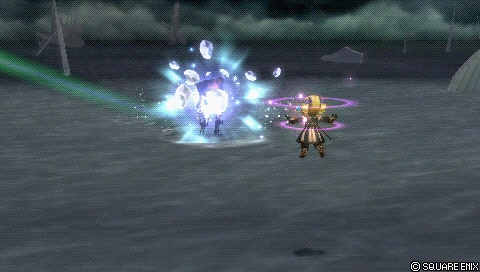 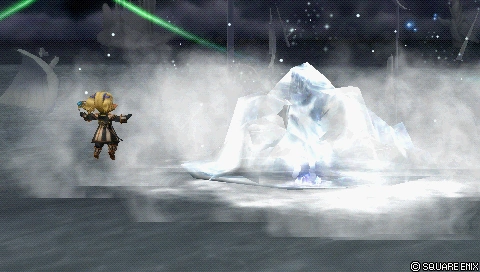
|
| Launch a shard of ice at the opponent that slams them down. Casts Blizzard, Blizzaga, or Freeze, depending on Bravery. Stronger versions summon even larger shards.
| ||||||||
| Move | Type | CP (Mastered) | AP | Priority | Effect | Damage type | Obtained | Image |
|---|---|---|---|---|---|---|---|---|
| Spirit Magic: Fire | Ground | 30 (15) | 120 | Ranged MidFire Ranged HighFiraga and Flare |
Wall RushFlare only | Magical | Initial |
|
| Launch multiple fireballs at the opponent. Casts Fire, Firaga or Flare, depending on Bravery. Stronger versions fire even more fireballs in all directions.
| ||||||||
| Spirit Magic: Earth | Ground | 30 (15) | 110 | Ranged MidStone Ranged HighStonega and Quake |
Wall Rush | Magical | Initial |
|
| Summon multiple rocks from the ground that stab upwards. Casts Stone, Stonega or Quake, depending on Bravery. Stronger versions summon much larger rocks that stab higher.
| ||||||||
| Spirit Magic: Thunder | Ground | 30 (15) | 130 | Ranged MidThunder Ranged HighThundaga and Burst |
Wall Rush | Magical | Initial |
|
| Create lightning strikes that hit the opponent from above. Casts Thunder, Thundaga or Burst, depending on Bravery. Stronger versions summon much larger strikes.
| ||||||||
| Spirit Magic: Air | Aerial | 30 (15) | 150 | Ranged MidAero Ranged HighAeroga and Tornado |
Absorb | Magical | Initial |
|
| Create winds that draw in the opponent. Casts Aero, Aeroga or Tornado, depending on Bravery. Stronger versions summon much larger winds.
| ||||||||
| Spirit Magic: Water | Aerial | 30 (15) | 140 | Ranged MidWater Ranged HighWaterga and Flood |
Absorb | Magical | Initial |
|
| Summon streams of water to circle and converge on the opponent. Casts Water, Waterga or Flood, depending on Bravery. Stronger versions summon much larger streams.
| ||||||||
| Spirit Magic: Ice | Aerial | 30 (15) | 160 | Ranged MidBlizzard Ranged HighBlizzaga and Freeze |
Absorb | Magical | Initial |
|
| Launch a shard of ice at the opponent that slams them down. Casts Blizzard, Blizzaga, or Freeze, depending on Bravery. Stronger versions summon much larger shards.
| ||||||||
EX Mode
Shantotto's EX Mode is called Two-hour Ability, where she equips the Cobra Unit Robe Set, an armor set for mages in Final Fantasy XI. While in EX Mode Shantotto gains the ability "Manafont", the Two-hour ability for Black Mages in Final Fantasy XI. In Dissidia, this causes Shantotto to retain her Bravery after landing an HP attack, even when using her EX Burst and performing its final blow. In Dissidia 012, Shantotto's Bravery drops to zero after dealing HP damage, but recovers back to its base value instantaneously regardless of its amount.
Shantotto's EX Burst, Play Rough, has her execute "Skillchain: Fusion" using the Weapon Skills Heavy Swing and Howling Fist, then attacking with a Magic Burst. A menu appears, and the player must select the spells and press ![]() once in order to execute the attack. The player must cast the spells quickly in this order after Shantotto laughs: Flare, Flood, Burst, Quake, Tornado, and Freeze. If successfully performed, Shantotto will deliver the final blow, consuming the opponent in a rainbow-colored blast of energy. Remember, Flare won't always be the first spell.
once in order to execute the attack. The player must cast the spells quickly in this order after Shantotto laughs: Flare, Flood, Burst, Quake, Tornado, and Freeze. If successfully performed, Shantotto will deliver the final blow, consuming the opponent in a rainbow-colored blast of energy. Remember, Flare won't always be the first spell.
Equipment
Shantotto can equip Rods, Staves, Bangles, Hats, Hairpins, Ribbons, Clothing, and Robes. In Dissidia 012, Shantotto can also equip Poles and Headbands.
Exclusive Weapons
| Name | Level | Stats | Effects | Obtained |
|---|---|---|---|---|
| Jupiter's Staff | 50 | BRV +26 ATK +35 | Initial BRV +20% | Trade: 15460 gil, Healing Staff, Thorny Lumber x3, Quickstrike Shard x2 |
| Laevateinn | 92 | BRV +38 ATK +62 | Initial BRV +30% | Trade: 29570 gil, Jupiter's Staff, Revival Tree x5, Quickstrike Crystal x3 |
| Claustrum | 100 | BRV +40 ATK +67 | Initial BRV +40% Major Gambler's Spirit Effect. |
Trade: 31920 gil, Laevateinn, Boiling Blood x5, Quickstrike Orb x5 |
| Name | Level | Stats | Effects | Obtained |
|---|---|---|---|---|
| Jupiter's Staff | 30 | BRV +41 ATK +38 | Initial Bravery +20% | Trade: 61000 gil, Healing Staff, Scarletite x1, Lady's Desire x5 |
| Laevateinn | 90 | BRV +34 ATK +62 | Initial Bravery +30% | Trade: 158000 gil, Jupiter's Staff, Electrum x1, Lady's Dream x5 |
| Claustrum | 100 | BRV +39 ATK +67 | Initial Bravery +40% Cat Nip Effect |
Trade: 182800 gil, Laevateinn, Boiling Blood x1, Lady's Hopes x5 |
Gallery
Template:Gallery Template:Gallery
Allusions
- If faced against Zidane in Dissidia, Shantotto will say "A male Mithra? Or perhaps not..." referencing the similarly-tailed race from Final Fantasy XI.
- The order in which the player can chain Shantotto's HP attacks, and enters her attacks during her EX Burst, are a reference to Ancient Magic, a unique set of spells available in Final Fantasy XI. In addition to the massive amount of damage each spell can deliver, Ancient Magic gives the target an elemental weakness to the spell's "weak" element, allowing other spells to do more damage. The order Shantotto's attacks are chained in is as follows: "Fire - Water - Thunder - Earth - Wind - Ice".
- When Shantotto begins her EX Burst, she strikes her opponent with her staff and lets loose a burst of wind from her hand. These two attacks are references to Full Swing and Howling Fist, Weapon Skills from Final Fantasy XI. However, in Final Fantasy XI only Monks and Puppetmasters can use Howling Fist.
- The sound made when the player casts a spell during Shantotto's EX Burst is the same sound heard in Final Fantasy XI when the player casts a spell or uses a special skill.
- Shantotto's EX Burst, "Skillchain: Fusion", links together Full Swing and Howling Fist as Weapon Skills, then executes a Magic Burst. This is identical to how Skillchains work in Final Fantasy XI: two Weapon Skills are used in quick succession, increasing the damage done and allowing allies to execute a certain type of elemental magic as a Magic Burst. The name of the Skillchain, Fusion, results in Fire or Light-aligned Magic Bursts in Final Fantasy XI, which is why Shantotto must first cast Flare in the chain of spells following the Skillchain.
When Shantotto loses, she turns into a doll.
- When Shantotto is defeated, she turns into a doll. This is a reference to a special event battle in Final Fantasy XI where the player can battle Shantotto. When they win Shantotto turns into a doll, and another Shantotto emerges and reveals the "Shantotto" the player just defeated was a puppet the real Shantotto had brought to life.
- Shantotto's emblem, seen as the symbol of Distant Glory - Heroes, is the flag of the Federation of Windurst. The music used on the board in her Distant Glory is "The Federation of Windurst", the city's main theme used in most of its areas.
- Shantotto's exclusive weapons are named after staves available in Final Fantasy XI. Specifically, the last two are the two most difficult Black Mage staves to acquire in the game; their Mythic Weapon and Relic Weapon, respectively.
- Shantotto's usage of the "loser" insult in her dialogue is a reference to her statement in the Vana'diel Tribune about enjoying the antics of "Total Loser" adventurers, whom she often berates in her manor. "Total Loser" is also a title players can earn if certain choices are made in the "Curses, Foiled A-Golem?!" quest, which is given to them by Shantotto.
- The amount of AP required to master Shantotto's HP attacks in Dissidia is the same as the order in which Black Mages learn the same spells in Final Fantasy XI: Stone, Water, Aero, Fire, Blizzard, and then Thunder. This is changed in Dissidia 012.
- The jewel on Shantotto's staff changes color according to the spell she casts. This in reference to a popular practice used by Black Mages in Final Fantasy XI where different elemental staves are equipped to provide a boost to spells of the corresponding element. The colors are as follows: green for Aero, cyan for Blizzard and Bind, red for Fire, yellow for Stone, blue for Water, purple for Thunder and Stun, and black for Bio as well as her EX Burst. The staff also changes color whenever Shantotto blocks (yellow), dodges (green), or attacks regularly (purple), referring to the weapons' additional enhancements to defense, evasion and critical hit rate respectively.
- Shantotto's quote to the Warrior of Light, "You would make a good shield," echoes a comment she makes about the player during the Treasures of Aht Urhgan: "He/She will serve as my shield, should things go wrong". She may be referring to the Warrior of Light's similarities to Final Fantasy XI's Paladin class, also known as Knight in the Japanese version. Common strategy in many MMOs consist of sending defensive melee characters into battle first to act as a "meatshield" and draw damage and attention away from other characters with lighter defenses, such as a Black Mage like Shantotto; Paladins are exceptionally good at this at high levels. The quote may also be a pun on how the Warrior of Light uses his own shield offensively.
- Shantotto's quote when fighting herself, "What a well-made automaton", is a reference to the Automatons of Final Fantasy XI.
- In Distant Glory, Shantotto warns the player's character "To beware of Cavernous Maws". Cavernous Maws are used in Final Fantasy XI's Wings of the Goddess expansion and its Abyssea add-ons to travel through time and between realities.
- One of her entrance lines for a weaker opponent, "Ohoho, a marvelous joke", is taken from the beginning of a quest: "Curses, Foiled A-Golem". Before this line is spoken the player has to choose a line of dialogue asking if s/he is "worthy".
- In Dissidia 012 when facing The Emperor, Shantotto says, "Though you may disagree, the world is here for me", alluding to her doppelgangers in A Shantotto Ascension that try to conquer the world, and the true Shantotto's joking suggestion she team up with them to do so.
- In the Dissidia 012 opening, Shantotto is standing above the war between Chaos and Cosmos's warriors laughing, referencing a similar scene in Final Fantasy XI.
- In Dissidia 012, with Bartz as the opponent, Shantotto will say, "Stupidity: Impossible to gauge!" This is a reference to Final Fantasy XI's check system, where players receive messages based on the level difference from players to monsters. 'Impossible to gauge' is the message players receive when facing Notorious Monsters.
- In Dissidia 012, when facing Jecht, he says "Oops, thought you was a ball!" referring to a joke among Final Fantasy XI fans about "Tarutaru punting".
- Her use of Retribution may be due to the fact that the player has to complete a quest to unlock that weaponskill, Shantotto being the quest giver.
- When facing Yuna, Shantotto says, "A summoner, you say? Let's see a display". This is a reference to the fact that summoning is a forbidden school of magic in Vana'diel, due to the possibly life-threatening strain it puts on the summoner's body.
Trivia
- Shantotto is the only character to know all her HP attacks initially.
- Prishe was initially intended to fill in the role of the representative of Final Fantasy XI in Dissidia, but was later rejected in favor of Shantotto.
- Shantotto shares her Japanese voice actress with Andoria Kaya Tranka Fam Forturio from Final Fantasy Type-0. She shares her English voice actress with Dona and Pacce from Final Fantasy X and Final Fantasy X-2.
- The damage inflicted by Bio after the initial use counts as an attack. Thus, Bio will count towards activating abilities like Counterattack and Magic Shield, is capable of causing a Break on the opponent if it depletes their Bravery, and if used by Shantotto as an Assist in Dissidia 012 it will cause an EX Break, even if the opponent enters EX Mode after the initial hit. If a Chase occurs while a character is poisoned by Bio, the damage it does may interrupt the Chase.
- Shantotto's highest tier Thunder spell, Burst, is the only spell in her repertoire of HP attacks that appears exclusively in Final Fantasy XI.
- In Dissidia 012, when an Assist Shantotto successfully inflicts Bio or Bind on the opponent, the opponent may flinch continuously every time Bio does damage or every second while under the effect of Bind, effectively pinning the opponent down in place and possibly disrupting HP attacks. It is likely that this is a glitch.
- Shantotto's models includes the texture for the Light Staff, though she never uses it in game.
Template:Dissidia Template:D012 Template:DFF2015