Final Fantasy Wiki
Advertisement

Template:Sideicon

FF4PSP Cid Portrait
Cid Pollendina: Oh, shut up and help me remodel the Quest (Final Fantasy XV)/Sidequests page!
Please expand this article into a full one. The following tasks need to be completed:
  • fill in how to complete each sidequest in their subsection.

This request can be discussed on the associated discussion page. Remove this notice upon completion.

Map icon.
New side quest map icon.

Sidequests are optional quests in Final Fantasy XV. They can involve many different types of objectives. They often provide rewards in EXP, items, weapons or accessories. Completing sidequests yields achievements and trophies, the best one being Weaving a Tapestry after 80 completed quests.

Tours

Tours are short sidequests involving unique moments with Noctis and an ally. When resting at a specific camp, an ally will ask for Noctis's help the following day, and if accepting it, Noctis will help them the next day upon waking. Tours involve a simple task, often following on screen prompts, and reward the party with 20 AP.

The Hallowed Hill of Hammerhead

NameLocationUnlockReward
The Hallowed Hill of HammerheadLeideCamp in Palmaugh Haven20 AP

Rise and Shine and Run

NameLocationUnlockReward
Rise and Shine and RunLeideCamp in Lachyrte Haven20 AP

Strike a Pose!

NameLocationUnlockReward

Stirred, Not Shaken

NameLocationUnlockReward
Stirred, Not ShakenLeideCamp in Cotisse Haven20 AP

The Chopping Block

NameLocationUnlockReward
The Chopping BlockDuscaeCamp in Fallaughns Haven20 AP

Up Close and Personal

NameLocationUnlockReward
Up Close and PersonalDuscaeCamp in Pullmoor Haven20 AP

Case of the Stolen Specs

NameLocationUnlockReward
Case of the Stolen SpecsCleigneCamp in Pectriche Haven20 AP

Liege of the Lake

NameLocationUnlockReward
Liege of the LakeCleigneCamp in Capitis Haven20 AP

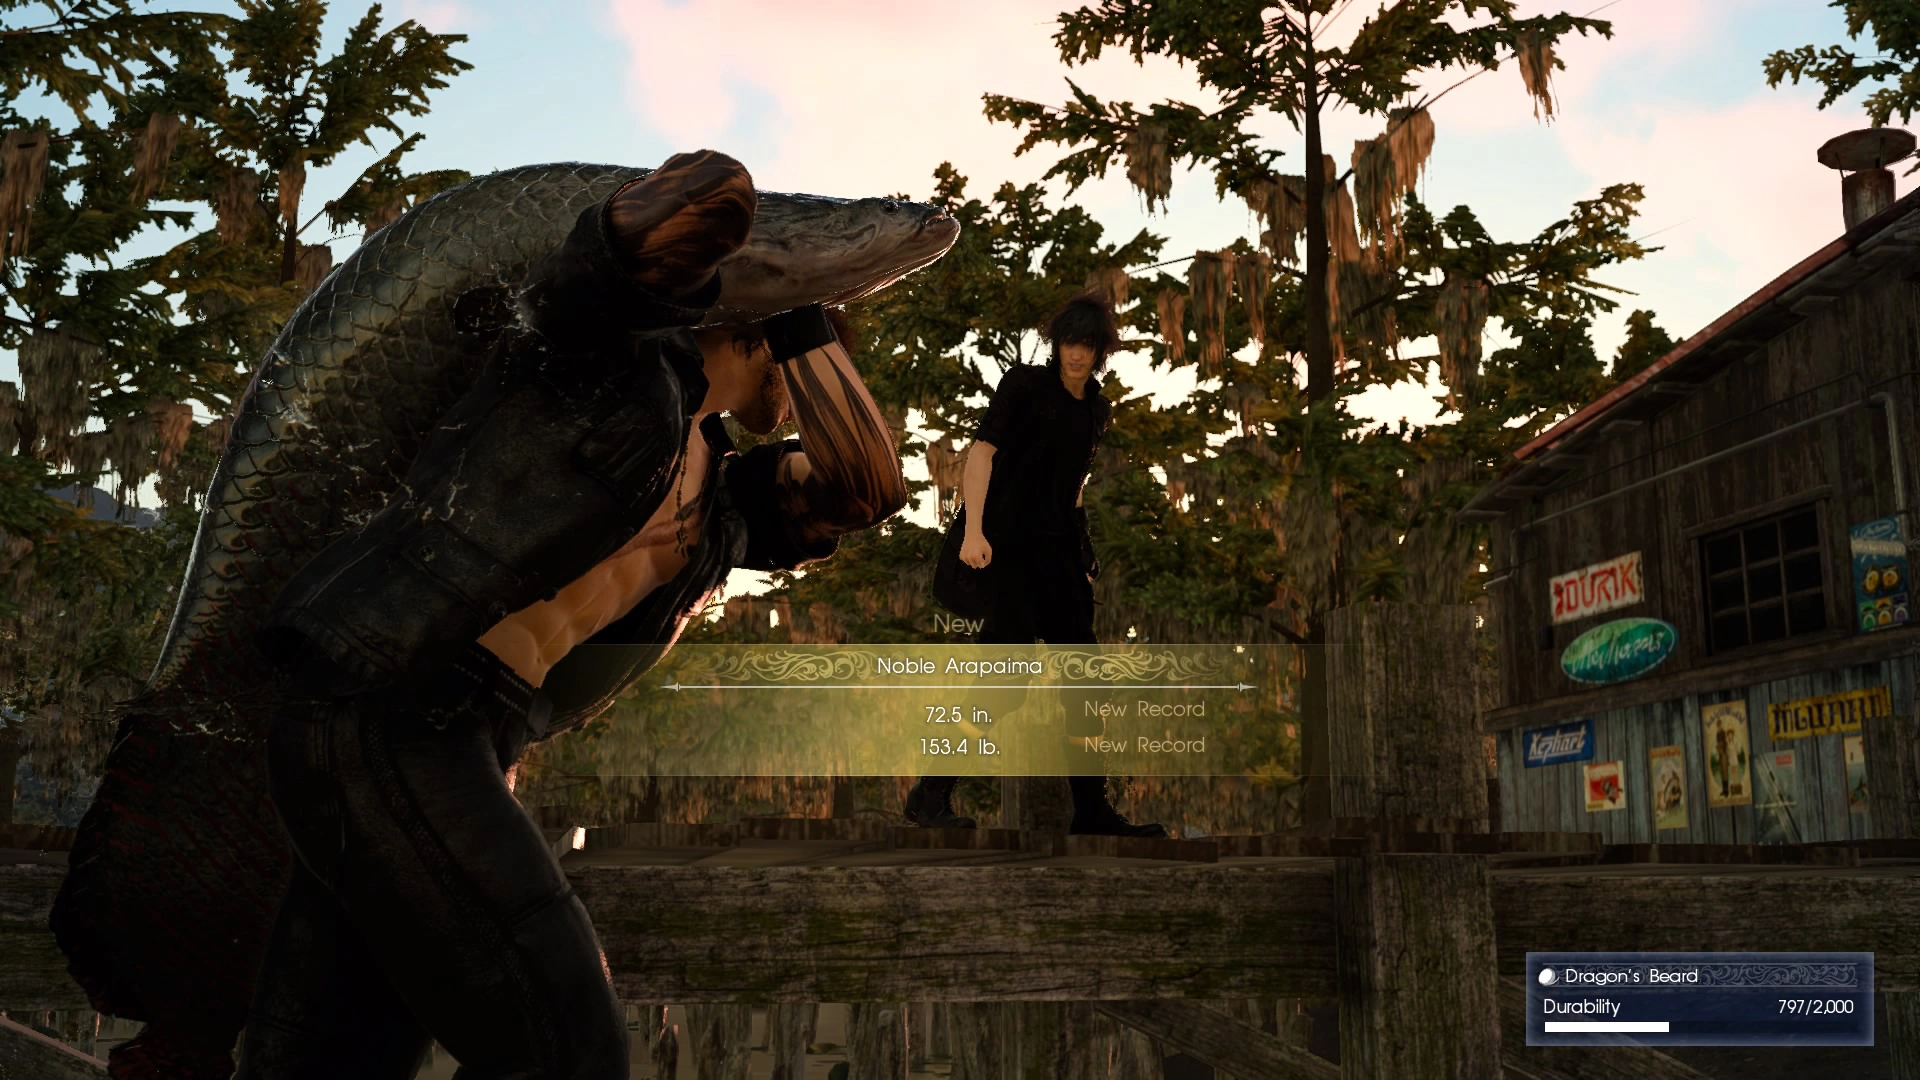
If the player camps at the haven near Vesperpool with a full party, Gladiolus will ask for him and Noctis to go fishing for the legendary Liege of the Lake in the Vesperpool the next morning. Complying triggers a quest for the fish. The tour is completed once the player catches the Liege; quitting fishing puts them back at camp, but the tour can be restarted at any time by camping at the same haven again. It is possible to catch the Liege outside of the tour when fishing at the same spot.

Vesperpool-Tour-Complete-FFXV

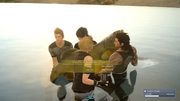
The tour at the lake completed.

The "Liege of the Lake" is one of the toughest fish to catch. It is a hidden fish (not marked on the radar while fishing) lurking in the top left corner of the fishing area. It can be caught with the 10,000 Needles Gold Cactuar lure that can be bought at the shop at the same fishing spot. It will appear regardless of weather. It will struggle almost all the time when caught. It is best to use the best fishing line, an upgraded rod and reel, and to have Fishing Level 7 or above. The player should continually tilt the analog stick the way the fish swims, and looking at the fish itself rather than the button prompt can be a better method, although this is not so easily seen if it is raining. The player must be patient and only reel in when the fish is not struggling (the controller doesn't vibrate). Tapping the reel in button can work better than holding it, to save line. Because the fish struggles so much, there are only short windows for reeling.

Cooking Kupoberry Cheesecake at camp before the tour that makes a fishing line last 25% longer helps in this quest (available from Moogle Chocobo Carnival). The player only needs to cast their line until the liege bites; any other fish that bite the player can let the fish come off the line to have a fresh line when catching the liege.

Catching the fish yields the Big Blaze Bahamut lure, which is special as it will return even if the line snaps.

A Flower for Iris

NameLocationUnlockReward
A Flower for IrisCleigneCamp in Lambath Haven20 AP

Rescues

Rescues require the player to locate trapped individuals found throughout Eos, and save them with a restorative item. These missions are not flagged until the player moves within a close proximity of the individual.

A Hurting Heart

NameLocationUnlockReward
A Hurting HeartDuscaeReach Chapter 03350 EXP, 900 Gil

When You Believe

NameLocationUnlockReward
When You BelieveLeideReach Chapter 09 and complete "Palpable Pain"1,000 EXP, 6,000 Gil

Weary and Wounded

NameLocationUnlockReward
Weary and WoundedDuscaeReach Chapter 09 and complete "A Hurting Heart"1,000 EXP, 2,500 Gil

The Faint of Heart

NameLocationUnlockReward
The Faint of HeartDuscaeReach Cape Caem in Chapter 08 and complete "Wracked with Anxiety"350 EXP, 900 Gil

Trembling with Fear

NameLocationUnlockReward
Trembling with FearDuscaeReach Chapter 03 and complete the "A Behemoth Undertaking" hunt350 EXP, 900 Gil

Accursed Curiosity

NameLocationUnlockReward
Accursed CuriosityDuscaeReach Chapter 03 and complete "All By Myself"350 EXP, 900 Gil

Down on your Luck

NameLocationUnlockReward
Down on your LuckDuscaeReach Chapter 091,500 EXP, 6,000 Gil

Not So Easy Anymore

NameLocationUnlockReward
Not So Easy AnymoreCleigneReach Chapter 09 and complete "Blame the Beasts!"1,000 EXP, 2,500 Gil

Keeping the Faith

NameLocationUnlockReward
Keeping the FaithCleigneReach Chapter 09 and complete "Losing Heart"1,500 EXP, 6,000 Gil

Almost Out of Hope

NameLocationUnlockReward
Almost Out of HopeCleigneReach Chapter 03500 EXP, 1,500 Gil

Blame the Beasts!

NameLocationUnlockReward
Blame the Beasts!CleigneReach Chapter 08500 EXP, 1,500 Gil

Alas, Poor Hunter...

NameLocationUnlockReward
Alas, Poor Hunter...CleigneReach Chapter 03500 EXP, 1,500 Gil

Injured and Introspective

NameLocationUnlockReward
Injured and IntrospectiveCleigneReach Chapter 09 and complete "Keeping the Faith"1,500 EXP, 6,000 Gil

Poor Misfortunate Soul

NameLocationUnlockReward

Wracked With Anxiety

NameLocationUnlockReward

The Verge of Despair

NameLocationUnlockReward
The Verge of DespairDuscaeReach Chapter 09 and complete "In Low Spirits"1,000 EXP, 2,500 Gil

Distress in the Desert

NameLocationUnlockReward
Distress in the DesertLeideReach Chapter 02 and complete "Lost Without a Potion"350 EXP, 900 Gil

Lost Without a Potion

NameLocationUnlockReward
Lost Without a PotionLeideReach Chapter 02 and complete "Search and Rescue"350 EXP, 900 Gil

Tired of Running

NameLocationUnlockReward
Tired of RunningLeideAvailable from the start300 EXP, 500 Gil

Palpable Pain

NameLocationUnlockReward
Palpable PainLeideReach Chapter 02 and complete "Tired of Running"350 EXP, 900 Gil

All By Myself

NameLocationUnlockReward
All By MyselfDuscaeReach Chapter 03350 EXP, 900 Gil

Search and Rescue

NameLocationUnlockReward
Search and RescueLeideComplete "The Mutant Marauder"300 EXP, 500 Gil

An Exaggerated Injury

NameLocationUnlockReward
An Exaggerated InjuryLeideReach Chapter 02 and complete "Scared and Stranded"350 EXP, 900 Gil

In Low Spirits

NameLocationUnlockReward
In Low SpiritsDuscaeReach Chapter 09 and complete "All By Myself"350 EXP, 900 Gil

A Cry for Help

NameLocationUnlockReward
A Cry for HelpLeideVisit the Longwythe Rest Area and speak to the motel owner to advance "The Errand Prince"300 EXP, 500 Gil

Conceal, Don't Feel

NameLocationUnlockReward
Conceal, Don't FeelLeideComplete "A Cry for Help"300 EXP, 500 Gil

Scared and Stranded

NameLocationUnlockReward
Scared and StrandedLeideReach Chapter 02 and complete "A Cry for Help"350 EXP, 900 Gil

Losing Heart

NameLocationUnlockReward
Losing HeartCleigneReach Chapter 09 and complete "Alas, Poor Hunter..."1,500 EXP, 6,000 Gil

Scared and Lonely

NameLocationUnlockReward
Scared and LonelyCleigneReach Chapter 03500 EXP, 1,500 Gil

Broken Cars

Broken Cars quests require the player to assist stranded drivers by the roadside, by providing them a Repair Kit. Like Rescues, they are only flagged when the player reaches one of the drivers and when the quest is unlocked.

Pedal to the Metal

NameLocationUnlockReward
Pedal to the MetalCleigneReach Chapter 09 and complete "A Manic Motorist"1,500 EXP, 6,000 Gil

Broken-down

NameLocationUnlockReward

One Tune-Up Too Many

NameLocationUnlockReward
One Tune-Up Too ManyLeideReach Chapter 03 and complete "Unlucky Driver"350 EXP, 900 Gil

Shoulda Been Serviced

NameLocationUnlockReward
Shoulda Been ServicedDuscaeHead to Coernix Station - Lestallum in Chapter 06350 EXP, 900 Gil

New to the Road

NameLocationUnlockReward
New to the RoadDuscaeReach Chapter 03500 EXP, 1,500 Gil

I'm Late!

NameLocationUnlockReward
I'm Late!DuscaeRetrieve the Regalia in Chapter 05 and complete "New to the Road"500 EXP, 1,500 Gil

The Jolly Joyrider

NameLocationUnlockReward
The Jolly JoyriderDuscaeReach Chapter 03350 EXP, 900 Gil

Carless in a Car

NameLocationUnlockReward

Roadside Assistance

NameLocationUnlockReward
Roadside AssistanceLeideReach Chapter 03 and complete "Stranded on the Sand"500 EXP, 900 Gil

Unlucky Driver

NameLocationUnlockReward
Unlucky DriverLeideAvailable from the start300 EXP, 500 Gil

Highway Helper

NameLocationUnlockReward
Highway HelperLeideAvailable from the start300 EXP, 500 Gil

Car-mic Retribution

NameLocationUnlockReward
Car-mic RetributionLeideReach Cape Caem in Chapter 06 and complete "Broken-Down"500 EXP, 1,500 Gil

Waiting for Help

NameLocationUnlockReward
Waiting for HelpLeideReach Cape Caem in Chapter 06 and complete "Car-mic Retribution"350 EXP, 900 Gil

Automotive Agitation

NameLocationUnlockReward
Automotive AgitationLeideReach Chapter 09 and complete "Stranded on the Sand"1,500 EXP, 6,000 Gil

Tune-up, Shmune-up

NameLocationUnlockReward
Tune-up, Shmune-upDuscaeReach Chapter 09 and complete "Shoulda Been Serviced"1,500 EXP, 6,000 Gil

That Brand-new Car Smell

NameLocationUnlockReward

A Manic Motorist

NameLocationUnlockReward
A Manic MotoristCleigneReach Chapter 09 and complete "My Beloved Chariot"1,500 EXP, 6,000 Gil

Alone on the Road

NameLocationUnlockReward
Alone on the RoadCleigneReach Chapter 09 and complete "My Beloved Chariot"1,500 EXP, 6,000 Gil

Dude, Where's My Car?

NameLocationUnlockReward
Dude, Where's My Car?CleigneReach Chapter 08800 EXP, 2,500 Gil

Oh My Grease-Monkey Goddess!

NameLocationUnlockReward
Oh My Grease-Monkey Goddess!CleigneReach Cape Caem in Chapter 06 and complete "Big Head Beind the Wheel"400 EXP, 1,500 Gil

Big Head Behind the Wheel

NameLocationUnlockReward
Big Head Behind the WheelCleigneReach Chapter 03400 EXP, 1,500 Gil

Wild Beasts on the Open Road

NameLocationUnlockReward
Wild Beasts on the Open RoadDuscaeReach Chapter 03500 EXP, 1,500 Gil

My Beloved Chariot

NameLocationUnlockReward
My Beloved ChariotCleigneReach Chapter 03400 EXP, 1,500 Gil

Keep Calm and Keep Driving

NameLocationUnlockReward
Keep Calm and Keep DrivingCleigneReach Chapter 08 and complete "Dude, Where's My Car?"800 EXP, 2,500 Gil

The Perpetual Passenger

NameLocationUnlockReward
The Perpetual PassengerDuscaeReach Chapter 09 and complete "The Jolly Joyrider"1,500 EXP, 6,000 Gil

A Driver in Despair

NameLocationUnlockReward
A Driver in DespairCleigneReach Cape Caem in Chapter 06 and complete "Vehicle Vexation"400 EXP, 1,500 Gil

Through a Rose-Tinted Windshield

NameLocationUnlockReward
Through a Rose-Tinted WindshieldDuscaeReach Chapter 09 and complete "The Perpetual Passenger"1,500 EXP, 6,000 Gil

Hurrying Home

NameLocationUnlockReward
Hurrying HomeDuscaeReach Chapter 09 and complete "Through a Rose-Tinted Windshield"500 EXP, 1,500 Gil

Vehicle Vexation

NameLocationUnlockReward
Vehicle VexationCleigneReach Chapter 03400 EXP, 1,500 Gil

Stranded on the Sand

NameLocationUnlockReward
Stranded on the SandLeideReach Chapter 02 and complete "Highway Helper"500 EXP, 900 Gil

Photo Ops

Photo Ops are short sidequests from which Prompto can take a memorable picture. They are activated during daylight hours when the player enters a zone around the area from which the picture is taken.

Photo Op: Battlefield

NameLocationUnlockReward
Photo Op: BattlefieldNear Prairie OutpostReach Chapter 05200 EXP

Photo Op: Quay

NameLocationUnlockReward
Photo Op: QuayGaldin QuayReach Chapter 03200 EXP

Photo Op: Quarry

NameLocationUnlockReward
Photo Op: QuarryNear Balouve MinesReach Chapter 04200 EXP

Photo Op: Disc

NameLocationUnlockReward
Photo Op: DiscDisc of CauthessReach Chapter 03 (must be completed before the end of Chapter 04)250 EXP

Photo Op: Lestallum

NameLocationUnlockReward
Photo Op: LestallumLestallumComplete the "A Stroll For Two" tour in Chapter 03250 EXP

Photo Op: Crag

NameLocationUnlockReward
Photo Op: CragCoernix Station - CauthessReach Chapter 08250 EXP

Photo Op: Park

NameLocationUnlockReward
Photo Op: ParkAltissiaReach Chapter 09400 EXP

Photo Op: Ranch

NameLocationUnlockReward
Photo Op: RanchWiz Chocobo PostComplete the "A Behemoth Undertaking" hunt and reach Cape Caem in Chapter 06250 EXP

Photo Op: Dock

NameLocationUnlockReward
Photo Op: DockAltissiaReach Chapter 09400 EXP

Photo Op: Bar

NameLocationUnlockReward
Photo Op: BarAltissiaReach Chapter 09400 EXP

Photo Op: Mascot

NameLocationUnlockReward
Photo Op: MascotOld LestallumReach Chapter 08300 EXP

Photo Op: Palace

NameLocationUnlockReward
Photo Op: PalaceAltissiaReach Chapter 09400 EXP

Photo Op: Waterfall

NameLocationUnlockReward
Photo Op: WaterfallOutside Greyshire Glacial GrottoReach Chapter 03300 EXP

Photo Op: Volcano

NameLocationUnlockReward
Photo Op: VolcanoVerinas Mart - RavatoghReach Chapter 03250 EXP

Photo Op: Beacon

NameLocationUnlockReward
Photo Op: BeaconCape CaemReach Chapter 08 and go through Cape Caem's parking area on foot300 EXP

Photo Op: Lakefront

NameLocationUnlockReward
Photo Op: LakefrontVesperpoolReach Chapter 07350 EXP

Photo Op: Mountain

NameLocationUnlockReward
Photo Op: MountainLongwythe's PeakReach Chapter 03200 EXP

Dave

Dave Auburnbrie, unlike many non-player characters, changes his position after each sidequest, and can be found at different outposts depending on the last sidequest completed. His sidequests involve obtaining a dog tag, often surrounded by creatures to kill first, and rewards useful restorative items. The tag is found somewhere within the circle on the map when the quest is active, and glows yellow on the ground.

Final Resting Plains

NameLocationUnlockReward
Final Resting PlainsDuscaeReach Chapter 03 and complete "Dust to Dust"800 EXP, Elixir x10

The Witch of the Woods

NameLocationUnlockReward
The Witch of the WoodsHouse of HexesComplete "Mountains of Misfortune" and visit Verinas Mart - Ravatogh tipster in Chapter 82,500 EXP, Mega Phoenix x10

Dust to Dust

NameLocationUnlockReward
Dust to DustLeideComplete Dave's "Gone Hunting"600 EXP, Mega-Potion x5

A Rocky End

NameLocationUnlockReward
A Rocky EndDuscaeComplete "Final Resting Plains"1,000 EXP, Hi-Elixir x10

Swallowed by Shadows

NameLocationUnlockReward
Swallowed by ShadowsDuscaeComplete "A Rocky End"1,200 EXP, Hi-Elixir x10

Mountains of Misfortune

NameLocationUnlockReward
Mountains of MisfortuneCleigneComplete "Washed Away" and reach Chapter 072,000 EXP, Megalixir x5

A Backwoods Burial

NameLocationUnlockReward
A Backwoods BurialCleigneComplete "Swallowed by Shadows"1,500 EXP, Phoenix Down x10

Gone Hunting

NameLocationUnlockReward
Gone HuntingLeideComplete "The Errand Prince" in Chapter 01500 EXP, Hi-Potion x10

Washed Away

NameLocationUnlockReward
Washed AwayCleigneComplete "A Backwoods Burial"1,800 EXP, Phoenix Down x10

Cid

Cid's sidequests allow weapons to be upgraded. After completing Cid Sophiar, Master Mechanic, Cid can offer a sidequest to upgrade each weapon that bears the "+" upgrade icon. The player must retrieve both the weapon and the specific part to upgrade it, and once taken to Cid, will be upgraded after fulfilling a specific number of quests or hunts, then resting at a camp or lodging. Cid is found in Hammerhead, except between chapter 6 and the end of chapter 8, in which he is found in Cape Caem.

Cid Sophiar, Master Mechanic

NameLocationUnlockReward
Cid Sophiar, Master MechanicHammerhead (Cape Caem in Chapter 07 and 08)Reach Chapter 02500 EXP, Drain Lance II

This requires the Drain Lance and Metal Scrap, a common item. When given to Cid, the weapon will upgrade immediately.

A Better Engine Blade

NameLocationUnlockReward
A Better Engine BladeHammerhead (Cape Caem in Chapter 07 and 08)Obtain Engine Blade and complete "Cid Sophiar, Master Mechanic"500 EXP, Engine Blade II

This requires the Rusted Bit to upgrade. After giving it to Cid, it is upgraded immediately.

A Better Engine Blade II

NameLocationUnlockReward
A Better Engine Blade IIHammerhead (Cape Caem in Chapter 07 and 08)Obtain Engine Blade II and complete "Cid Sophiar, Master Mechanic"800 EXP, Engine Blade III (after completing one quest or hunt)

This requires the Glass Gemstone to upgrade. It is a common item, which can be found in Lestallum. One quest or hunt must be completed before it is upgraded.

A Better Engine Blade III

NameLocationUnlockReward
A Better Engine Blade IIIHammerhead (Cape Caem in Chapter 07 and 08)Obtain Engine Blade III and complete "Cid Sophiar, Master Mechanic"1,000 EXP, Ultima Blade (after completing three quests or hunts)

This requires the Sturdy Helixhorn to upgrade. It can be obtained by breaking Duplicorn's horn (75% rate). The player can lock onto it and then warp-strike from a distance. After giving both to Cid, three quests or hunts must be completed before the weapon is upgraded.

A Better Drain Lance II

NameLocationUnlockReward
A Better Drain Lance IIHammerhead (Cape Caem in Chapter 07 and 08)Complete "Cid Sophiar, Master Mechanic"800 EXP, Drain Lance III (after completing one quest or hunt)

This requires the Coeurl Whiskers to upgrade. It is dropped either by Coeurl (50% rate) or Elder Coeurl (100% rate). After giving both to Cid, one quest or hunt must be completed before the weapon is upgraded.

A Better Auto Crossbow

NameLocationUnlockReward
A Better Auto CrossbowHammerhead (Cape Caem in Chapter 07 and 08)Obtain Auto Crossbow and complete "Cid Sophiar, Master Mechanic"2,000 EXP, Auto Crossbow Plus (after completing two quests or hunts)

This requires the Cactuar Needle to upgrade. It can be found south of Vesperpool, dropped by the Slactuar (100% rate). After giving both to Cid, two quests or hunts must be completed before upgrade is ready.

A Better Bioblaster

NameLocationUnlockReward
A Better BioblasterHammerhead (Cape Caem in Chapter 07 and 08)Obtain Bioblaster and complete "Cid Sophiar, Master Mechanic"2,000 EXP, Bioblaster Plus (after completing two quests or hunts)

This requires the Dynamo. It can be found at Callatein's Plunge outside Greyshire Glacial Grotto, dropped by MA Veles (50% rate), by MA Veles-Bis (60% rate), or by MA Hoplomachus (95% rate). After giving both to Cid, two quests or hunts must be completed before upgrade is ready.

A Better Circular Saw

NameLocationUnlockReward
A Better Circular SawHammerhead (Cape Caem in Chapter 07 and 08)Obtain Circular Saw and complete "Cid Sophiar, Master Mechanic"2,000 EXP, Circular Saw Plus (after completing two quests or hunts)

This requires the Sky Gemstone, which is a reward for the A Feline Feast quest. After giving both to Cid, two quests or hunts must be completed before upgrade is ready.

A Better Gravity Well

NameLocationUnlockReward
A Better Gravity WellHammerhead (Cape Caem in Chapter 07 and 08)Obtain Gravity Well and complete "Cid Sophiar, Master Mechanic"2,000 EXP, Gravity Well Plus (after completing two quests or hunts)

This requires the Hydraulic Cylinder. It can be found north of Fort Vaullerey, dropped by MA-X Patria (97% rate). After giving both to Cid, two quests or hunts must be completed before upgrade is ready.

A Better Noiseblaster

NameLocationUnlockReward
A Better NoiseblasterHammerhead (Cape Caem in Chapter 07 and 08)Obtain Noiseblaster and complete "Cid Sophiar, Master Mechanic"2,000 EXP, Noiseblaster Plus (after completing two quests or hunts)

This requires the Magnetron. It can be found in Gralea, dropped by MA Hoplomachus (5% rate). After giving both to Cid, two quests or hunts must be completed before upgrade is ready.

A Better Drillbreaker

NameLocationUnlockReward
A Better DrillbreakerHammerhead (Cape Caem in Chapter 07 and 08)Obtain Drillbreaker and complete "Cid Sophiar, Master Mechanic"2,000 EXP, Drillbreaker Plus (after completing two quests or hunts)

This requires the Magitek Core. It can be found in Gralea, dropped by MA-X Dux (100% rate), or by MA-X Patria (3% rate). After giving both to Cid, two quests or hunts must be completed before upgrade is ready.

A Better Force Stealer

NameLocationUnlockReward
A Better Force StealerHammerhead (Cape Caem in Chapter 07 and 08)Obtain Force Stealer and complete "Cid Sophiar, Master Mechanic"800 EXP, Force Stealer II (after completing one quest or hunt)

This requires the Monster Claw. It is dropped from Bandersnatch (100% rate). After giving both to Cid, one quest or hunt must be completed before upgrade is ready.

A Better Pair of Plunderers

NameLocationUnlockReward
A Better Pair of PlunderersHammerhead (Cape Caem in Chapter 07 and 08)Obtain Plunderers and complete "Cid Sophiar, Master Mechanic"800 EXP, Plunderers II (after completing one quest or hunt)

This requires the Barbed Scythe. It is dropped by Killer Wasp. After giving both to Cid, one quest or hunt must be completed before upgrade is ready.

A Better Valiant

NameLocationUnlockReward
A Better ValiantHammerhead (Cape Caem in Chapter 07 and 08)Obtain Valiant and complete "Cid Sophiar, Master Mechanic"800 EXP, Valiant II (after completing one quest or hunt)

This requires the Earth Gemstone, a common item. After giving both to Cid, one quest or hunt must be completed before upgrade is ready.

A Better Absorb Shield

NameLocationUnlockReward
A Better Absorb ShieldHammerhead (Cape Caem in Chapter 07 and 08)Obtain Absorb Shield and complete "Cid Sophiar, Master Mechanic"800 EXP, Absorb Shield II (after completing one quest or hunt)

This requires the Spiked Armor. It can be obtained by breaking appendage from Skarnbulette (75% rate). After giving both to Cid, one quest or hunt must be completed before upgrade is ready.

Takka

Takka is found in Hammerhead, and his sidequests request the party defeat enemies for Takka. They reward many ingredients.

Everyone Loves Beans

NameLocationUnlockReward
Everyone Loves BeansDuscaeComplete "Emergency Delivery"1,500 EXP, Leiden Pepper x5, Hulldagh Nutmeg x5, Killer Tomato x5

Hunters and Gatherers

NameLocationUnlockReward
Hunters and GatherersLeideComplete "Scenic Delivery"500 EXP, Cleigne Wheat x5, Dualhorn Steak x5, Leiden Pepper x5, Hammerhead Hot Sandwich

Emergency Delivery

NameLocationUnlockReward
Emergency DeliveryDuscaeReach Chapter 03, complete "Hunters and Gardeners"1,000 EXP, Cleigne Wheat x5, Killer Tomato x5, Saxham Rice x5

Lestallum's Finest

NameLocationUnlockReward
Lestallum's FinestDuscaeComplete "Everyone Loves Beans"2,000 EXP, Griffon Breast x2, Saxham Rice x5, Schier Turmeric x5

A Meat Most Magnificent

NameLocationUnlockReward
A Meat Most MagnificentDuscaeComplete "Lestallum's Finest"3,000 EXP, Allural Shallot x5, Kettier Ginger x5, Sizzling Humongo-Steak

Scenic Delivery

NameLocationUnlockReward
Scenic DeliveryLeideComplete "The Power of Kings" in Chapter 02300 EXP, Gighee Ham x2, Leiden Potato x2, Sheep Milk x2, Funguar x2

Dino

Dino Ghiranze is found in Galdin Quay. His quests require the player to obtain a jewel, often surrounded by monsters or in a dangerous location, and reward the player with useful accessories.

Reliable Royalty

NameLocationUnlockReward
Reliable RoyaltyCleigneComplete "A Stone-Studded Stunner"1,500 EXP, Sapphire Bracelet x1

The Aspiring Artisan

NameLocationUnlockReward
The Aspiring ArtisanDuscaeReach Chapter 02500 EXP, Amethyst Bracelet x1

A Stone-Studded Stunner

NameLocationUnlockReward
A Stone-Studded StunnerDuscaeComplete "The Aspiring Artisan"1,000 EXP, Heliodor Bracelet x1

No Pain, No Gem

NameLocationUnlockReward
No Pain, No GemCleigneComplete "Reliable Royalty"2,000 EXP, Ruby Bracelet x1

A Treasure Beyond Measure

NameLocationUnlockReward
A Treasure Beyond MeasureDuscaeComplete "No Pain, No Gem"3,000 EXP, Emerald Bracelet x1

Cindy

Cindy is found in Hammerhead. She offers quests to ask the player to retrieve a specific car part, often located within a dangerous location, to upgrade the Regalia.

The Ever Gleaming Regalia

NameLocationUnlockReward
The Ever Gleaming RegaliaDuscaeComplete "The Ever Elegant Regalia"600 EXP, Fiberglass Coating component

The Ever Valorous Regalia

NameLocationUnlockReward
The Ever Valorous RegaliaCleigneComplete "The Ever Gleaming Regalia"1,000 EXP, Supercharger component

Into Unknown Frontiers

NameLocationUnlockReward
Into Unknown FrontiersFormouth GarrisonComplete "The Ever Illustrious Regalia" and "Formouth Garrison" and reach Chapter 15Regalia Type-F

The Ever Illustrious Regalia

NameLocationUnlockReward
The Ever Illustrious RegaliaCrestholm ChannelsComplete "The Ever Valorous Regalia"3,000 EXP, Enhanced Headlights components

The Ever Regal Regalia

NameLocationUnlockReward
The Ever Regal RegaliaLeideReach Chapter 02 and complete "The Power of Kings"150 EXP, Aero Wax component

The Ever Elegant Regalia

NameLocationUnlockReward
The Ever Elegant RegaliaBalouve MinesComplete "The Ever Regal Regalia"500 EXP, Hammerhead decal, Racing Stripes I decal, Basic Color Samples

Sania

Sania is located in Coernix Station - Alstor. Her quests require the player to collect passive fauna or other biological samples, and reward the player with useful accessories.

The Professor's Protégé

NameLocationUnlockReward
The Professor's ProtégéDuscaeReach Chapter 033,000 EXP, Star Pendant x1

The Professor's Protégé - Gigantoad

NameLocationUnlockReward
The Professor's Protégé - GigantoadCleigneComplete "The Professor's Protégé" - Yellow Frogs4,000 EXP, Rainbow Pendant x1

The Professor's Protégé - Yellow Frogs

NameLocationUnlockReward
The Professor's Protégé - Yellow FrogsDuscaeComplete "The Professor's Protégé"4,000 EXP, Rainbow Pendant x1

The Professor's Protégé - Wyvern

NameLocationUnlockReward
The Professor's Protégé - WyvernRock of RavatoghComplete "The Professor's Protégé" - Gigantoad8,000 EXP, Earth Pendant x1

The Professor's Protégé - Myrlwood Firefly

NameLocationUnlockReward
The Professor's Protégé - Myrlwood FireflyCleigneComplete "The Professor's Protégé" - Wyvern10,000 EXP, Golden Hourglass x1

The Professor's Protégé - Griffon

NameLocationUnlockReward
The Professor's Protégé - GriffonDuscaeComplete "The Professor's Protégé" - Myrlwood Firefly12,000 EXP, Safety Bit x1

The Frogs of Legend

NameLocationUnlockReward
The Frogs of LegendMeldacio Hunter HQComplete "The Professor's Protégé" - Griffon15,000 EXP, Ribbon x1

Navyth

Navyth moves to various water sides depending on the last mission completed. His missions are fishing missions, that reward the player with EXP and fishing items. The fish he requests for can be caught from the fishing spot at which the quest is given, but the player can also catch the fish elsewhere if they wish. If the player has already caught the requested fish, it can be presented to Navyth to complete the quest immediately after accepting it.

Fishing Buddies

NameLocationUnlockReward
Fishing BuddiesDuscae Alstor SloughReach Chapter 031,500 EXP, Knife T. Tonberry x1

The first fishing quest requires Noctis to catch a Crag Barramundi. Fishing buddies quest is located by the Alstor Slough, next to the marshy waters north from the Wiz Chocobo Post, south from the Coernix Station - Alstor, in Duscae.

The Crag Barramundi will appear as a yellow dot on the fish radar. The following lures are especially suitable: Sweet Jamming: Custard, Tidal Might Leviathan, Bomber: Ice Bomb, Ranker Tonberry.

For completing the quest the player will get 1,500 EXP, a Knife T. Tonberry lure. Catching the fish yields the Grilled Wild Barramundi recipe (+80 attack and magic, +500 health).

Fishing Naturally

NameLocationUnlockReward
Fishing, NaturallyCleigneComplete "Fishing Buddies"2,000 EXP, Butterfly Edge x1

Noctis must catch a Cherrycomb Trout. Navyth is located west from Lestallum; following the road to the west, the player will cross the river. Navyth will be fishing near in the vicinity of the Mynbrum Haven campground.

Cherrycomb Trout will appear as a yellow dot on the radar. Suitable lures include: Whiskers: Crystal, and Knife T. Tonberry.

For completing the quest the player will get 2,000 EXP and the Butterfly Edge (150 defense) rod.

Navyth's Challenge

NameLocationUnlockReward

Noctis must catch the rare fish Vesper Gar. Navyth is found at the Vesperpool, in the northwestern part of the map. Vesper Gar has a long, thin body, and is marked with a blue mark on the radar. After casting the line the player should pay attention to the fish below the surface and look for the Vesper Gar. Suitable lures include: Stinker: Malboro, Stinker: Malbodoom, and Ranker Tonberry.

For completing the quest the player will get 3,000 EXP and the Invincible Iron Giant lure that sinks when reeled in and floats when tension is released.

Angler's Nightmare

NameLocationUnlockReward
Angler's NightmareGaldin QuayComplete "Navyth's Challenge"5,000 EXP, Tranquility x1
Anglers-Nightmare-FFXV

The quest completed.

Navyth's last quest at Galdin Quay has Noctis catch the "Devil of the Cygillan" (Murk Grouper). Navyth is found on the beach. It is best to be at least level 7 in fishing. The fish won't be visible on the radar, but it can be found on the spot nearest to Navyth during daytime by casting the line to the middle of the fishing area, or a little to the right. If the player spots a giant fishing lurking under the surface, they have found it.

Suitable lures are the ones that sink, but an especially good fit is the Burrower: Abyss Worm. It will be a tough battle to reel in the fish, as it will struggle a lot (water is splashing and the controller vibrates). The player must not reel when the fish struggles, but there might only be short windows for reeling as the fish fights back most of the time. Tapping the reel button tends to work better than holding against fish that struggle a lot. Because the fish is so big, it wears down the line fast, and thus the player needs good technique and equipment to catch the fish.

Completing the quest yields 5000 EXP along with the Tranquility rod (290 defense).

Vyv

Vyv is located in Lestallum, and requests that the player take specific photos. These reward a high amount of gil and decent EXP.

The Cursed Canvas

NameLocationUnlockReward
The Cursed CanvasAltissiaComplete "The Pen is Mightier than the Sword", reach Chapter 095,000 EXP, 25,000 Gil

The Pen is Mighter Than the Sword

NameLocationUnlockReward
The Pen is Mighter Than the SwordDuscaeComplete "A Place to Call Home4,000 EXP, 20,000 Gil

A Place to Call Home

NameLocationUnlockReward
A Place to Call HomeLeideComplete "Vyv's Volcanic Inspiration"3,500 EXP, 17,500 Gil, Time photo filler

Of Gods and Kings

NameLocationUnlockReward
Of Gods and KingsDuscaeComplete "Aftermath of the Astral War"2,500 EXP, 12,500 Gil

The Perfect Landscape

NameLocationUnlockReward
The Perfect LandscapeDuscaeComplete "A Stroll for Two" in Chapter 031,000 EXP, 5,000 Gil

An Eye for Islands

NameLocationUnlockReward
An Eye for IslandsGaldin QuayComplete "The Perfect Landscape"1,500 EXP, 7,500 Gil

Aftermath of the Astral War

NameLocationUnlockReward
Aftermath of the Astral WarDuscaeComplete "An Eye for Islands"2,000 EXP, 10,000 Gil

Vyv's Volcanic Inspiration

NameLocationUnlockReward
Vyv's Volcanic InspirationRock of RavatoghComplete "Of Gods and Kings"3,000 EXP, 15,000 Gil

Lestallum Merchants

Several merchants in Lestallum offer quests to collect things or defeat enemies throughout the map. When quests are completed, they offer discounts at their shop.

On the Hunt for a Harvest

NameLocationUnlockReward
On the Hunt for a HarvestSaxham OutpostComplete "A Stroll for Two" main quest in Lestallum2,000 EXP, discount applied to all articles sold by Furloch

Mind the Trap

NameLocationUnlockReward
Mind the TrapDuscaeComplete "A Stroll for Two"1,500 EXP, discount applied to all articles sold by Veenon

Vegging Out

NameLocationUnlockReward
Vegging OutDuscaeComplete "Wild about Onions"3,000 EXP, discount applied to all articles sold by Furloch

Tails Spin

NameLocationUnlockReward
Tails SpinDuscaeComplete "Ace of Carapace"2,500 EXP

Sting Your Praises

NameLocationUnlockReward
Sting Your PraisesCleigneComplete "Tails Spin"4,500 EXP, discount applied to all articles sold by Arms Vendor

Wild about Onions

NameLocationUnlockReward
Wild about OnionsDuscaeComplete "On the Hunt for a Harvest"2,500 EXP

Van, Interrupted

NameLocationUnlockReward
Van, InterruptedDuscaeComplete "A Stroll for Two"2,000 EXP

Van, Interrupted Again

NameLocationUnlockReward
Van, Interrupted AgainDuscaeComplete "Van, Interrupted"2,500 EXP, discount applied to all articles sold by Prissock

Ace of Carapace

NameLocationUnlockReward
Ace of CarapaceDuscaeComplete "A Stroll for Two"1,500 EXP, discount applied to all articles sold by Arms Vendor

Holly

Holly is found in Lestallum. Her quests require the player to locate and fix parts of an environment, and offer decent EXP but substantial gil.

Holding Back the Dark

NameLocationUnlockReward
Holding Back the DarkDuscaeComplete "Power to the Pylons"4,000 EXP, 10,000 Gil

Steam Valve Inspection

NameLocationUnlockReward
Steam Valve InspectionLestallumReach Chapter 082,000 EXP, 2,500 Gil

Power to the Pylons

NameLocationUnlockReward
Power to the PylonsDuscaeComplete "Steam Valve Inspections"3,000 EXP, 5,000 Gil

Wiz

Wiz is located at the Wiz Chocobo Post, and offers various quests to locate chocobo materials. The reward is often EXP or chocobo items.

Chase That Chocobo!

NameLocationUnlockReward
Chase That Chocobo!LeideComplete "A Feathery Fest"2,000 EXP, Valfruit Seeds x1, O'Ghomoro Berry Seeds x1, Cieldalaes Pineapple Seeds x1, Han Lemon Seeds x1

Bird on the Brink

NameLocationUnlockReward
Bird on the BrinkDuscaeComplete "Where the Wild Chocobos Are"1,000 EXP

A Feathery Feast

NameLocationUnlockReward
A Feathery FeastDuscaeComplete "Bird on the Brink"1,500 EXP, Fat Chocobo Triple-Decker

Where the Wild Chocobos Are

NameLocationUnlockReward
Where the Wild Chocobos AreDuscaeComplete "A Behemoth Undertaking"500 EXP, Xelphatol Apple Seeds x1, Doman Plum Pits x1, Mamook Pear Seeds x1

Savior of the Species

NameLocationUnlockReward
Savior of the SpeciesCleigneComplete "Chase That Chocobo!" and reach Chapter 072,500 EXP

Dungeons

Dungeon sidequests are triggered upon locating and entering them. These are the dungeons that are not entered during the main quest, and reward substantial EXP. Many also contain a Royal Arm.

The Rock of Ravatogh

NameLocationUnlockReward
The Rock of RavatoghCleigneEnter Rock of Ravatogh4,000 EXP, Mace of the Fierce

Formouth Garrison

NameLocationUnlockReward
Formouth GarrisonLeideEnter Formouth Garrison10,000 EXP

Balouve Mines

NameLocationUnlockReward
Balouve MinesLeideEnter Balouve Mines10,500 EXP, Bow of the Clever

Daurell Caverns

NameLocationUnlockReward
Daurell CavernsDuscaeEnter Daurell Caverns4,000 EXP

Crestholm Channels

NameLocationUnlockReward
Crestholm ChannelsLeideEnter Crestholm Channels10,000 EXP

Malmalam Thicket

NameLocationUnlockReward
Malmalam ThicketCleigneEnter Malmalam Thicket3,000 EXP, Scepter of the Pious

The Myrlwood

NameLocationUnlockReward
The MyrlwoodCleigneEnter Myrlwood3,000 EXP, Star of the Rogue

Costlemark Tower

NameLocationUnlockReward
Costlemark TowerDuscaeEnter Costlemark Tower15,000 EXP, Sword of the Tall

Menaces

Once chapter 15 is reached and four optional dungeons Balouve Mines, Crestholm Channels, Daurell Caverns and Costlemark Tower are completed, these sidequests can be commenced by speaking to Ezma at the Meldacio Hunter HQ. She will grant Noctis the key to breaking many seals found within dungeons which lead to rooms underground filled with powerful monsters and a large boss at the end. While they do not offer EXP on their own, the dungeon's rooms itself often contain many useful items, accessories and weapons (among the strongest in the game), while the enemies yield substantial EXP rewards.

Each dungeon features several sections with random rewards and enemies. There are times in which camps are available, and times in which the paths branch out three possible directions, of which only one is correct and will progress the party further into the dungeon.

Menace Beneath Lucis

NameLocationUnlockReward
Menace Beneath LucisCleigneComplete storyline dungeons, Balouve Mines, Crestholm Channels, Daurell Caverns and Costlemark Tower0 EXP, Hunter Medal

This quest requires all menaces to be defeated. Once defeated, the player should return to Ezma.

A Menace Sleeps in the Grotto

NameLocationUnlockReward
A Menace Sleeps in the GrottoGreyshire Glacial GrottoCommence "Menace Beneath Lucis"0 EXP

This menace is located beneath the Glacial Grotto. The enemies that can be fought here are Yojimbo, Cryonade, Skeleton, Elder Coeurl and Royalisk. The final boss is the Kengo.

There are two camps. After the first camp, paths branch out twice; the first time the player must take the path leading right, the second time they must take the middle path. After the second camp, the next time there are branching paths, the player must take the left path.

Defeating the final boss will earn the player the Firearm Executioner.

The recommended level for this dungeon is 65.

A Menace Sleeps in Steyliff

NameLocationUnlockReward
A Menace Sleeps in SteyliffSteyliff GroveCommence "Menace Beneath Lucis"0 EXP

This menace is located beneath the Steyliff Grove. The final boss is the Mictlantecihuatl.

Defeating the final boss will earn the player the Polearm Flayer.

The recommended level for this dungeon is 86.

A Menace Sleeps in Costlemark

NameLocationUnlockReward
A Menace Sleeps in CostlemarkCostlemark TowerCommence "Menace Beneath Lucis"0 EXP

This menace is located beneath the Costlemark Tower. The final boss is the Bilröst.

Defeating the final boss will earn the player the Accessory Dark Matter Bracelet.

The recommended level for this dungeon is 99.

A Menace Sleeps in Fociaugh

NameLocationUnlockReward
A Menace Sleeps in FociaughFociaugh HollowCommence "Menace Beneath Lucis"0 EXP

This menace is located beneath the Fociaugh Hollows. The final boss is the Chandravarma.

Defeating the final boss will earn the player the Sword Enhancer.

The recommended level for this dungeon is 65.

A Menace Sleeps in Balouve

NameLocationUnlockReward
A Menace Sleeps in BalouveBalouve MinesCommence "Menace Beneath Lucis"0 EXP

This menace is located beneath the Fociaugh Hollows. The final boss is the Psychomancer.

Defeating the final boss will earn the player the Firearm Death Penalty.

The recommended level for this dungeon is 78.

A Menace Sleeps in Keycatrich

NameLocationUnlockReward
A Menace Sleeps in KeycatrichKeycatrich TrenchCommence "Menace Beneath Lucis"0 EXP

This menace is located beneath the Keycatrich Trench. The final boss is the Lakhmu Flan.

Defeating the final boss will earn the player the Firearm Hyper Magnum.

The recommended level for this dungeon is 55.

A Menace Sleeps in Crestholm

NameLocationUnlockReward
A Menace Sleeps in CrestholmCrestholm ChannelsCommence "Menace Beneath Lucis"0 EXP

This menace is located beneath the Crestholm Channels. The final boss is the Manxom.

Defeating the final boss will earn the player the Accessory Gigas Bangle.

The recommended level for this dungeon is 92.

A Menace Sleeps in Daurell Caverns

NameLocationUnlockReward
A Menace Sleeps in Daurell CavernsDaurell CavernsCommence "Menace Beneath Lucis"0 EXP

This menace is located beneath the Daurell Caverns. The final boss is the Mahanaga.

Defeating the final boss will earn the player the Polearm Precision Lance.

The recommended level for this dungeon is 72.

Randolph

Upon reaching chapter 15, Randolph can be found in Lestallum. He tasks the player with defeating a powerful monster, after which he will grant some of the most powerful weapons.

A Legend Is Born

NameLocationUnlockReward
A Legend Is BornLeideReach Chapter 158,500 EXP, Iron Duke

This quest requires the player to defeat the Bennu. It is weak to Polearms, Machinery and Lightning, meaning that Noctis should equip the best Polearm to fight it, infused with Lightning from Ignis' Enhancement, and fought with aerial combos. After completing it, the player will earn the Iron Duke.

The recommended level for this quest is 55.

Dreadful Legend

NameLocationUnlockReward
Dreadful LegendVesperpoolComplete "A Legend Is Born"10,000 EXP, Dragon Lance

This quest requires the player to defeat a Malbodoom, which is surrounded by Malboro Brat minions. It is weak to Daggers and Ice, meaning Noctis should equip his best Daggers infused with Ice by Ignis. The best opportunity to deal damage is during Malbodoom's Bad Breath by attacking it from behind. The Malboro Brat minions mostly serve as a distraction and should be avoided if possible.

The recommended level for this quest is 65.

Legend Wrapped in an Enigma

NameLocationUnlockReward
Legend Wrapped in an EnigmaDuscaeComplete "Dreadful Legend"12,000 EXP, Ziedrich

This quest requires the player to defeat two Sir Tonberries at night time outside the Tomb of the Tall. They are weak to Daggers and Light, meaning Noctis should equip his best Daggers, with the Light-infused Orichalcum being a solid choice. Due to the rapid speed of the Sir Tonberries, the player should defend consistently and focus on parrying them to deal damage. When only one Tonberry remains, the player may choose to fight more offensively.

The recommended level for this quest is 75.

Cursed Legend

NameLocationUnlockReward
Cursed LegendDuscaeComplete "Legend Wrapped in an Enigma"15,000 EXP, Soul Saber

This quest requires the player to defeat a large Phalaris. It is weak to Greatswords, meaning Noctis should equip his best Greatsword and Gladio should use Techniques against it often. It is not possible to defend against Phalaris' hoof stomps, meaning Noctis should roll constantly to try and avoid it and attack its hind legs. Using Prompto's Piercer Technique is effective as it can reduce its armor.

The recommended level for this quest is 85.

Wondrous Weapon

NameLocationUnlockReward
Wondrous WeaponFort VaullereyComplete "Cursed Legend"20,000 EXP, Zwill Crossblades

The final Legend, the Naglfar is fought at Fort Vaullerey, which resists all weapon types but is weak to all elements. This means that the player should focus on creating the best Elemancy spells to use against it. By creating spells with Zu Beak items, the player can create multiple spells which break the damage limit. If Noctis equips the right weaponry and eats the right meal that boosts his Magic, using these spells against the Naglfar can deal 99,999 damage, meaning ten spells should be used.

The recommended level for this quest is 99.

Multiple

Let Sleeping Mountains Lie

NameLocationUnlockReward
Let Sleeping Mountains LieLeideReturn to Lucis via Umbra/royal vessel in Chapter 9 or laterUnlocks Lonely Rumblings in Longwythe Hunt

Let Sleeping Mountains Lie is the mandatory quest to unlock the fight with Adamantoise, the biggest enemy. If the player returns to Lucis via Umbra, this quest will be automatically added when Cindy calls Noctis about strange earthquakes. Upon being talked to in Hammerhead, she will redirect the party toward Dave in Longwythe Rest Area.

When approached, the player will be teleported in the local Crow's Nest restaurant, where a number of characters will be waiting, having rallied the place after hearing about the quakes. Each will give the player an item to help during the fight to come. Up to 14 characters can be present, but only those the player encountered will appear. A prompt will indicate the player how many characters are present out of the 14 possible. There are no special reward for assembling all 14, apart from collecting more items.

These characters are:

Scraps of Mystery

The party finds treasures maps they must piece together.

Advertisement