
I couldn't finish 'em. Looks like this's gonna get complicated.

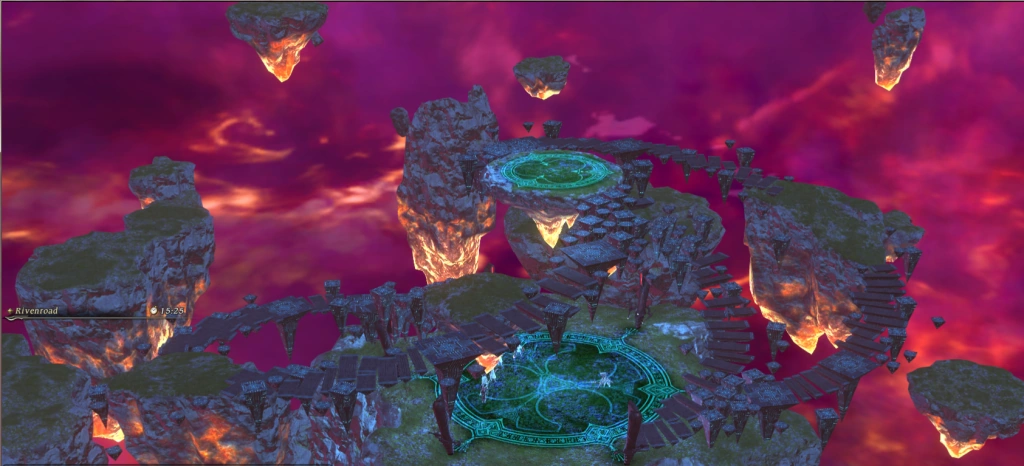
The Rivenroad.
Rivenroad was a trial in the original release of Final Fantasy XIV, introduced in patch 1.23a. The battle takes place in a small group of floating islands from Coerthas Eastern Highlands, and saw players fight Nael van Darnus as the final boss of the Seventh Umbral Era storyline. The fight was balanced towards level 50 characters. After completing the story, players could unlock its hard version: Rivenroad (Hard), which was called "the "most punishing battle available in Final Fantasy XIV" by the development team at the time[1].
Rivenroad is the only trial from the original release to not return in A Realm Reborn, though it received a spiritual successor in ![]() The Second Coil of Bahamut - Turn 4, which features a rematch against a transformed Nael deus Darnus on a holographic Rivenroad.
The Second Coil of Bahamut - Turn 4, which features a rematch against a transformed Nael deus Darnus on a holographic Rivenroad.
Progression[]
Normal[]
Phase 1[]
This fight is relatively simple compared to the primal battles, but Nael is not to be underestimated. As time is a big factor, players will need to work as efficiently as possible. He will start the fight using only melee attacks, so the party should use this period to position themselves; a good tanking position is below one of the two platforms floating above the arena, while ranged attackers stay just a bit to the left of their initial position, to avoid Nael's Iron Chariot and Thermionic Beam moves.
After Nael's HP reaches 75%, he will say "Enough of this mummer's farce!", and the proper fight will begin, and he starts using abilities. Ravensbeak is a powerful single target skill that hits for around 2000 damage. Twisting Vice and Chaos Thrust work similarly to their lancer counterparts, including the TP drain effect of Twisting Vice, which can be dangerous. Iron Chariot is an AoE move centered on Nael. If the party is well positioned, all those moves should only hit the tank and melee fighters.
Every once in a while, Nael will teleport to one corner of the arena, target the tank and use his powerful Thermionic Beam move. It hits a straight line and also creates pillars of light horizontally in front of him, and can hit twice if a player is caught between these two beams, which is likely fatal. Melee fighters should run to where the ranged fighters are positioned to avoid being damaged.
Once again, if properly positioned, only the tank should be hit (it is possible for the tank to avoid it by running towards the ranged group, but this is not advised as he will then need to reposition himself and Nael once again, and the damage can be easily healed).
After this point, the fight is pretty straightforward. Burn down Nael as fast as possible until he reaches 30-40% HP, as he will shoot a beam of light towards the sky and the following message will appear on the chat log: "Lunar Debris is caught by the elemental field above Rivenroad!". A Black Mages (two, if necessary) should go up the stairs in preparation for this and defeat the lunar fragments falling down to the arena. They are very slow, have very low life and should be destroyed by a single Thunder -> Thundara combo. The elevation restriction may make this challenging, as spells cannot be cast on targets too far above or below. However, both meteors can be reached from either side on the first platform above the arena.
If any lunar fragments get close to the ground, any available ranged attackers can attempt to finish it off from the ground level. Even one fragment will put the entire party in critical health if it lands. After both fragments are defeated, the black mages should return to the ground and help defeating Nael.
Two important notes about the fight: The 30 minute time limit does count time spent watching cutscenes. As there's a second fight right after this one, it is recommended that players do a first run watching the cutscenes before and after the fight and then always skip on following attempts (or just watch them inside the inn room), as they take roughly 7 minutes. Many parties who skip the cutscenes will finish the fight with far less time available.
Another important aspect to beware is about Nael's teleporting. If a player is on the stairs (not the platform above them, but on the proper stairs) while Nael is teleporting, he will not do his usual Thermionic Beam but instead teleport to the player and use the Fierce Ravensbeak move, which deals 9999 damage. If he ever uses it, he will include it on his regular moveset and use it other times during the battle, making it far harder and possibly killing several players.
Phase 2[]
The fight is very similar to the previous phase and the basic strategy and positioning is largely the same. It is possible (and recommended) to fully regenerate HP / MP and rebuff all party members before engaging Nael, unless this has been done before finishing off the first phase.
For this second phase of the final battle, Nael loses her Lancer weaponskills, but all her attacks are stronger and she gains the "Lunar Dynamo" move. Every other ability works the same way as the previous battle.
Lunar Dynamo is a powerful "doughnut" shaped AoE move that drains HP and MP from those hit by it, healing Nael for the damage done. To avoid it, players must be close to the boss when it is used; positioning in the same way as the previous fight, it is possible to avoid both Iron Chariot and Lunar Dynamo.
However, Nael also uses Lunar Dynamo after teleporting; as she will likely reposition herself after a teleport, the party may need to move closer to her to avoid being hit. After she takes some damage, she will start saying things like "Ahhhh..", "Yeeess..." and "Just so...."; these are hints warning that she will not use Lunar Dynamo, but a combo of Iron Chariot instead. This is particularly dangerous, as players can be hit by two Iron Chariots and knocked back to the range of Lunar Dynamo, a combo that is extremely likely to kill all players caught in it and heal the boss.
This time, Nael will utter "I shall not suffer life" and "I shall not suffer death" as calls down Lunar Fragments considerably earlier and will not stop after two. As such, it is recommended to place a Black Mage atop one of the first flying platforms and have them exclusively on "meteor duty", disposing of any fragments summoned during the fight. "I shall not suffer life" indicates she is calling a fragment on the north side, and "I shall not suffer death" indicates she is calling one on the south side.
One moderately-geared Black Mage should be able to destroy a fragment with a Thundara combo.The elevation restriction becomes a major factor here, as spells cannot be cast on targets to far above or below the caster. If a meteor comes close to the ground, any available ranged unit should immediately finish it off.
After she starts summoning lunar fragments, there's no change on her behavior until Nael's HP drops to 5%. Once this happens, she will say "Oblivion.... Well do I know thee..." and teleport to the highest platform, where she will activate magic glyphs, summon two Lunar Golems and start charging her strongest move, Megaflare. During this stage, her defense is greatly increased.
Lunar fragments will start falling much quicker than normal and also gain a sizable boost to HP and defense. It is impossible to deal with them with only one Black Mage, parties should position at least one mage on each platform, as well as a Bard or White Mage to ensure the fragments are destroyed. The Lunar Golems can be defeated pretty easily by melee attacks, and can also be put to Sleep.
The tank, one White Mage, and any melee available should go up to where Nael is preparing Megaflare and attack her to reduce a bit her regeneration. Nael will not initiate Megaflare unless she is attacked while charging it. Parties have experienced seemingly endless Meteors for not doing so, and counteracting her regeneration will make the final part end much sooner.
After being hit for a while, Nael will cast Megaflare, which is powered up by how many lunar fragments hit the ground during the battle. If 3 make impact with the ground, Nael will immediately use Megaflare in this stage and deal 9999 damage to everyone, ending the fight.
As soon as Nael speaks again in preparation for Megaflare, the tank needs to run downstairs as fast as possible to avoid getting hit by Nael while she is empowered by the stairs. Everyone but the Black Mages should go back to the ground level and a White Mage should cast Benediction to fully recover from the damage. After this, it's as simple as repositioning the boss and finish the remaining life while the mages destroy any possible fragment that gets summoned.
Hard[]
Nael immediately begins charging Megaflare, which now deals around 7000 damage even without any lunar fragments touching the ground. The fragments themselves now fall faster, and become Lunar Golems upon touching the ground (after dealing the explosion damage).
To even have a shot at surviving Megaflare, players need to stack up as many defensive buffs as possible on high HP jobs such as Paladin, then proceed to raise the other party members. Another viable option is to play as a pure class instead of using Job crystals, to gain access to Sentinel. Thaumaturges, in particular, may be able to survive with Sentinel + Protect + Stoneskin + Sanguine Rite + Battle Voice. The use of max HP increasing food and items can also help.
After Megaflare, Nael will switch to her regular pattern. During this period, any Lunar Fragments destroyed may yield Deaspected Clusters. These clusters can then be used to craft Lunar Curtains, a consumable item that gives Sentinel's effect and also stacks with the ability, helping the other jobs survive the initial Megaflare.
Once her HP hits 60%, Nael will say, "Hope and despair. Joy and sorrow... Such things are meaningless". This signals the start of a lunar fragment spam phase, in which she will keep summoning fast moving fragments until her HP falls down to roughly 40%. Two ranged attackers are needed to deal with them.
After taking some more damage, Nael will teleport to the top of the arena and start casting Megaflare once again. This time, eight Lunar Golems will spawn. It is advised to ignore or leash them, and focus all DD on Nael to force Megaflare (which deals the same damage as the regular fight one, instead of 7000+ like the first used in the fight), as the golems and fragments can easily wipe the party at this point.
Once Megaflare goes off, Nael will fully recover HP, golems will disappear and she will teleport back again, returning to her usual attack patterns. Every once in a while, she will teleport to the top, summon a golem and charge Dalamud Dive. These golems cannot be ignored and need to be killed quickly, since the Legatus will summon more golems every time she uses Dalamud Dive. Dalamud Dive damage can be reduced or even negated by damaging Nael.
When her HP reaches 40%, she can initiate a special sequence of ten total Lunar Fragments (~667 HP), accompanied by Nael saying, "Come, lost child, and receive of me the gift of purity." This time, fragments can appear at a lower height and move at a fast speed, so all ranged attackers and white mages should focus on taking them down, positioning themselves not only on the top platform, but also on the middle of the stairs. Meanwhile, the melee DPS will need to continue chasing Nael up to prevent Dalamud Dive whenever she uses it.
After this phase, she goes back to her usual pattern once again. The party only needs to keep up with the damage and be careful with the occasional fast falling fragment.
Completing this hard version of the fight rewarded the players with the White Ravens earrings.
Music[]
The theme played during the first phase is called "Tempest," one of the original pieces composed by Nobuo Uematsu. It is a rock-and-roll variation of Nael's character theme that features heavy use of guitars, a female voice singing small bits of "Answers" and a howling similar to that present in the intro to the Final Fantasy IX final boss theme.
The song played during the second phase of the fight is "Rise of the White Raven", composed by Masayoshi Soken. It features a duet singing in Latin.
Gallery[]
")
")
")
")
")
")
Trivia[]
- Dalamud is several times larger in the background of this fight.
- Though the lunar fragments appear as fast as cannonballs in other scenes, they are much slower in this battle.
- In spite of the obvious complexity, the arena of Rivenroad has point symmetry, meaning it is the same if rotated 180 degrees.
- Nael undergoes a subtle mood change in this fight: her lines in the first phase are all shouted, indicated by the exclamation points, while her dialogue in the second phase are all spoken calmly. Even her lines for calling lunar fragments change from "Begone wretched creatures!" and "Embrace oblivion!" to "I shall not suffer life/death". This change reflects the intoxicating power she receives from Dalamud.
- If a player disconnects and the party fails, the player may re-enter the game in an empty arena. It is interesting to note that the glyphs and the stairs will all be completely gone, as they are added components to the map specifically for the fight.