m (→Treasures) |
BlueHighwind (talk | contribs) |
||
| Line 30: | Line 30: | ||
This treasure is good for farming because it spawns 80% of the time, and has only 15% chance to contain [[gil]]. A treasure in the middle of the northern area of the Slumbermead may have the [[List of Final Fantasy XII Accessories#Nishijin Belt|Nishijin Belt]]. The treasure on the little "island" in the middle of the Lifeless Strand area can have the [[List of Final Fantasy XII Accessories#Gillie Boots|Gillie Boots]]. |
This treasure is good for farming because it spawns 80% of the time, and has only 15% chance to contain [[gil]]. A treasure in the middle of the northern area of the Slumbermead may have the [[List of Final Fantasy XII Accessories#Nishijin Belt|Nishijin Belt]]. The treasure on the little "island" in the middle of the Lifeless Strand area can have the [[List of Final Fantasy XII Accessories#Gillie Boots|Gillie Boots]]. |
||
| + | |||
| + | ====Greencrag==== |
||
| + | {|class="full-width FFXII table" style="text-align:center" |
||
| + | |-class="a" |
||
| + | !style="width:20%"|Chest |
||
| + | !style="width:10%"|Spawns |
||
| + | !style="width:10%"|Holds Gil% |
||
| + | !style="width:30%" colspan="3"|Normal Treasure |
||
| + | !style="width:30%" colspan="3"|Diamond Armlet Treasure |
||
| + | |- |
||
| + | |class="b" rowspan="2"|1 |
||
| + | |rowspan="2"|80% |
||
| + | |rowspan="2"|15% |
||
| + | |class="a" width="10%"|Gil |
||
| + | |class="a" width="20%" colspan="2"|Item |
||
| + | |class="a" width="10%"|Gil |
||
| + | |class="a" width="10%"|Common |
||
| + | |class="a" width="10%"|Rare |
||
| + | |- |
||
| + | |≤ 1,000 gil |
||
| + | |colspan="2"|Red Fang |
||
| + | |≤ 3,000 gil |
||
| + | |Knot of Rust |
||
| + | |X-Potion |
||
| + | |- |
||
| + | |class="b" rowspan="2"|2 |
||
| + | |rowspan="2"|80% |
||
| + | |rowspan="2"|15% |
||
| + | |class="a" width="10%"|Gil |
||
| + | |class="a" width="20%" colspan="2"|Item |
||
| + | |class="a" width="10%"|Gil |
||
| + | |class="a" width="10%"|Common |
||
| + | |class="a" width="10%"|Rare |
||
| + | |- |
||
| + | |≤ 1,000 gil |
||
| + | |colspan="2"|Blue Fang |
||
| + | |≤ 3,000 gil |
||
| + | |Knot of Rust |
||
| + | |X-Potion |
||
| + | |} |
||
| + | |||
| + | ====Vale of Lingering Sorrow==== |
||
| + | {|class="full-width FFXII table" style="text-align:center" |
||
| + | |-class="a" |
||
| + | !style="width:20%"|Chest |
||
| + | !style="width:10%"|Spawns |
||
| + | !style="width:10%"|Holds Gil% |
||
| + | !style="width:30%" colspan="3"|Normal Treasure |
||
| + | !style="width:30%" colspan="3"|Diamond Armlet Treasure |
||
| + | |- |
||
| + | |class="b" rowspan="2"|3 |
||
| + | |rowspan="2"|80% |
||
| + | |rowspan="2"|70% |
||
| + | |class="a" width="10%"|Gil |
||
| + | |class="a" width="10%"|Item 1 |
||
| + | |class="a" width="10%"|Item 2 |
||
| + | |class="a" width="10%"|Gil |
||
| + | |class="a" width="10%"|Common |
||
| + | |class="a" width="10%"|Rare |
||
| + | |- |
||
| + | |≤ 1,000 gil |
||
| + | |Red Fang |
||
| + | |[[List of Final Fantasy XII Accessories#Golden Amulet|Golden Amulet]] |
||
| + | |≤ 3,000 gil |
||
| + | |Knot of Rust |
||
| + | |X-Potion |
||
| + | |- |
||
| + | |class="b" rowspan="2"|4 |
||
| + | |rowspan="2"|80% |
||
| + | |rowspan="2"|15% |
||
| + | |class="a" width="10%"|Gil |
||
| + | |class="a" width="20%" colspan="2"|Item |
||
| + | |class="a" width="10%"|Gil |
||
| + | |class="a" width="10%"|Common |
||
| + | |class="a" width="10%"|Rare |
||
| + | |- |
||
| + | |≤ 1,000 gil |
||
| + | |colspan="2"|Blue Fang |
||
| + | |≤ 3,000 gil |
||
| + | |Knot of Rust |
||
| + | |X-Potion |
||
| + | |} |
||
| + | |||
| + | ====Echoes of the Past==== |
||
| + | {|class="full-width FFXII table" style="text-align:center" |
||
| + | |-class="a" |
||
| + | !style="width:20%"|Chest |
||
| + | !style="width:10%"|Spawns |
||
| + | !style="width:10%"|Holds Gil% |
||
| + | !style="width:30%" colspan="3"|Normal Treasure |
||
| + | !style="width:30%" colspan="3"|Diamond Armlet Treasure |
||
| + | |- |
||
| + | |class="b" rowspan="2"|5 |
||
| + | |rowspan="2"|80% |
||
| + | |rowspan="2"|15% |
||
| + | |class="a" width="10%"|Gil |
||
| + | |class="a" width="20%" colspan="2"|Item |
||
| + | |class="a" width="10%"|Gil |
||
| + | |class="a" width="10%"|Common |
||
| + | |class="a" width="10%"|Rare |
||
| + | |- |
||
| + | |≤ 1,000 gil |
||
| + | |colspan="2"|Blue Fang |
||
| + | |≤ 3,000 gil |
||
| + | |Knot of Rust |
||
| + | |X-Potion |
||
| + | |- |
||
| + | |class="b" rowspan="2"|6 |
||
| + | |rowspan="2"|80% |
||
| + | |rowspan="2"|15% |
||
| + | |class="a" width="10%"|Gil |
||
| + | |class="a" width="20%" colspan="2"|Item |
||
| + | |class="a" width="10%"|Gil |
||
| + | |class="a" width="10%"|Common |
||
| + | |class="a" width="10%"|Rare |
||
| + | |- |
||
| + | |≤ 1,000 gil |
||
| + | |colspan="2"|Blue Fang |
||
| + | |≤ 3,000 gil |
||
| + | |Knot of Rust |
||
| + | |X-Potion |
||
| + | |- |
||
| + | |class="b" rowspan="2"|7 |
||
| + | |rowspan="2"|80% |
||
| + | |rowspan="2"|15% |
||
| + | |class="a" width="10%"|Gil |
||
| + | |class="a" width="10%"|Item 1 |
||
| + | |class="a" width="10%"|Item 2 |
||
| + | |class="a" width="10%"|Gil |
||
| + | |class="a" width="10%"|Common |
||
| + | |class="a" width="10%"|Rare |
||
| + | |- |
||
| + | |≤ 1,000 gil |
||
| + | |Red Fang |
||
| + | |Elixir |
||
| + | |≤ 3,000 gil |
||
| + | |Knot of Rust |
||
| + | |X-Potion |
||
| + | |- |
||
| + | |class="b" rowspan="2"|8 |
||
| + | |rowspan="2"|80% |
||
| + | |rowspan="2"|15% |
||
| + | |class="a" width="10%"|Gil |
||
| + | |class="a" width="20%" colspan="2"|Item |
||
| + | |class="a" width="10%"|Gil |
||
| + | |class="a" width="10%"|Common |
||
| + | |class="a" width="10%"|Rare |
||
| + | |- |
||
| + | |≤ 1,000 gil |
||
| + | |colspan="2"|White Fang |
||
| + | |≤ 3,000 gil |
||
| + | |Knot of Rust |
||
| + | |X-Potion |
||
| + | |} |
||
| + | |||
| + | ====The Slumbermead==== |
||
| + | {|class="full-width FFXII table" style="text-align:center" |
||
| + | |-class="a" |
||
| + | !style="width:20%"|Chest |
||
| + | !style="width:10%"|Spawns |
||
| + | !style="width:10%"|Holds Gil% |
||
| + | !style="width:30%" colspan="3"|Normal Treasure |
||
| + | !style="width:30%" colspan="3"|Diamond Armlet Treasure |
||
| + | |- |
||
| + | |class="b" rowspan="2"|9 |
||
| + | |rowspan="2"|80% |
||
| + | |rowspan="2"|15% |
||
| + | |class="a" width="10%"|Gil |
||
| + | |class="a" width="20%" colspan="2"|Item |
||
| + | |class="a" width="10%"|Gil |
||
| + | |class="a" width="10%"|Common |
||
| + | |class="a" width="10%"|Rare |
||
| + | |- |
||
| + | |≤ 1,000 gil |
||
| + | |colspan="2"|Blue Fang |
||
| + | |≤ 3,000 gil |
||
| + | |Knot of Rust |
||
| + | |X-Potion |
||
| + | |- |
||
| + | |class="b" rowspan="2"|10 |
||
| + | |rowspan="2"|80% |
||
| + | |rowspan="2"|15% |
||
| + | |class="a" width="10%"|Gil |
||
| + | |class="a" width="20%" colspan="2"|Item |
||
| + | |class="a" width="10%"|Gil |
||
| + | |class="a" width="10%"|Common |
||
| + | |class="a" width="10%"|Rare |
||
| + | |- |
||
| + | |≤ 1,000 gil |
||
| + | |colspan="2"|White Fang |
||
| + | |≤ 3,000 gil |
||
| + | |Knot of Rust |
||
| + | |X-Potion |
||
| + | |- |
||
| + | |class="b" rowspan="2"|11 |
||
| + | |rowspan="2"|80% |
||
| + | |rowspan="2"|15% |
||
| + | |class="a" width="10%"|Gil |
||
| + | |class="a" width="20%" colspan="2"|Item |
||
| + | |class="a" width="10%"|Gil |
||
| + | |class="a" width="10%"|Common |
||
| + | |class="a" width="10%"|Rare |
||
| + | |- |
||
| + | |≤ 1,000 gil |
||
| + | |colspan="2"|Blue Fang |
||
| + | |≤ 3,000 gil |
||
| + | |Knot of Rust |
||
| + | |X-Potion |
||
| + | |- |
||
| + | |class="b" rowspan="2"|12 |
||
| + | |rowspan="2"|80% |
||
| + | |rowspan="2"|15% |
||
| + | |class="a" width="10%"|Gil |
||
| + | |class="a" width="20%" colspan="2"|Item |
||
| + | |class="a" width="10%"|Gil |
||
| + | |class="a" width="10%"|Common |
||
| + | |class="a" width="10%"|Rare |
||
| + | |- |
||
| + | |≤ 1,000 gil |
||
| + | |colspan="2"|Red Fang |
||
| + | |≤ 3,000 gil |
||
| + | |Knot of Rust |
||
| + | |X-Potion |
||
| + | |- |
||
| + | |class="b" rowspan="2"|13 |
||
| + | |rowspan="2"|80% |
||
| + | |rowspan="2"|15% |
||
| + | |class="a" width="10%"|Gil |
||
| + | |class="a" width="20%" colspan="2"|Item |
||
| + | |class="a" width="10%"|Gil |
||
| + | |class="a" width="10%"|Common |
||
| + | |class="a" width="10%"|Rare |
||
| + | |- |
||
| + | |≤ 1,000 gil |
||
| + | |colspan="2"|Blue Fang |
||
| + | |≤ 3,000 gil |
||
| + | |Knot of Rust |
||
| + | |X-Potion |
||
| + | |- |
||
| + | |class="b" rowspan="2"|14 |
||
| + | |rowspan="2"|75% |
||
| + | |rowspan="2"|45% |
||
| + | |class="a" width="10%"|Gil |
||
| + | |class="a" width="10%"|Item 1 |
||
| + | |class="a" width="10%"|Item 2 |
||
| + | |class="a" width="10%"|Gil |
||
| + | |class="a" width="10%"|Common |
||
| + | |class="a" width="10%"|Rare |
||
| + | |- |
||
| + | |≤ 1,000 gil |
||
| + | |Red Fang |
||
| + | |[[List of Final Fantasy XII Accessories#Nishijin Belt|Nishijin Belt]] |
||
| + | |≤ 3,000 gil |
||
| + | |Knot of Rust |
||
| + | |X-Potion |
||
| + | |- |
||
| + | |class="b" rowspan="2"|15 |
||
| + | |rowspan="2"|80% |
||
| + | |rowspan="2"|15% |
||
| + | |class="a" width="10%"|Gil |
||
| + | |class="a" width="10%"|Item 1 |
||
| + | |class="a" width="10%"|Item 2 |
||
| + | |class="a" width="10%"|Gil |
||
| + | |class="a" width="10%"|Common |
||
| + | |class="a" width="10%"|Rare |
||
| + | |- |
||
| + | |≤ 1,000 gil |
||
| + | |White Fang |
||
| + | |Red Fang |
||
| + | |≤ 3,000 gil |
||
| + | |Knot of Rust |
||
| + | |X-Potion |
||
| + | |} |
||
| + | |||
| + | ====The Fog Mutters==== |
||
| + | {|class="full-width FFXII table" style="text-align:center" |
||
| + | |-class="a" |
||
| + | !style="width:20%"|Chest |
||
| + | !style="width:10%"|Spawns |
||
| + | !style="width:10%"|Holds Gil% |
||
| + | !style="width:30%" colspan="3"|Normal Treasure |
||
| + | !style="width:30%" colspan="3"|Diamond Armlet Treasure |
||
| + | |- |
||
| + | |class="b" rowspan="2"|16 |
||
| + | |rowspan="2"|80% |
||
| + | |rowspan="2"|15% |
||
| + | |class="a" width="10%"|Gil |
||
| + | |class="a" width="20%" colspan="2"|Item |
||
| + | |class="a" width="10%"|Gil |
||
| + | |class="a" width="10%"|Common |
||
| + | |class="a" width="10%"|Rare |
||
| + | |- |
||
| + | |≤ 1,000 gil |
||
| + | |colspan="2"|Red Fang |
||
| + | |≤ 3,000 gil |
||
| + | |Knot of Rust |
||
| + | |X-Potion |
||
| + | |- |
||
| + | |class="b" rowspan="2"|17 |
||
| + | |rowspan="2"|80% |
||
| + | |rowspan="2"|15% |
||
| + | |class="a" width="10%"|Gil |
||
| + | |class="a" width="20%" colspan="2"|Item |
||
| + | |class="a" width="10%"|Gil |
||
| + | |class="a" width="10%"|Common |
||
| + | |class="a" width="10%"|Rare |
||
| + | |- |
||
| + | |≤ 1,000 gil |
||
| + | |colspan="2"|White Fang |
||
| + | |≤ 3,000 gil |
||
| + | |Knot of Rust |
||
| + | |X-Potion |
||
| + | |} |
||
| + | |||
| + | ====Lifeless Strand==== |
||
| + | {|class="full-width FFXII table" style="text-align:center" |
||
| + | |-class="a" |
||
| + | !style="width:20%"|Chest |
||
| + | !style="width:10%"|Spawns |
||
| + | !style="width:10%"|Holds Gil% |
||
| + | !style="width:30%" colspan="3"|Normal Treasure |
||
| + | !style="width:30%" colspan="3"|Diamond Armlet Treasure |
||
| + | |- |
||
| + | |class="b" rowspan="2"|18 |
||
| + | |rowspan="2"|80% |
||
| + | |rowspan="2"|15% |
||
| + | |class="a" width="10%"|Gil |
||
| + | |class="a" width="20%" colspan="2"|Item |
||
| + | |class="a" width="10%"|Gil |
||
| + | |class="a" width="10%"|Common |
||
| + | |class="a" width="10%"|Rare |
||
| + | |- |
||
| + | |≤ 1,000 gil |
||
| + | |colspan="2"|Red Fang |
||
| + | |≤ 3,000 gil |
||
| + | |Knot of Rust |
||
| + | |X-Potion |
||
| + | |- |
||
| + | |class="b" rowspan="2"|19 |
||
| + | |rowspan="2"|60% |
||
| + | |rowspan="2"|60% |
||
| + | |class="a" width="10%"|Gil |
||
| + | |class="a" width="10%"|Item 1 |
||
| + | |class="a" width="10%"|Item 2 |
||
| + | |class="a" width="10%"|Gil |
||
| + | |class="a" width="10%"|Common |
||
| + | |class="a" width="10%"|Rare |
||
| + | |- |
||
| + | |≤ 1,000 gil |
||
| + | |White Fang |
||
| + | |[[List of Final Fantasy XII Accessories#Gillie Boots|Gillie Boots]] |
||
| + | |≤ 3,000 gil |
||
| + | |Knot of Rust |
||
| + | |X-Potion |
||
| + | |- |
||
| + | |class="b" rowspan="2"|20 |
||
| + | |rowspan="2"|80% |
||
| + | |rowspan="2"|15% |
||
| + | |class="a" width="10%"|Gil |
||
| + | |class="a" width="20%" colspan="2"|Item |
||
| + | |class="a" width="10%"|Gil |
||
| + | |class="a" width="10%"|Common |
||
| + | |class="a" width="10%"|Rare |
||
| + | |- |
||
| + | |≤ 1,000 gil |
||
| + | |colspan="2"|White Fang |
||
| + | |≤ 3,000 gil |
||
| + | |Knot of Rust |
||
| + | |X-Potion |
||
| + | |- |
||
| + | |class="b" rowspan="2"|21 |
||
| + | |rowspan="2"|80% |
||
| + | |rowspan="2"|15% |
||
| + | |class="a" width="10%"|Gil |
||
| + | |class="a" width="20%" colspan="2"|Item |
||
| + | |class="a" width="10%"|Gil |
||
| + | |class="a" width="10%"|Common |
||
| + | |class="a" width="10%"|Rare |
||
| + | |- |
||
| + | |≤ 1,000 gil |
||
| + | |colspan="2"|Red Fang |
||
| + | |≤ 3,000 gil |
||
| + | |Knot of Rust |
||
| + | |X-Potion |
||
| + | |- |
||
| + | |class="b" rowspan="2"|22 |
||
| + | |rowspan="2"|80% |
||
| + | |rowspan="2"|15% |
||
| + | |class="a" width="10%"|Gil |
||
| + | |class="a" width="10%"|Item 1 |
||
| + | |class="a" width="10%"|Item 2 |
||
| + | |class="a" width="10%"|Gil |
||
| + | |class="a" width="10%"|Common |
||
| + | |class="a" width="10%"|Rare |
||
| + | |- |
||
| + | |≤ 1,000 gil |
||
| + | |White Fang |
||
| + | |Blue Fang |
||
| + | |≤ 3,000 gil |
||
| + | |Knot of Rust |
||
| + | |X-Potion |
||
| + | |- |
||
| + | |class="b" rowspan="2"|23 |
||
| + | |rowspan="2"|80% |
||
| + | |rowspan="2"|15% |
||
| + | |class="a" width="10%"|Gil |
||
| + | |class="a" width="20%" colspan="2"|Item |
||
| + | |class="a" width="10%"|Gil |
||
| + | |class="a" width="10%"|Common |
||
| + | |class="a" width="10%"|Rare |
||
| + | |- |
||
| + | |≤ 1,000 gil |
||
| + | |colspan="2"|Red Fang |
||
| + | |≤ 3,000 gil |
||
| + | |Knot of Rust |
||
| + | |X-Potion |
||
| + | |} |
||
| + | |||
| + | ====Field of the Fallen Lord==== |
||
| + | {|class="full-width FFXII table" style="text-align:center" |
||
| + | |-class="a" |
||
| + | !style="width:20%"|Chest |
||
| + | !style="width:10%"|Spawns |
||
| + | !style="width:10%"|Holds Gil% |
||
| + | !style="width:30%" colspan="3"|Normal Treasure |
||
| + | !style="width:30%" colspan="3"|Diamond Armlet Treasure |
||
| + | |- |
||
| + | |class="b" rowspan="2"|24 |
||
| + | |rowspan="2"|80% |
||
| + | |rowspan="2"|15% |
||
| + | |class="a" width="10%"|Gil |
||
| + | |class="a" width="20%" colspan="2"|Item |
||
| + | |class="a" width="10%"|Gil |
||
| + | |class="a" width="10%"|Common |
||
| + | |class="a" width="10%"|Rare |
||
| + | |- |
||
| + | |≤ 1,000 gil |
||
| + | |colspan="2"|Blue Fang |
||
| + | |≤ 3,000 gil |
||
| + | |Knot of Rust |
||
| + | |X-Potion |
||
| + | |- |
||
| + | |class="b" rowspan="2"|25 |
||
| + | |rowspan="2"|80% |
||
| + | |rowspan="2"|15% |
||
| + | |class="a" width="10%"|Gil |
||
| + | |class="a" width="10%"|Item 1 |
||
| + | |class="a" width="10%"|Item 2 |
||
| + | |class="a" width="10%"|Gil |
||
| + | |class="a" width="10%"|Common |
||
| + | |class="a" width="10%"|Rare |
||
| + | |- |
||
| + | |≤ 1,000 gil |
||
| + | |White Fang |
||
| + | |Red Fang |
||
| + | |≤ 3,000 gil |
||
| + | |Knot of Rust |
||
| + | |X-Potion |
||
| + | |- |
||
| + | |class="b" rowspan="2"|26 |
||
| + | |rowspan="2"|80% |
||
| + | |rowspan="2"|15% |
||
| + | |class="a" width="10%"|Gil |
||
| + | |class="a" width="20%" colspan="2"|Item |
||
| + | |class="a" width="10%"|Gil |
||
| + | |class="a" width="10%"|Common |
||
| + | |class="a" width="10%"|Rare |
||
| + | |- |
||
| + | |≤ 1,000 gil |
||
| + | |colspan="2"|Blue Fang |
||
| + | |≤ 3,000 gil |
||
| + | |Knot of Rust |
||
| + | |X-Potion |
||
| + | |- |
||
| + | |class="b" rowspan="2"|27 |
||
| + | |rowspan="2"|80% |
||
| + | |rowspan="2"|15% |
||
| + | |class="a" width="10%"|Gil |
||
| + | |class="a" width="20%" colspan="2"|Item |
||
| + | |class="a" width="10%"|Gil |
||
| + | |class="a" width="10%"|Common |
||
| + | |class="a" width="10%"|Rare |
||
| + | |- |
||
| + | |≤ 1,000 gil |
||
| + | |colspan="2"|White Fang |
||
| + | |≤ 3,000 gil |
||
| + | |Knot of Rust |
||
| + | |X-Potion |
||
| + | |} |
||
==Locations== |
==Locations== |
||
Revision as of 20:40, 27 January 2015
Template:Sideicon

Oh, shut up and help me remodel the Nabreus Deadlands page!
- Adding a Locations section, with images and brief descriptions of the areas within the location.
This request can be discussed on the associated discussion page. Remove this notice upon completion.
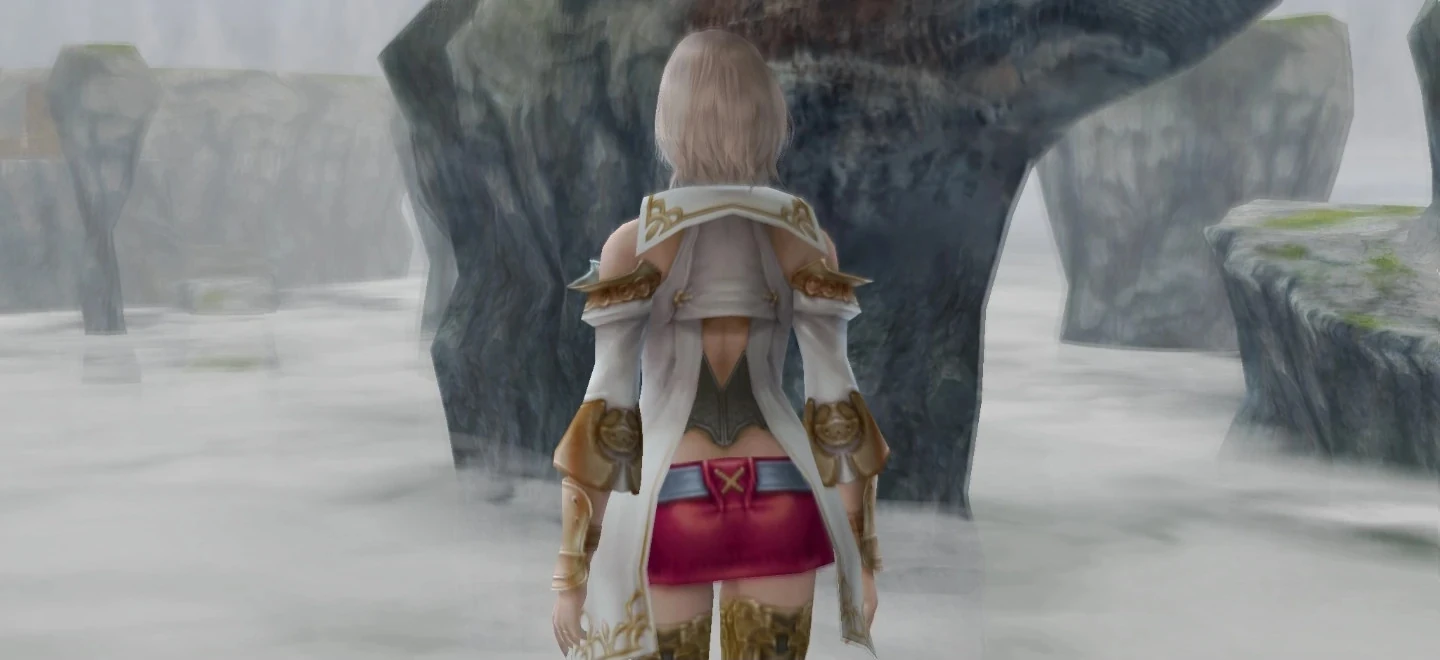
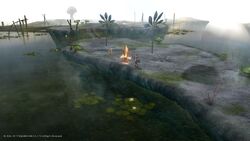
Mist covers the Deadlands.
Nabreus Deadlands.
The Nabreus Deadlands (ナブレウス湿原, Nabureusu Shitsugen?) is a location in the land of Ivalice in Final Fantasy XII. It is a mist-thick wetlands area north of the Salikawood.
The entire area is completely optional. The player must come to the Deadlands to complete the Three Medallions Sidequest in order to get the Esper Chaos.
Location
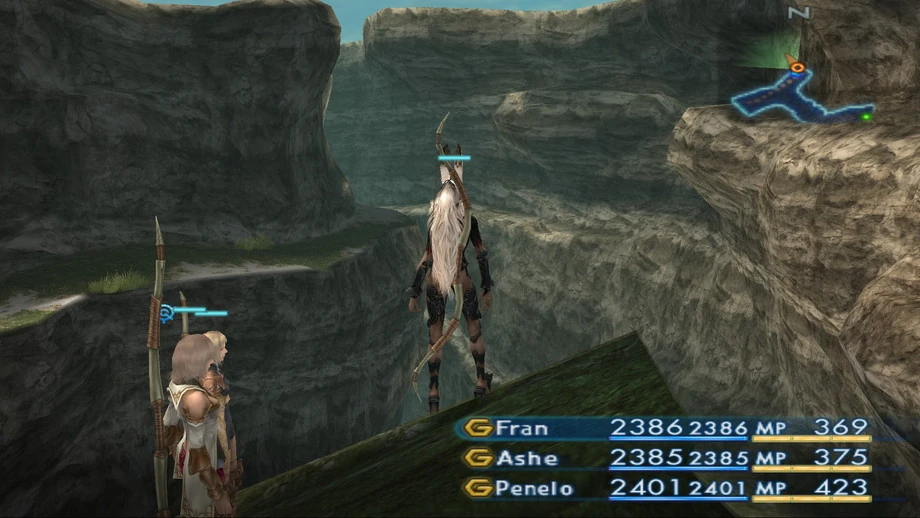
Nabreus Canyon.
The Nabreus Deadlands are located just to the North of Salikawood, in the Nabradia region. Towards the west lies the Necrohol of Nabudis.
Sage Knowledge
Place once known as Nabudis, the prosperous capital of Nabradia. In the war against Archadia two years ago, the city was utterly destroyed, leaving nothing but an eerie waste of swirling Mist. Even by day, the sun does not penetrate that ever present fog. Beneath it, dense Mist has given rise to all manner of bizarre flora and fauna of an invariably vicious temperament.
Sage Knowledge 63, Nabreus Deadlands
Weather

The Gate Crystal in the Deadlands is a Crystalbug.
Nabudis Deadlands has three weather conditions:
- Sunny
- Cloudy (fog drifting in the air)
- Heavy Fog (poor visibility)
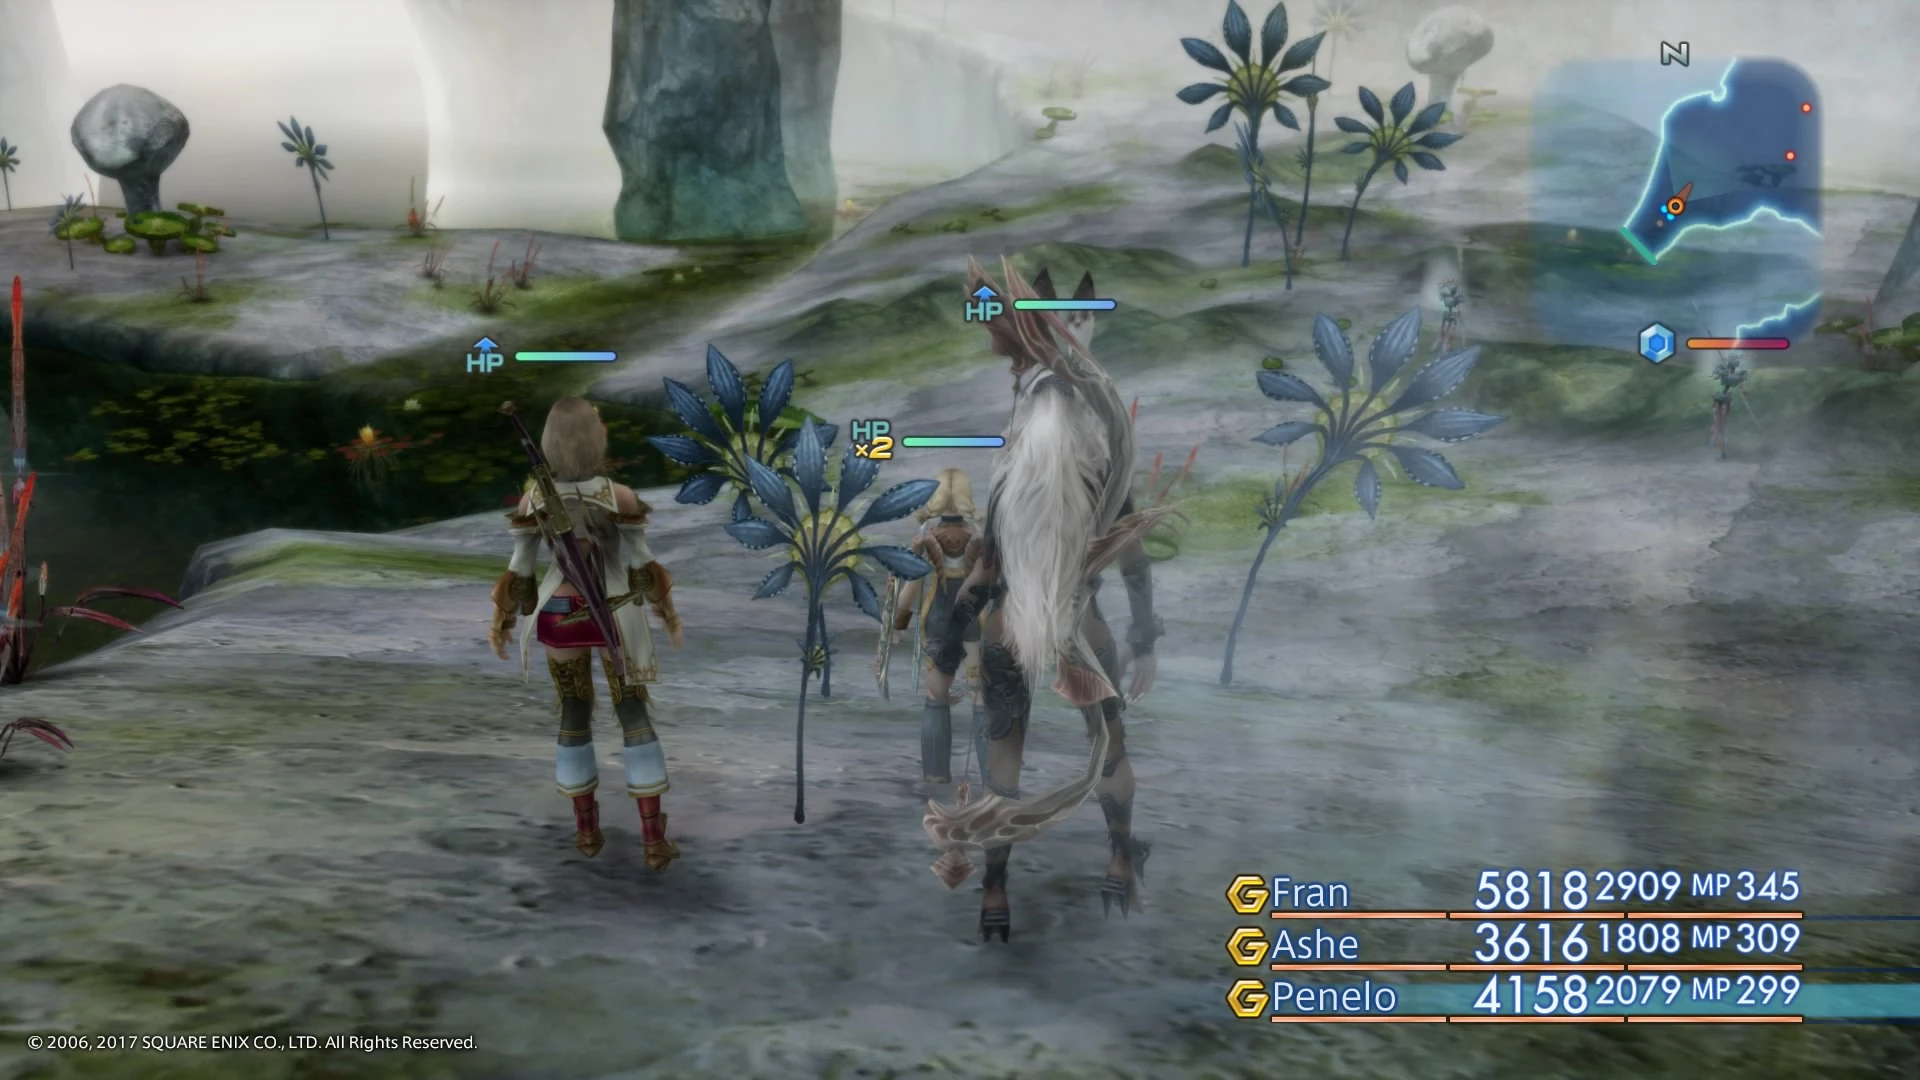
During heavy fog, Water damage is boosted by 20%. The Leamonde Entite appears in the Slumbermead area during heavy fog as well.
Treasures
Template:See Also The most common item treasure in the area is some type of Fang. With the Diamond Armlet equipped the common item treasure is Knot of Rust, and the rare item treasure is X-Potion.
In the southwest corner of Vale of Lingering Sorrow a random treasure may contain the Golden Amulet. The southernmost treasure in the Echoes of the Past area can have an Elixir, which is a rare occurrence of an Elixir treasure without the need to equip the Diamond Armlet.
This treasure is good for farming because it spawns 80% of the time, and has only 15% chance to contain gil. A treasure in the middle of the northern area of the Slumbermead may have the Nishijin Belt. The treasure on the little "island" in the middle of the Lifeless Strand area can have the Gillie Boots.
Greencrag
| Chest | Spawns | Holds Gil% | Normal Treasure | Diamond Armlet Treasure | ||||
|---|---|---|---|---|---|---|---|---|
| 1 | 80% | 15% | Gil | Item | Gil | Common | Rare | |
| ≤ 1,000 gil | Red Fang | ≤ 3,000 gil | Knot of Rust | X-Potion | ||||
| 2 | 80% | 15% | Gil | Item | Gil | Common | Rare | |
| ≤ 1,000 gil | Blue Fang | ≤ 3,000 gil | Knot of Rust | X-Potion | ||||
Vale of Lingering Sorrow
| Chest | Spawns | Holds Gil% | Normal Treasure | Diamond Armlet Treasure | ||||
|---|---|---|---|---|---|---|---|---|
| 3 | 80% | 70% | Gil | Item 1 | Item 2 | Gil | Common | Rare |
| ≤ 1,000 gil | Red Fang | Golden Amulet | ≤ 3,000 gil | Knot of Rust | X-Potion | |||
| 4 | 80% | 15% | Gil | Item | Gil | Common | Rare | |
| ≤ 1,000 gil | Blue Fang | ≤ 3,000 gil | Knot of Rust | X-Potion | ||||
Echoes of the Past
| Chest | Spawns | Holds Gil% | Normal Treasure | Diamond Armlet Treasure | ||||
|---|---|---|---|---|---|---|---|---|
| 5 | 80% | 15% | Gil | Item | Gil | Common | Rare | |
| ≤ 1,000 gil | Blue Fang | ≤ 3,000 gil | Knot of Rust | X-Potion | ||||
| 6 | 80% | 15% | Gil | Item | Gil | Common | Rare | |
| ≤ 1,000 gil | Blue Fang | ≤ 3,000 gil | Knot of Rust | X-Potion | ||||
| 7 | 80% | 15% | Gil | Item 1 | Item 2 | Gil | Common | Rare |
| ≤ 1,000 gil | Red Fang | Elixir | ≤ 3,000 gil | Knot of Rust | X-Potion | |||
| 8 | 80% | 15% | Gil | Item | Gil | Common | Rare | |
| ≤ 1,000 gil | White Fang | ≤ 3,000 gil | Knot of Rust | X-Potion | ||||
The Slumbermead
| Chest | Spawns | Holds Gil% | Normal Treasure | Diamond Armlet Treasure | ||||
|---|---|---|---|---|---|---|---|---|
| 9 | 80% | 15% | Gil | Item | Gil | Common | Rare | |
| ≤ 1,000 gil | Blue Fang | ≤ 3,000 gil | Knot of Rust | X-Potion | ||||
| 10 | 80% | 15% | Gil | Item | Gil | Common | Rare | |
| ≤ 1,000 gil | White Fang | ≤ 3,000 gil | Knot of Rust | X-Potion | ||||
| 11 | 80% | 15% | Gil | Item | Gil | Common | Rare | |
| ≤ 1,000 gil | Blue Fang | ≤ 3,000 gil | Knot of Rust | X-Potion | ||||
| 12 | 80% | 15% | Gil | Item | Gil | Common | Rare | |
| ≤ 1,000 gil | Red Fang | ≤ 3,000 gil | Knot of Rust | X-Potion | ||||
| 13 | 80% | 15% | Gil | Item | Gil | Common | Rare | |
| ≤ 1,000 gil | Blue Fang | ≤ 3,000 gil | Knot of Rust | X-Potion | ||||
| 14 | 75% | 45% | Gil | Item 1 | Item 2 | Gil | Common | Rare |
| ≤ 1,000 gil | Red Fang | Nishijin Belt | ≤ 3,000 gil | Knot of Rust | X-Potion | |||
| 15 | 80% | 15% | Gil | Item 1 | Item 2 | Gil | Common | Rare |
| ≤ 1,000 gil | White Fang | Red Fang | ≤ 3,000 gil | Knot of Rust | X-Potion | |||
The Fog Mutters
| Chest | Spawns | Holds Gil% | Normal Treasure | Diamond Armlet Treasure | ||||
|---|---|---|---|---|---|---|---|---|
| 16 | 80% | 15% | Gil | Item | Gil | Common | Rare | |
| ≤ 1,000 gil | Red Fang | ≤ 3,000 gil | Knot of Rust | X-Potion | ||||
| 17 | 80% | 15% | Gil | Item | Gil | Common | Rare | |
| ≤ 1,000 gil | White Fang | ≤ 3,000 gil | Knot of Rust | X-Potion | ||||
Lifeless Strand
| Chest | Spawns | Holds Gil% | Normal Treasure | Diamond Armlet Treasure | ||||
|---|---|---|---|---|---|---|---|---|
| 18 | 80% | 15% | Gil | Item | Gil | Common | Rare | |
| ≤ 1,000 gil | Red Fang | ≤ 3,000 gil | Knot of Rust | X-Potion | ||||
| 19 | 60% | 60% | Gil | Item 1 | Item 2 | Gil | Common | Rare |
| ≤ 1,000 gil | White Fang | Gillie Boots | ≤ 3,000 gil | Knot of Rust | X-Potion | |||
| 20 | 80% | 15% | Gil | Item | Gil | Common | Rare | |
| ≤ 1,000 gil | White Fang | ≤ 3,000 gil | Knot of Rust | X-Potion | ||||
| 21 | 80% | 15% | Gil | Item | Gil | Common | Rare | |
| ≤ 1,000 gil | Red Fang | ≤ 3,000 gil | Knot of Rust | X-Potion | ||||
| 22 | 80% | 15% | Gil | Item 1 | Item 2 | Gil | Common | Rare |
| ≤ 1,000 gil | White Fang | Blue Fang | ≤ 3,000 gil | Knot of Rust | X-Potion | |||
| 23 | 80% | 15% | Gil | Item | Gil | Common | Rare | |
| ≤ 1,000 gil | Red Fang | ≤ 3,000 gil | Knot of Rust | X-Potion | ||||
Field of the Fallen Lord
| Chest | Spawns | Holds Gil% | Normal Treasure | Diamond Armlet Treasure | ||||
|---|---|---|---|---|---|---|---|---|
| 24 | 80% | 15% | Gil | Item | Gil | Common | Rare | |
| ≤ 1,000 gil | Blue Fang | ≤ 3,000 gil | Knot of Rust | X-Potion | ||||
| 25 | 80% | 15% | Gil | Item 1 | Item 2 | Gil | Common | Rare |
| ≤ 1,000 gil | White Fang | Red Fang | ≤ 3,000 gil | Knot of Rust | X-Potion | |||
| 26 | 80% | 15% | Gil | Item | Gil | Common | Rare | |
| ≤ 1,000 gil | Blue Fang | ≤ 3,000 gil | Knot of Rust | X-Potion | ||||
| 27 | 80% | 15% | Gil | Item | Gil | Common | Rare | |
| ≤ 1,000 gil | White Fang | ≤ 3,000 gil | Knot of Rust | X-Potion | ||||
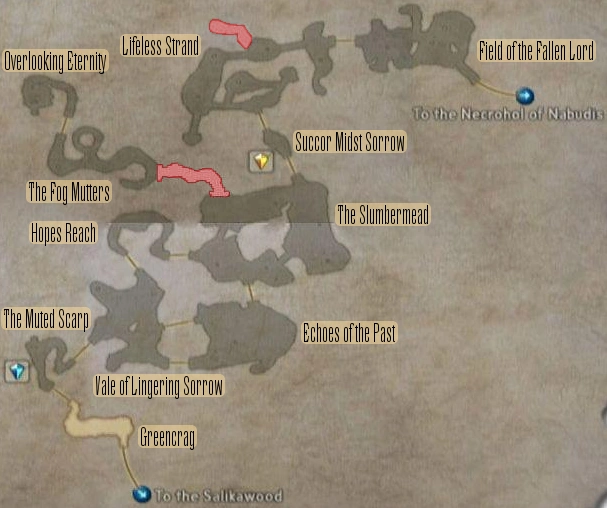
Locations
- Greencrag (to the Salikawood)
- The Muted Scarp
- Vale of Lingering Sorrow
- Echoes of the Past
- Hope's Reach
- The Slumbermead
- The Fog Mutters
- Overlooking Eternity
- Succour Midst Sorrow
- Lifeless Strand
- Field of the Fallen Lord (to the Necrohol of Nabudis)
Quests
Medallions

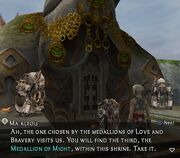
Shrine at Nabreus Deadlands.
To fight Chaos in Necrohol of Nabudis the player must complete a side quest to obtain the appointed keys. The player must go to Nabreus Deadlands to trigger the scene with the nu mou Ma'Kleou, and then collect three medallions. The medallions are found in Royal City of Rabanastre and Imperial City of Archades, and after giving the first two medallions to the nu mou, the player return to Nabreus Deadlands and talk to Ma'Kleou.
The player must head northwest and search for a hidden path and at the end of the path there is a monument with the nu mou, and the player gets the Medallion of Bravery, Medallion of Love, and the Lustreless Medallion. These can be used to open sealed areas in the Necrohol of Nabudis.
Land of Death
Template:See Also Two years ago, Judge Zecht came to Nabradia with the intention of testing the Midlight Shard for Dr. Cid. The result was the destruction of the entire area, covering it in a thick mist. As such, sunlight never breaks through, and all kinds of monsters now infest the area.
Enemies
- Baknamy
- Crusader
- Banshee
- Dead Bones
- Emeralditan
- Foobar
- Focalor (Docile)
- Leynir
- Shield Wyrm
- Crystalbug
- Leamonde Entite (Thick fog only)
- Arioch (Rare)
- Velelu (Rare)
- Roblon (Mark)
Music
Template:Listen
The theme of Nabreus Deadlands is called "A Land of Memories" (追憶の地, Tsuioku no chi?).
Map
- Note: areas highlighted in red are hidden passages that do not appear on the map.
Template:FFXII