Template:Sideicon The Battle of Judecca (ジュデッカ会戦, Jyudekka Kaisen?) is a mission taking place on Tem. XVII, 842 in Final Fantasy Type-0. Its mission level is 29. The player can choose ten cadets to take for this mission. Machina is absent from the party during this sequence in the game, as well as the three cadets deployed to the Staging Point for the next mission.
Briefing
Rubrum assigns cadets to airship squadrons and prepares to engage Concordia in an air battle. Central Command estimates the point of encounter with Concordian dragon fleet to be the airspace over the Strait of Judecca. Class Zero must send a squad up to ten to assist in the operation.
Briefing
The mission
S-rank requirements
- Time: 22:00 (with Bahamut ZERO)
- Time: 35:00 (without Bahamut ZERO)
- Phantoma: 64
- Casualties: 0
Rewards
- With Bahamut ZERO
- Clearing the mission on Officer difficulty unlocks the spell Fire MIS.
- Clearing the mission on Agito difficulty unlocks Shock Armor at the Armory Shop.
- Clearing the mission on Finis difficulty unlocks Turbo Ether at the Orderly Shop.
- Earning S-rank on Officer difficulty yields a Ignis Tertius, Vol. II or Aegis Tertia, Vol. II.
- Without Bahamut ZERO
- Clearing the mission on Officer difficulty unlocks Lunar Armlet at the Armory Shop.
- Clearing the mission on Agito difficulty unlocks Platinum Bangle at the Armory Shop.
- Clearing the mission on Finis difficulty unlocks Mythril Bangle at the Armory Shop.
Special Orders
Here is a list of all unique special orders on this mission:
| Area | Special Order | Time Limit | Effect | Reward |
|---|---|---|---|---|
| Aximo Deck | Take down fifteen wingverns using your active leader | 1:30 | Protect 0:30 | Killer Knuckles |
| Aximo Deck | Score a Killsight strike on Zuiun using your active leader | 2:00 | Invincible 0:15 | Elixir |
| Aximo Deck | Take down twenty wingverns using your active leader | 1:30 | Protect 0:30 | Auric Ring |
| Aximo Deck | Evasion Drill: Avoid all attacks | 1:00 | Regen 0:30 | Regal Armor |
| Frozen Trail | Use your active leader to take down one crème brûlée with magic | 1:00 | Trance 0:30 | Megalixir |
| Frozen Trail | Score Killsight strikes on two dracoknights using your active leader | 2:00 | Quick 0:30 | Draco Medica |
| Frozen Trail | Take down Mikazuchi using your active leader | 4:00 | Endure 0:30 | Eidolon: Vulcan |
| Glacial Plain | Acquisition Challenge: Retrieve a lost article from the airship wreckage | 1:00 | Invincible 0:15 | Elixir |
| The Yugumo | Acquisition Challenge: Retrieve a lost article from the airship wreckage | 1:00 | Trance 0:30 | Phoenix Down |
| Central Station | Acquisition Challenge: Retrieve a lost article from the airship wreckage | 1:00 | Trance 0:30 | Megalixir |
| Glacial Plain | Stop Sanzashi using your active leader without taking down his flywyvern | 2:00 | Quick 0:30 | Reaper's Scythe |
| First Deck | Quest Intel: Investigate the interior | 3:00 | Aura 0:30 | U1-Shock Damper |
| Second Deck | Quest Intel: Investigate the interior | 3:00 | Aura 0:30 | Elixir |
| Third Deck | Quest Intel: Investigate the interior | 3:00 | Aura 0:30 | Plated Armor |
| Crystalline Cloudfield | Combat Trial: Do not engage any enemies | 1:00 | Invisible 0:15 | Magic: Blizzard MIS-II |
| Ark Moorage | Take down five dracobaltians with your active leader | 4:00 | Trance 0:30 | Magicite Prime |
| Cimmerian Icefield | Evasion Drill: Avoid all damage | 2:00 | Aura 1:00 | Crystal Ball |
| Cimmerian Icefield | Slay Shinryu Celestia using your active leader | 5:00 | Aura 1:00 | Venom Bow |
Strategy
- Aximo Deck
Firing at the wyverns with the cannon.
The player must take control of the unmanned autocannon and fight off the wyverns for one minute. The wyverns never attack from the propeller side, so it is best to focus attention to the left. The player should pay attention to the upper-left corner of the screen it is easy to miss the wyverns coming from that angle. Before taking the cannon the party can accept an SO to take down 15 wyverns within the timelimit for Killer Knuckles weapon for Eight.
Eventually the Commanding Officer wyvern, Zuiun, lands on the deck. There is a fallen cadet near another cannon that has a Knowing Tag on him. There is an SO to score Killsight on Zuiun that nets an Elixir.
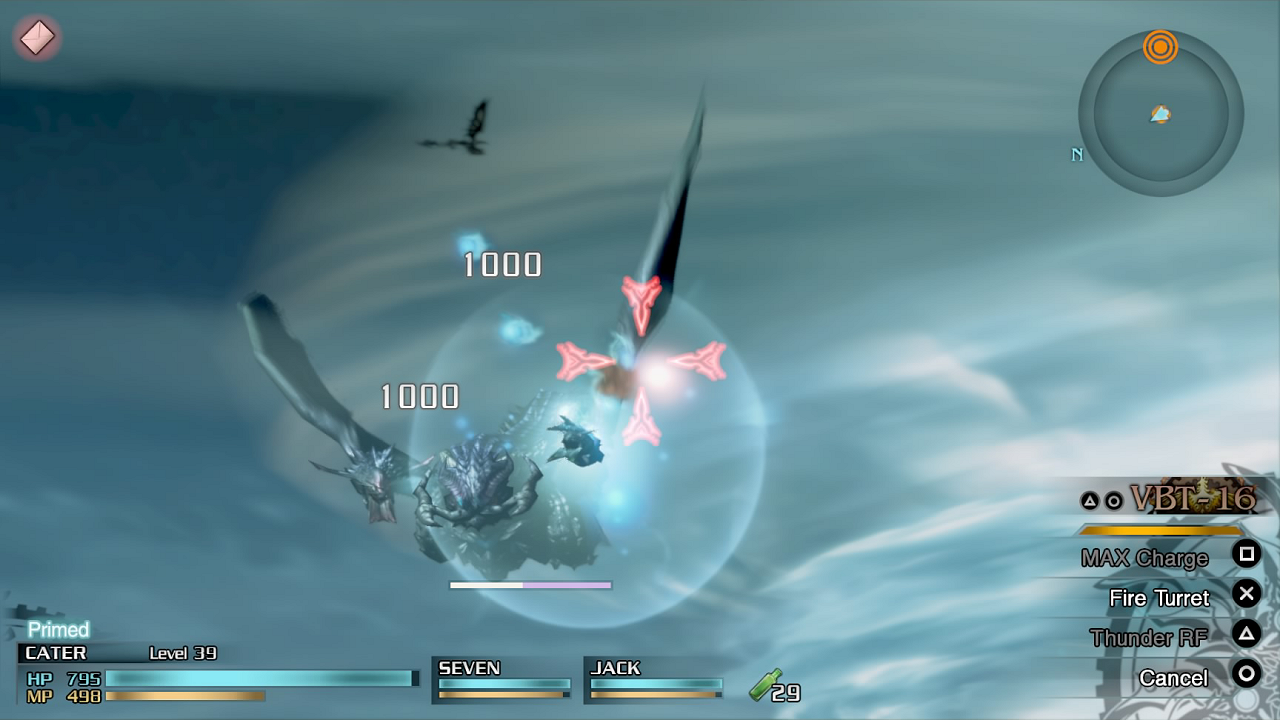
After taking the CO out the player should return to the autocannon for another assault similar to the first attack. Before taking the cannon, the party can accept an SO for felling 20 wyverns for an Auric Ring. After a minute a Five-Star Dragon appears. The player needs to shoot at it to deplete its HP. It keeps firing at the party and the player can step off the autocannon when it attacks to dodge to the far side of the ship. Using a fast cadet makes this easier. There is an SO to avoid attacks for a minute for a Regal Armor.
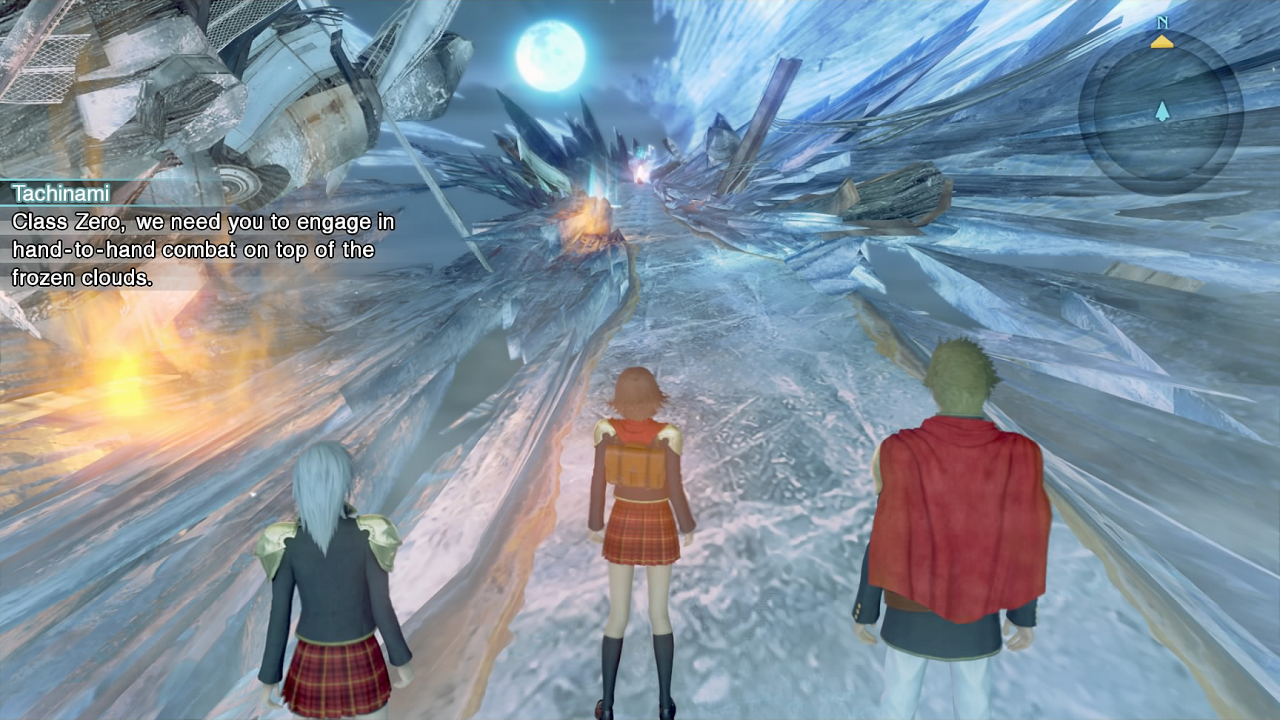
- Frozen Trail
Frozen Trail.
The cadets end up on a frozen trail with a relic terminal and a recovery portal. Behind the cadets is a felled cadet with a Knowing Tag, and near the relic terminal there is another item glimmering on the ground (Ferrum Medica).
The next area has Créme Brûlées and Pyronades controlled by their Dracoknight handlers. There is an SO to take down a Créme Brûlée with magic for a Megalixir.
The area after has a Dracoknights with a Demonicorn. It has an SO to score Killsight strikes on two Dracoknights for a Draco Medica. After a while the Seiku dragon Commanding Officer appears. There is an SO for killing it that earns a new Eidolon: Vulcan. A ranged cadet makes this battle easier.
The next area has Dracoknights, Pyronades and a Snowsquatch. There is an item (Hi-Potion) on an outcropping. The next area has Mikazuchi dragon accompanied by Créme Brûlées. A ranged cadet can avoid most of its attacks.
- Dominion HQ Pro Tem
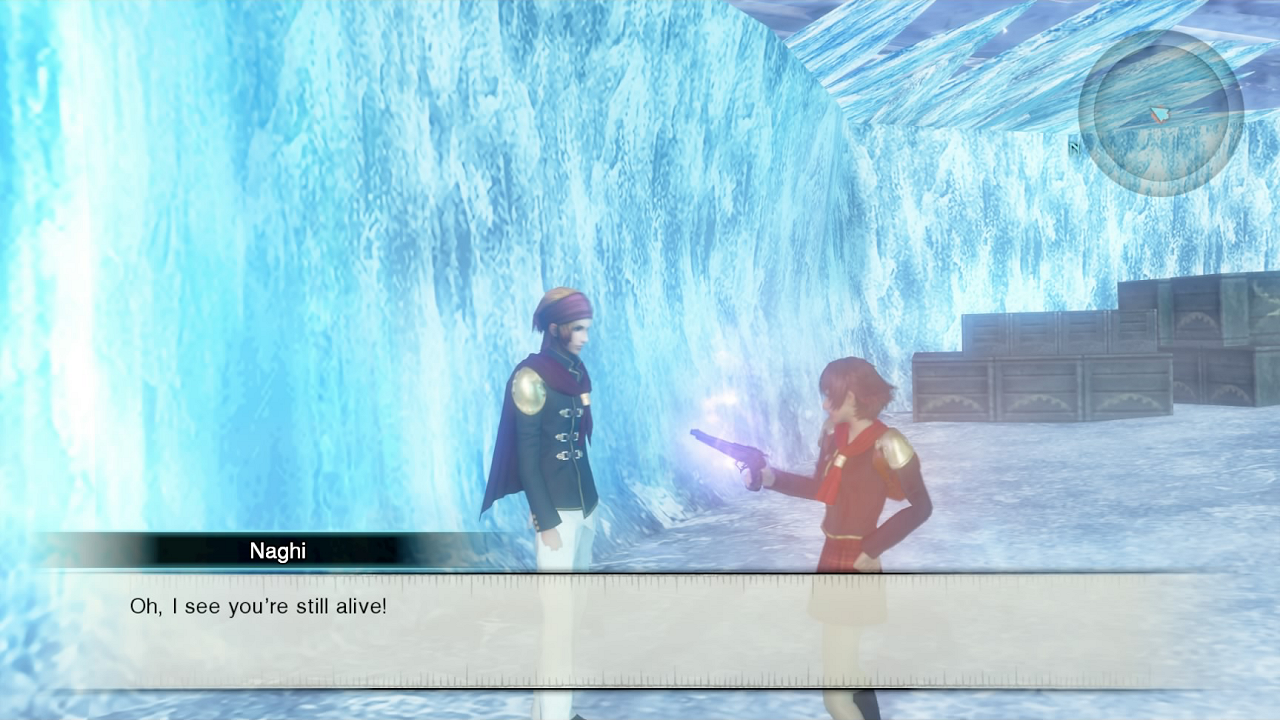
Naghi met.
The cadets are attacked by the dragon Commanding Officer, Ginga. It is accompanied by Dracoknights. Taking it out turns the area into a safe zone with a recovery portal and a relic terminal. There is an Ether on the crates in the middle, and the player can interact with the cadet being healed to receive a Knowing Tag. The cadets should follow the marker on the minimap to Naghi Minatsuchi and talk to him, and then follow the quest marker to the next destination.
- Yugumo Approach
In the Yugumo Approach the cadets will face a Dracoknight, a Demonicorn and Petrifeyes. In the next area they will face a dragon Commanding Officer Ryusei alongside more Petrifeyes. The end of this area has a recovery portal.
- Glacial Plain
This area has Pyronades and a Behemoth. The cadets should defeat the enemies in the area before accepting the area's acquisition challenge SO, then head to the flaming wreckage to the left of the south path to find the Knowing Tag needed to fulfill it, earning an Elixir.
- The Yugumo Crash Site
There is a safe zone with a relic terminal and a recovery portal, as well as another Knowing Tag lying on the ground. After leaving this area a timer initiates. There is a Flyvern and a Toxifeye, and an SO for collecting another Knowing Tag that is found along the path, earning a Phoenix Down. The cadets should hurry into the next area, the Eastern Station, to take out the Blancmanges and Dracoknights. The cadets can then continue down the west path and toward the Central Station.
- The Stations
Attacking the Flyvern here scares it away, and starts another timer. There is also a Cryonade here. The cadets must take down the enemies marked on the map as quickly as possible. The next area is random depending on which station the Flyvern flies off to, but the Knowing Tag for the SO is in front of the burning wreckage in the center, earning a Megalixir.
The cadets should engage the Flyvern until it flees and starts the timer. After taking out any remaining enemies and receiving a Hi-Potion from the saved cadet, the cadets should follow the yellow marker to the Western Station to save another cadet. The cadets should attack the Flyvern until it flees then finish off the Snowsquatch to receive an Ether from the cadet, then head south to the Southern Station. The cadets should engage the Flyvern again, then take out the Demonicorns to receive an Mega-Potion. The cadets should follow the marker to the Eastern Station to drive the Flyvern away and earn an Elixir. These events are accomplished in random order depending on which station the dragon flies off to.
The cadets should now head back to the Yugumo, and head north and up the ladder to the safe zone. From there the player should climb the ladder to return to the Glacial Plain.
- Glacial Plain
The cadets must fight the dragon rider Sanzashi and his Flyvern. It is best to cycle through the targets until focusing on Sanzashi. A ranged cadet is good. There is a Breaksight strike chance while the Flyvern is charging a fireball. It's best to attack when the Flyvern is grounded after a Breaksight strike. There is an SO to take down Sanzashi without taking out the Flyvern to earn Reaper's Scythe for Sice. Talking to the surrendered Flyvern afterward also yields an item. The cadets should head north to get to the Dracobaltian Dreadnought safe zone with a relic terminal and a recovery portal.
- Dracobaltian Dreadnought


Dracobaltian.
Heading north from the safe zone eds up with the cadets falling to the First Deck. It's important to stay on the move while fighting the Dracobaltians as remaining still will get hit. It is best to attack then dodge until the area is cleared. The SO item, Wyvern Femur, is in front of the Dracobaltian, earning an U1-Shock Damper. The cadets should head to the Second Deck to find the item needed for the next SO, Kingdom Helmet, on the last outcropping, earning an Elixir.
The Third Deck has more Dracobaltians with the SO item, Kingdom Armor, located on an outcropping, earning a Plated Armor. The player should head to the Bottom Deck and follow the yellow marker down the path and engage the Dracobaltians, then head north to the Crystal Cloudfield for a relic terminal and a recovery portal.
- Helping Naghi
Going through the Dominion HQ Pro Team finds Naghi in danger, being attacked by Shinryu Celestia. Approaching Shinryu chases it away. The cadets should follow Naghi to the Crystalline Cloudfield. If accepting the SO to not engage enemies, the player can simply put away their weapon and wait for the timer to run out before crossing the threshold into the Ark Moorage. Completing the SO earns Blizzard-MIS II. This area has Pyronades and Wingverns as well as their Dracoknight handlers.
In Ark Moorage the cadets must clear out the Wingverns and Dracobaltians to create a safe zone before the upcoming boss battle at the Cimmerian Icefield against Shinryu Celestia. If the player completes the SO to kill five Dracobaltians with the party leader, they earn a Magicite Prime for Cater.
- Shinryu Celestia
It will be tough to win this fight with the cadets during the first playthrough, as Shinryu Celestia is LV50 and can one-hit KO the player. It is best to stay away to make dodging easier. The Avoid magic should be used. When Shinryu Celestia is in the dark the player should pay attention to the red eyes to dodge the following attacks by staying on one side of the area, then rushing to the other side as soon as she attacks. It is best to keep Shinryu Celestia in front. With ranged attacks the player can hit Shinryu's Breaksight strike stunning it and dealing many Breaksight strikes in a row until it recovers. However, as it takes numerous such Breaksights to kill it, and the player is likely to die in one hit, the cadets are likely to perish one by one. There is an SO to avoid damage for two minutes that earns a Crystal Ball. Another SO for slaying Shinryu with the active leader appears, and appeasing it yields a Venom Bow for Trey.
If the party is wiped out a LV99 Bahamut ZERO emerges to save them. The player can use Grand Buster physical attack to deal 2800-3500 of damage, or charge the Megaflare until it turns into Gigaflare, and then to Teraflare. The battle at this stage can only be won by using Teraflare, as depleting Shinryu Celestia's HP to 0 is not enough. Defeating Shinryu Celestia completes the mission.
Rubicus
Template:See Also
- Tem. XVII The Battle of Judecca
Taking a clear stand against Rubrum, Concordia worked in consort with its new Militesi allies, mobilizing its troops to attack from the east while Milites struck from the west. However, the queen's assassination had left the kingdom in disarray, and the mobilization effort was not proceeding as planned. Thus, they devised a new strategy in which the battle-ready Five-Star Royal Guard would invade the dominion by air. The other units would trek to the border while they organized their ranks, then cross over into dominion territory once the Royal Guard had made their move.
In order to hold off the numerically superior empire, the dominion kept its legions positioned on the western front, and instead sent fleets of cadets via dreadnought to intercept the kingdom's assault. Rubrum met Concordia in the skies above the Strait of Judecca separating the two countries, and the battle commenced. At first, the Azure Dragon l'Cie Soryu overwhelmed the dominion forces with its powerful breath attack, sending Central Command into a panic. The Vermilion Bird l'Cie Lord Zhuyu also joined the fray, but he had his hands full dealing with Soryu and was thus unable to provide any extra support.
The fierce fighting continued atop the sea of clouds, now a shimmering world of ice thanks to Soryu's chilling breath. Rubrum's Eidolons easily overwhelmed Concordia's wyverns, even forcing the Azure Dragon l'Cie Celestia to retreat. The Royal Guard incurred enormous casualties, losing more than 1,000 of its precious dragons. Without its wyverns, the kingdom would never be able to conduct an invasion of this scope again.
Template:Type0