
Oh, shut up and help me remodel the Labyrinth of Time page!
- information on each trial and addition of missing trials.
This request can be discussed on the associated discussion page. Remove this notice upon completion.
Template:Images Template:Sideicon
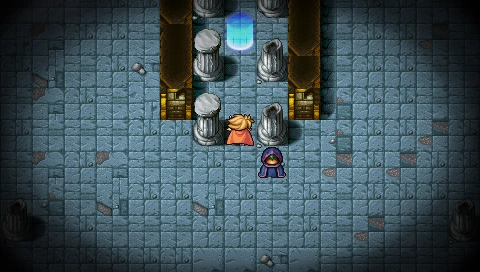
The entrance to the Labyrinth of Time.
The Labyrinth of Time (時の迷宮, Toki no Meikyū?) is the new bonus dungeon in the PSP and iOS versions of the original Final Fantasy. It consists of various floors, each one containing puzzles that must be solved on time for the player to be able to proceed. If the player fails to solve the puzzle on time, a dense fog will invade the area, sapping the party's HP and increasing the encounter rate, and the player will unlock the red seal of the floor when completing the puzzle, which is a sign of failure. Successfully completing a floor will allow the player to unlock its blue seal; either way, a passage to the next floor becomes available. Stages are chosen at random on each playthrough.
If the player is able to reach the deepest floor of the dungeon, they will face Chronodia, Master of Time, the PSP version's new superboss. Chronodia's strength depends on the number of blue and red seals unlocked by the player. The more red seals unlocked, the weaker Chronodia will be, and the more blue seals unlocked, the stronger Chronodia will be.
This dungeon is located in the Chaos Shrine and can be first visited when the player defeats all four Fiends for the first time. The player must visit Cornelia first and speak to the mysterious man in the center of the town. Then, the party should head for the Shrine, where they will observe the man entering a hidden room that serves as the entrance to the Labyrinth.
Floors
Before entering each floor, the player meets the Light of Time, who allows the player to trade abilities for time. The maximum number of abilities to surrender (and their nature) depends on the floor to be entered. After the transaction is done, the player will enter the floor, which contains a puzzle. The black-caped man may randomly appear as the player enters the area, and offer a random service, such as giving items, giving more time, or even allowing the player to leave the dungeon. After that, it is compulsory to solve the puzzle before proceeding deeper in the Labyrinth. Most of the puzzle areas are devoid of enemy encounters.
Modern Maze
In the Labyrinth of Time, the floors (and their order) one gets at each playthrough are randomized every time, although the first is always taken from a set of floors called the Modern Maze. Usually, they are the easiest puzzles and the random encounters should pose no threat.
- Fairies' Frolic (1 ability sacrifice): A single fairy will do some dance steps (facing different directions, always repeats the same pattern). She then goes away, and comes back with four other fairies. The player has to find the first fairy.
- To reach the room, follow this route at each fork in the road:
- Southwest
- East
- From the room, follow this route to the seals:
- East
- North
- Fairies' Farce (1 ability sacrifice): This puzzle is one of logic. There are nine chests arranged in a square pattern. One of them opens the way. The others reset the puzzle (and halve the remaining time). Seven fairies give hints as to which chest is the good one, but one of them lies. It is up to the player to solve the puzzle.
- To reach the room, follow this route at each fork in the road:
- Northwest
- From the room, follow this route to the seals:
- South
- Southeast
- Neat and Tidy (7 ability sacrifices): The player has to push eight blocks into eight pits. However, automatons roam the area and will destroy the blocks on contact.
- To reach the room, follow this route at each fork in the road:
- East
- South
- From the room, follow this route to the seals:
- North
- East (around to the southeast corner)
- East
Medieval Dungeon
- The Guardian (1 ability sacrifice): The player has to find a treasure chest in a labyrinth inhabited by dragons. The dragons cannot be attacked. If the player comes within three steps of the dragons, they are instantly brought back to the beginning of the labyrinth. However, there are three treasure chests, only one containing the key to proceat each fork in the road:
- East
- East
- East
- From the room, follow this route to the seals:
- South
- South
- West
- West
- West
- West
- Labyrinth of Darkness (2 ability sacrifices): The player will be asked to find a treasure chest in a dark labyrinth. Lighting candles along the way can help.
- To reach the room, follow this route at each fork in the road:
- East
- From the room, follow this route to the seals:
- North (from maze exit)
- West
- The Bat Cave (7 ability sacrifices): As the name suggests, the player has to count the bats in the area, the number of moving bats, and the number of still bats, and then tell one of those numbers to the black-caped man awaiting at the far end. The bats are moving among each other, which makes the counting harder.
Original Chaos
Starting here, the player might have a harder time getting through. The puzzles are harder, possibly longer, and usually require several abilities to be traded for time. As such, they make the random encounters (with usually powerful enemies) very dangerous.
- Note for Note (4 ability sacrifices): The player simply has to repeat three melodies the black-caped man will have played before.
Netherworld Crypt
This is a powered up version of Original Chaos. The first floor of the Netherworld Crypt (the Inner Sanctum) allows the player to fully recover HP, MP and status ailments, and to leave the Labyrinth of Time. This is the only time (except for the black-caped man who might give the opportunity) the player can leave. Otherwise, Chronodia has to be defeated to avoid getting a Game Over. In the iOS version, if you close the app after reaching the Inner Sanctum (while still in the Labyrinth of Time), you will be brought back to the Inner Sanctum upon selecting 'Resume' when you next open the app.
- Step by Step: The player has to cross a room full of robots. The robots do one step as the player does one. Touching a robot causes the player to enter a fight with a Warmech. While those can be very dangerous, they yield a lot of Experience, and no penalty is suffered from fighting them. Thus, if the player is strong enough to defeat them, they can easily go up several levels in a few minutes. Considering that, at this point, the only way to exit the Labyrinth of Time alive is to defeat Chronodia, it might be a good idea to do so, as the additional levels will help a lot for that difficult battle.
- Fairies Frolic: A single fairy will do some dance steps (facing different directions, always repeats the same pattern). She then goes away, and comes back with four other fairies. The player has to find the first fairy.
- Buying Flowers: First, several people will walk in a line to an area beyond, with several other people. The people who were in the line are flower-sellers. The others will attack if talked to. The player has a bag of gil containing a random amount of money. They will then have to find the flower sellers and buy flowers to exactly deplete the gil. It is possible to buy from each flower-seller only once.
- Twin Statues: Four pairs of statues have to be put face to face.
- Trick Statues: Three pairs of statues have to be put face to face. Each pair represents a kind of monster roaming the area. When the statues are facing each other, those monsters will disappear. If the player touches a monster, they will battle. The monster will then reappear somewhere else. The monsters do one step (in any direction) as the player does one step.
- Scavenger Hunt: In a big room, the player will first be given a hint, such as The key lies 11 feet away and will have to dig it up. If the first try isn't successful, another similar hint will be given.
- Robots And Buttons: The random encounters are what makes this puzzle difficult.
- Labyrinth of Darkness: The player will be asked to find a treasure chest in a dark labyrinth. Lighting candles along the way can help.
- Lightning Rods and Candles: The player has to find the exit of a dark maze. Lighting candles along the way can help. However, automatons roam the area and must not be touched. Also, thunder-like sound will often be heard, and a lightning bolt will soon strike. The player has to be near a lightning rod to avoid being brought back at the beginning of the maze.
- Marching Orders: The player has to get in a line of soldiers. The commanding officer will put his soldiers to test, to march forward, stopping once in a while. The player has to march in time. The difficulty lies in that the officer gives no hint when he stops walking. You will only need to cross the parade square twice -- once to the right and once to the left.
- March of Souls: First, several people will walk in a line. Then, the player will be asked three questions, such as "Who was the last in line?". If a mistake is made, the line will pass again, with the same or different people, and the player will be asked different questions.
- Slay or be Slain: In a room, there will be several dragons. The sprites of the dragons can have four, two or no horns, short or long tails, and short or long wings. In battle, all are Red Dragons. The player will be first asked to defeat a random number of one possible dragon type (on twelve possibilities). Second, to defeat random numbers of two types of dragons, then random numbers of three types of dragons. However the number and types will only be said once.
Enemy formations
- Chronodia (Boss)
Gallery
Template:Gallery
Template:FFI Template:Sidequests