| Line 30: | Line 30: | ||
The third party finds a Red Cap here and two entrances to separate parts of their Factory Area 1. They later exit back to the outside after Cave Area 1, where chests containing a Megalixir and Rainbow Brush are found. A chest with a glowing red star here must also be examined to open a path for Party 1 that is otherwise obstructed. |
The third party finds a Red Cap here and two entrances to separate parts of their Factory Area 1. They later exit back to the outside after Cave Area 1, where chests containing a Megalixir and Rainbow Brush are found. A chest with a glowing red star here must also be examined to open a path for Party 1 that is otherwise obstructed. |
||
| − | After navigating the switch puzzle areas, the party in the middle path moves to the final outside area to find [[Demon (Final Fantasy VI)|Demon]]. A Save Point appears when it is defeated. |
+ | After navigating the switch puzzle areas, the party in the middle path moves to the final outside area to find [[Demon (Final Fantasy VI)|Demon]]. A Save Point appears when it is defeated. A Ribbon is hidden at the bottom of the path here, found by examining the wall. |
===Cave=== |
===Cave=== |
||
Revision as of 23:56, 24 July 2014
Template:Sideicon
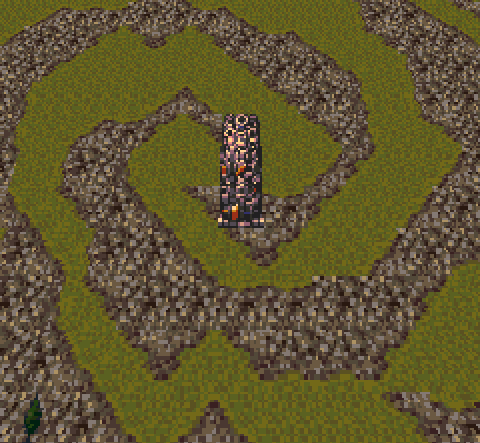
Kefka's Tower on the World Map.
Kefka's Tower (ガレキの塔, Gareki no Tō?, lit. Tower of Rubble) is a location in Final Fantasy VI, created as a monument to destruction, and stands as a symbol of Kefka Palazzo's power. In his tower Kefka exercises his reign of terror over the World of Ruin, using the Light of Judgment to smite anyone who opposes him. The tower serves as the game's final dungeon and should not be confused with the Cultists' Tower.
Although Celes can walk up to the tower right after sailing to the mainland, the tower cannot be entered on foot. Kefka's Tower can be reached after obtaining the Falcon and, as such, it is possible to go through the ruins, and fight and possibly beat Kefka using only Celes, Setzer and Edgar, as they are the only characters the player is required to obtain to progress in the World of Ruin.
Story
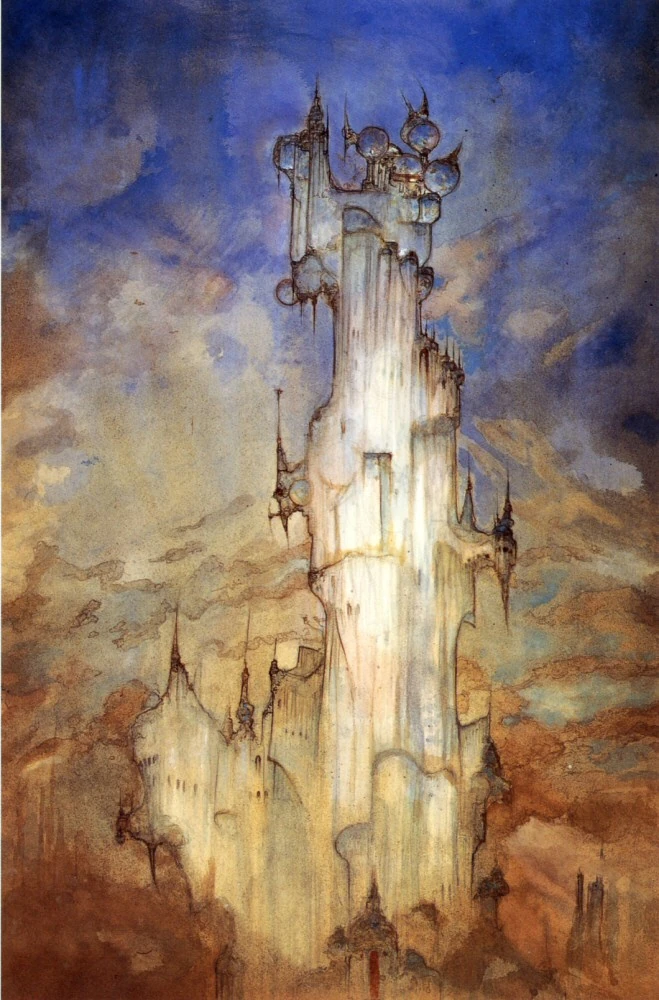
Kefka's Tower art by Yoshitaka Amano.
When the party first enters the tower, they question the fate of magic, espers, and Terra if they destroy the Warring Triad — since the three deities are the source of magic, their destruction would cause it to vanish from the world.
When the party confronts Kefka at the tower's summit, he declares all life is meaningless and expresses his desire to continue destroying the world until humans have no hope or dreams. The party engages Kefka's final minions before battling Kefka himself. With Kefka dead, the tower begins to collapse, and Terra transforms into her esper form for the final time, leading the party out of the tower. The party races to the airship as Terra flies into the air to lead them to safety, her powers fading.
As the party escapes, the magicites they have collected vanish. Maduin comforts Terra with the knowledge she can survive if her human side has a strong emotional attachment to the world. Terra loses her powers and falls through the air, narrowly landing on the deck of the Falcon. Due to her love for the children of Mobliz, Terra awakens as a human.
Locations
Part of the tower's switch puzzle. In the shown shot, the first party is represented by Sabin, the second party by Edgar, and the third party by Locke.
Kefka's Tower is a tower formed of rubble and its outside is a mash-up of dirt, metal, and machinery. Formed in the approximate location of Vector, most of the tower's building material originate from the city, including the Imperial Palace and Magitek Research Facility. The magic used to twist the land into the tower is reflected in the area, as the grass and smaller islands form a swirl with the tower standing in the center. The tower's interior varies, but each passage follows one of three designs.
The tower must be completed using the teamwork of three parties. Each party has its own path, and each path is lined with powerful bosses. The parties can change paths at a complex switch puzzle, requiring all three parties to cooperate to trigger several switches at once to open the path to the Warring Triad, which stand as the tower's final guardians. The parties assemble at the top where they confront Kefka in the final battle and fight the Statue of the Gods leading up to Kefka himself. Due to using several parties, the player can exploit the Save Point Glitch.
Outside
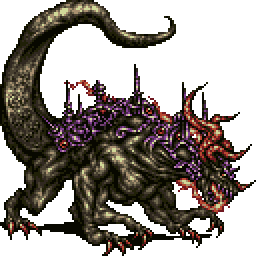
The outside of the tower is where the three individual parties begin, and consists of various short passageways with doorways and ventilation ducts that lead into the tower's interior. Cranes from the Falcon periodically swoop by the starting points of the three parties, giving the player the chance to return to the airship. The peak of the tower, in the center of the outside area, is where Demon is fought.
The first party finds a Coronet here before entering the first Cave area. After exiting the first Factory area and before entering the second, a Pinwheel is found. A blocked path in this area must be opened by Party 3 via a red star on a chest found in their path.
The second party exits back to the outside from Factory Area 1, where they can find a Force Shield, Force Armor, and entrances to the Factory 1 area of Party 1 and their own Cave 2 area.
The third party finds a Red Cap here and two entrances to separate parts of their Factory Area 1. They later exit back to the outside after Cave Area 1, where chests containing a Megalixir and Rainbow Brush are found. A chest with a glowing red star here must also be examined to open a path for Party 1 that is otherwise obstructed.
After navigating the switch puzzle areas, the party in the middle path moves to the final outside area to find Demon. A Save Point appears when it is defeated. A Ribbon is hidden at the bottom of the path here, found by examining the wall.
Cave
These areas continue the exterior's design aesthetic. Metal beams span the ceiling with blinking lights, and ventilation ducts act as doorways between areas. These areas hold no bosses, but it is a cave-type area where the three parties open the path to the gauntlet of final bosses.
Party 1, Cave 1
A small area accessed through a ventilation duct below the chest with a Hypno Crown, it has two conveyor belts and a door leading to Palace Area 1.
Party 1, Cave 2
A small hook-shaped hallway leading from the second Factory area to the outside. This is the hallway in which Fiend Dragons are encountered.
Party 2, Cave 1
A forked hallway containing a chest with a Minerva Bustier, it is the first area entered by Party 2 and connects to Palace Area 1. A small side room contains a chest with a Pinwheel and a one-way duct exiting from Factory Area 1.
Party 2, Cave 2
A long hallway connecting the outside to Palace Area 2 where the Gold Dragon is fought.
Party 3, Cave 1
A pair of hallways, they connect the outside to Factory Area 1. The first hallway leads to a catwalk in Factory Area 1, the second hallway opens back to the outside from Factory Area 1 after the party defeats Inferno, Ketu, and Rahu.
Party 3, Cave 2
A long hallway connecting the outside to Palace Area 1 where the Skull Dragon is fought.
Palace
These areas are built from the rubble of the Imperial Palace, and feature imperial banners, carpets, and statues. The prison cells hold the Ultima Buster in Kefka's cell. The palace areas hold the final two of the Eight Dragons, and the fights with the Guardian and Goddess.
Party 1, Palace 1
A curved hallway accessed from Cave 1 and connecting back to the outside, it contains a treasure chest holding the Fixed Dice.
Party 2, Palace 1
This area recreates the Prison Cells of Vector, and is accessed from Cave Area 1. The Ultima Buster is fought here, and a Save Point appears when it is defeated. A door provides a one-way entrance to Factory Area 1.
Party 2, Palace 2
A small stepped chamber where Gold Dragon is fought. After this the party progresses to the Switch Area.
Party 3, Palace 1
A small stepped chamber where Skull Dragon is fought. After this the party progresses to the Switch Area.
Factory
The factory areas are primarily constructed out of pieces of the Magitek Research Facility, including a hallway that was in the facility originally. Esper capsules, conveyor belts, and catwalks mark these areas. Inferno, Ketu, and Rahu are fought in a factory area.
Party 1, Factory 1
Accessed from the second outside area and connecting to Cave Area 2, it is a two-section area that includes a hallway from the Magitek Research Facility. A platform here must be moved by Party 2 to open the path for Party 1 to progress. A chest containing a Ribbon can be found by Party 2 here.
Party 2, Factory 1
After exiting from Palace Area 1, the second party drops into Factory Area 1. This is the only room where Movers and Muud Suuds are found. Stairs lead up to a second area where two pipes lead to separate areas. The left pipe leads back to the outside, the right pipe deposits the party back in Cave Area 1 through a ventilation duct.
Party 3, Factory 1
A three-screen area, it is the first area accessed by Party 3. A catwalk connecting to Cave 1 contains chests with a Nutkin Suit and a Gauntlet. The lower area of the factory includes a chest with a Hero Ring a hidden passage in the southern area leading to a room with an Aegis Shield. After this the party rides a roller belt to the third screen of the area where Inferno, Ketu, and Rahu are fought. After this the party exists to Cave Area 1 leading to the outside. The upper area includes a Save Point. A pipe in the upper area allows the party to move back to the lower area.`
Switch Area
The factory areas hold a complex switch palace deep inside the tower that requires all three parties to work together to open the path forward. The choices the player makes at this switch puzzle determine which bosses each party faces. First, Party 2 and Part 3 must hold down switches to open the door for Party 1 to progress to the next area. Here Party 1 must climb stairs to either the left or right, the path behind them closing when they do so. Exiting to the south puts them on a ledge in the first area, where they must push a weight onto the switch the party below is standing on. This allows that party to step onto the center catwalk and take the other path Party 1 did not, pushing down another weight to let the last party into the second area. All parties must now move to the second area and hold down three switches, creating a new path to the south for the middle party along with a stairwell forward. The south path leads to another ledge where a final switch creates doors for the other two parties to progress.
The switch puzzle and its influences on the paths the three parties take can be simplified to if Party 1 takes the left or right staircase in the second screen. If they choose the left stairs, the first party will fight Fiend, the second will fight Goddess, and the third will fight Guardian and Demon. If they choose the right stairs, the first party will fight Goddess, the third will fight Fiend, and the second will fight Guardian and Demon. It is impossible for the first party to fight Guardian or Demon, the second to fight Fiend, or the third to fight Goddess.
Switch Area, Cave 1
The middle party enters this small cave after defeating Guardian. It connects to the outside where Demon is fought and contains a one-way exit from the final Cave area.
Switch Area, Cave 2
This area is the final destination of the dungeon, where all parties exit to immediately after defeating the member of the Warring Triad in their path. Moving the three parties onto their respective switches here immediately teleports them to the summit of the tower to face Kefka.
Switch Area, Palace 1
A small area with hallways leading upward, the middle party resulting from the switch puzzle fights Guardian here. A Save Point appears once it is defeated.
Switch Area, Palace 2
A stepped area where Goddess is fought. A Save Point appears when she is defeated.
Switch Area, Factory 1
A small area where Fiend is fought. A Save Point appears when it is defeated.
Treasure
Party 1
Party 2
|
Party 3
Party 2 or 3
|
Enemy Formations
Kefka's Tower is host to several palette swaps of earlier bosses: Inferno is based on Number 128, Ultima Buster is based on Ultima Weapon, and the Prometheus, Fiend Dragon, Daedelus, and Muud Suud are palette swaps of Tunnel Armor, Blue Dragon, Dullahan, and Humbaba, respectively. Though palette swaps of enemies are frequent in Final Fantasy games, these enemies in particular were originally the only palette swaps of these specific bosses, were only encountered in the Tower, and furthermore are each only found in a single room. This changed in the Advance release, where new enemies and bosses were added, leaving Tunnel Armor and Number 128 as the only aforementioned enemies with a single palette swap.
|
Tower exterior
|
Cave areas
|
|
Factory areas
|
Palace areas
|
Final Bosses - Statue of the Gods
- Tier I: Visage, Long Arm, Short Arm
- Tier II: Machine, Magic, Tiger, Power
- Tier III: Lady, Rest
- Tier IV: Kefka
Music
Template:Listen
Kefka's Tower background theme is fittingly called "Last Dungeon".
Other Appearances
Dissidia Final Fantasy
Template:Sideicon
Kefka's Tower in Dissidia.
Kefka's Tower is the representative arena for Final Fantasy VI and is where Firion begins his storyline, and Cecil splits up from Tidus and Firion. Zidane and Terra battle Kefka in their respective storylines in the tower, and in Shade Impulse is it the site of the final battle with Kefka. The tower is host to a handful of confrontations between villains, such as when Kefka advises Kuja to kidnap Squall.
The portion of the tower shown in Dissidia Final Fantasy is a multi-layered factory-like area. The top section features catwalks and esper-retaining capsules in small alcoves, while the lower section contains several closed-in areas with pipes running between walls. The upper portion of the tower is wider than the lower areas, and has railings the character can grind on. The Ω form of the stage features vents of magical steam that explode from walls whenever part of the stage is destroyed or a character is wall rushed, knocking characters through the air and bouncing them between walls. The steam damages their Bravery, adding it to the Bravery pool.
The Magicite is the battlegen item obtained through stage destruction in this area. There is a minor graphical glitch in the area involving the capsule tops.
Dissidia 012 Final Fantasy
Template:Sideicon Kefka's Tower returns as an arena in Dissidia 012 Final Fantasy. Vaan and Terra stop here while fleeing from Kefka, and it is where Kain meets with the Warrior of Light to tell him the truth of the cycles of war.
Theatrhythm Final Fantasy
The background of the final battle with Kefka appears as the BMS for "Dancing Mad".
Theatrhythm Curtain Call
Template:Sideicon

Kefka's Tower
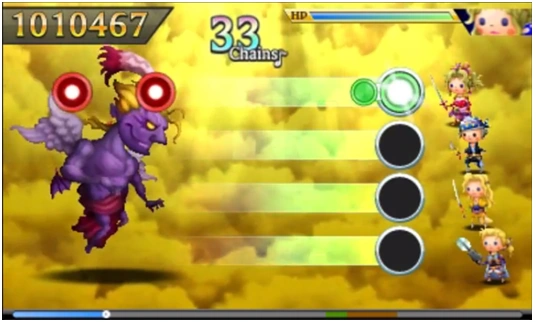

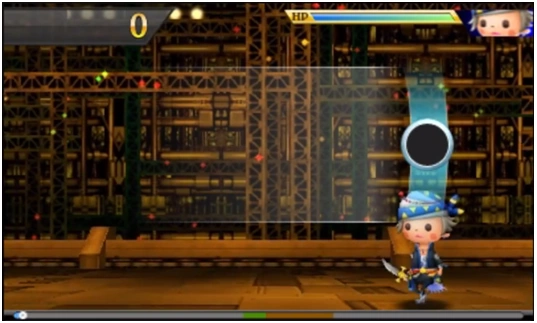
The final battle with Kefka
The top floor of Kefka's Tower returns as the BMS for Dancing Mad, while the lower areas appear as the FMS for it's eponymous theme.
Gallery
Template:Gallery
References
Template:FFVI Template:Dissidia Template:D012