A legendary Warrior blessed by the light. Bearing sword and shield, he is skilled in all aspects of combat.
Dissidia Final Fantasy description
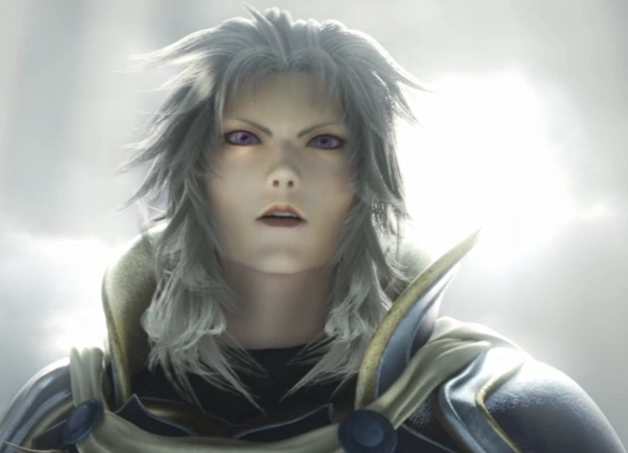
The Warrior of Light a hero fighting on the side of Cosmos in Dissidia Final Fantasy and Dissidia 012 Final Fantasy. A skilled and honorable swordsman, he duels using both sword and shield to strike his enemies. He leads the warriors of Cosmos, and serves the will of the goddess faithfully as her right-hand warrior. His nemesis, Garland, is Chaos's right-hand man.
Unlike the other warriors, Dissidia character files note that the Warrior of Light is unaware of his true name or origins. In Dissidia 012, his connection to Cosmos and Cid of the Lufaine is revealed, establishing him as an original character not summoned from another world.
Profile[]
A warrior of light clad in armor, wielding sword and shield. A noble warrior that fears no one and faces any foe gallantly. He has taken on the role of a leader among the warriors.
Dissidia 012 description
Appearance[]
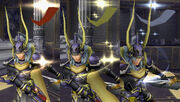
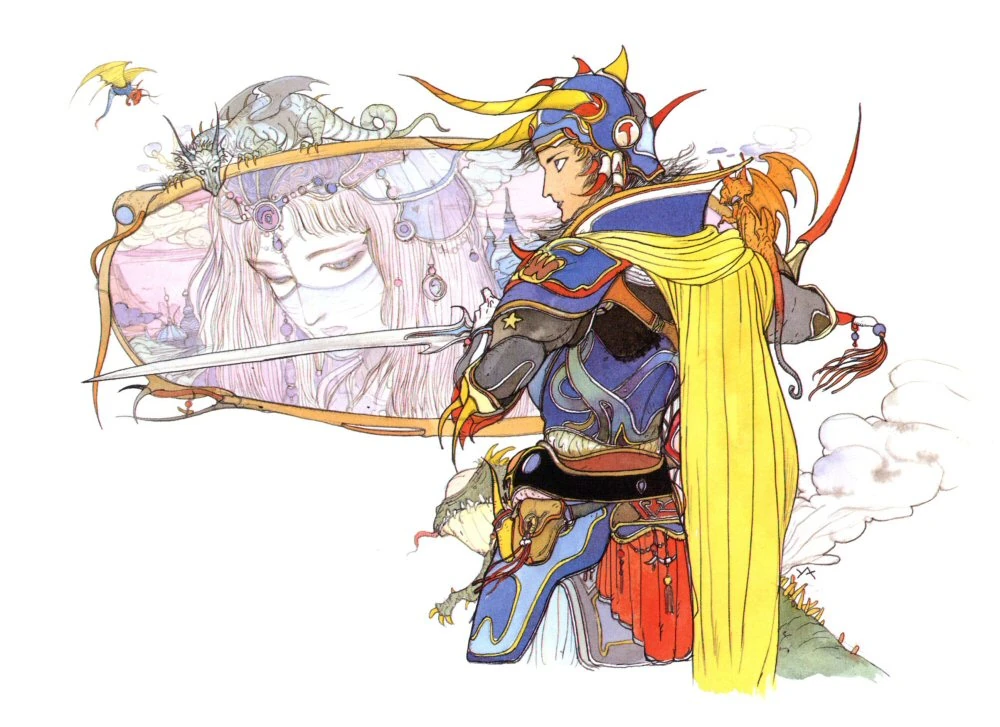
The Warrior of Light's base outfit is adapted from Yoshitaka Amano's concept artwork ![]() of the Knight class from the original Final Fantasy. He wears pale blue armor with gold, yellow, and white details, a horned helmet, and a yellow cape. He has aquamarine eyes and long, silver hair. The Warrior's appearance as a knight in his EX Mode is more directly based on the Amano artwork of the Knight, giving his armor various red and yellow highlights, coloring his cape gold, and shifting the horns of his helmet to point forward.
of the Knight class from the original Final Fantasy. He wears pale blue armor with gold, yellow, and white details, a horned helmet, and a yellow cape. He has aquamarine eyes and long, silver hair. The Warrior's appearance as a knight in his EX Mode is more directly based on the Amano artwork of the Knight, giving his armor various red and yellow highlights, coloring his cape gold, and shifting the horns of his helmet to point forward.
The Warrior's first alternate outfit, "Amethyst Armor", is a red and sepia recolor to invoke a weathered feeling, and his EX Mode is recolored red with silver and white highlights like the alternate concept artwork ![]() of the Knight in Final Fantasy.
of the Knight in Final Fantasy.
The Warrior's second alternate outfit, "Classic Red", is based on the Warrior sprites ![]() from the original NES version of Final Fantasy. The Warrior wears a simpler crimson armor with no cape or skirt, shorter gauntlets that show his biceps, and a shorter collar. He wears no helmet, showing dark red hair. His EX Mode is taken from the Knight class upgrade
from the original NES version of Final Fantasy. The Warrior wears a simpler crimson armor with no cape or skirt, shorter gauntlets that show his biceps, and a shorter collar. He wears no helmet, showing dark red hair. His EX Mode is taken from the Knight class upgrade ![]() , granting him a more muscular build and slicking his hair upwards.
, granting him a more muscular build and slicking his hair upwards.
As a downloadable fourth outfit, the Warrior appears as he does in Dissidia 012 Final Fantasy's opening and flashbacks in the Reports. The Warrior retains his base outfit but removes his helmet to reveal spiked silver hair, and his sword has a broken spike. His EX Mode is identical to his base outfit's EX Mode, but without the helmet and with the different sword.
The Warrior's manikin, the False Hero, is blue.
")
")
")
")
Equipment[]
The Warrior's sword is based on Amano's concept art ![]() , consisting of a long blade with two small protrusions above the guard, and a yellow handle and guard with a small orange stone. His shield is of an original design, and bears a simple silver-gray and blue color scheme. While Dissidia does not name these items, spin-offs identify the sword by the name "Braveheart" and the shield as the "Lustrous Shield" or "Shield of Light".
, consisting of a long blade with two small protrusions above the guard, and a yellow handle and guard with a small orange stone. His shield is of an original design, and bears a simple silver-gray and blue color scheme. While Dissidia does not name these items, spin-offs identify the sword by the name "Braveheart" and the shield as the "Lustrous Shield" or "Shield of Light".
In the Warrior's first alt outfit, his sword and shield are recolored in red tones, to match the coloring of his armor. His third outfit's Braveheart is identical to his default outfit, and the Lustrous Shield is a brighter silver with the central crest colored bright red and the detailing around it black. The Braveheart in his DLC outfit is mostly identical to the default outfit, but one of its spiked protrusions is broken, and his shield is the same as his default outfit. In his EX Mode in all of his outfits, except for his second alt (in which the shield's design is the same in both modes), the Lustrous Shield is recolored black with gold and red linings.
The Warrior's crystal is a large blue shard in reference to the elemental Crystals from Final Fantasy.
")
")
")
")
Personality[]
No matter what becomes of the world... the light will always be with us.
Warrior of Light
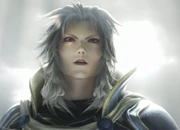
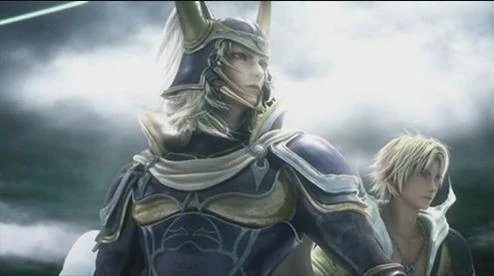
Warrior of Light without his helmet in the Dissidia 012 opening FMV.
The Warrior of Light is calm, stoic, tactical, and focused, solemnly believing in Cosmos and that her victory will come as a result of the valor of her warriors. Determined and confident in his abilities, he pays no heed to the taunts and attempted manipulations of the villains he battles. Though he grows concerned that they know something vital he does not, he continues to believe in the light and struggles onward. Even Cosmos is unable to sway his resolve, the goddess concerned over the growing risk of the battle, and the Warrior telling her that she taught him to always keep fighting. The Warrior's unflappable demeanor often makes it hard for his allies to understand him.
The Warrior is a virtuous and kind soul to others, even towards his nemesis, Garland. When Garland reveals the war is a cycle and they cannot permanently kill each other, the Warrior declares he will fight to end the cycle and will save Garland from his eternity of battle as well. Towards the other warriors of Cosmos, he is a stern but compassionate leader, temporarily straying from his path to rescue Firion from Sephiroth and challenging Squall to ensure he is strong enough to travel alone safely.
The Warrior speaks in a frank yet courteous manner and does not hesitate to speak his mind. He acts in his comrades' best interests, even if some, such as Squall, do not share the same mindset, and apologizes for any misjudgments. In Dissidia 012, the Warrior is initially the only other warrior of Cosmos aware of Kain's plans to incapacitate the others to save them from the manikins, and does his utmost to ensure his comrades' survival in spite of their disagreements. The Warrior realizes that due to the horde of manikins, they can only survive by submitting to the cycle's nature and accept defeat as inevitable to be reborn for a chance to end the cycle next time.
He is loyal to Cosmos and protective of her, being her closest warrior. He fearlessly defends her even at the expense of his own life. At the end of the twelfth cycle, the Warrior battles an army of manikins to protect Cosmos from being permanently killed. He apologizes to her for being unable to lead her warriors to victory, and, in spite of his actions, his faith in her has never wavered. He encourages her to trust in her surviving warriors in the next conflict. He is horrified when Cosmos confronts the manikins directly to protect him, knowing that her actions would kill her.
History[]
Early cycles[]
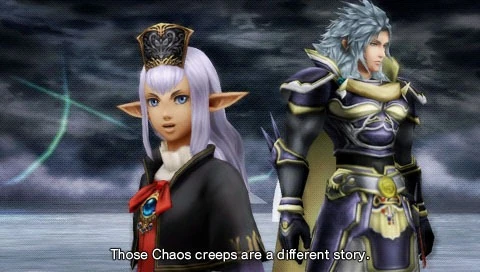

The Warrior of Light with Prishe.
During one of the previous cycles of conflict, Cid of the Lufaine attempted to make a perfect manikin from his own memories. After repeated failures, he created a manikin whose body did not crystallize and had no signs of will, which Cid attributed to an incomplete transfer of his memories. He placed it among the other summoned warriors of the cycle to see what became of it. Prishe and Garland find him in the Chaos Shrine. Though Prishe is confused by his appearance, Garland recognizes the Warrior and tells Prishe she cannot understand what he is. The two battle over the custody of the newly summoned Warrior as he stands aside in a confused daze. After the battle, the victorious Prishe takes the Warrior to Order's Sanctuary, where she and Shantotto convince Cosmos to imbue him with her power, transforming him into a warrior of Cosmos.
At the Empyreal Paradox, the Warrior of Light tells Prishe he has no name and no memories. While the Warrior claims that he does not need memories, and that as long as he fights, he has a use and purpose to defined himself as a person. Prishe argues that emotions are more important and that he should take strength from them. She reassures the Warrior that he doesn't need memories to know who he is, and thinks about bringing the topic up with Cosmos before proclaiming she knows what his name should be.
In an unspecified cycle, the Warrior is fighting against Gabranth with Prishe, who warns them he is merely a distraction - unguarded, Cosmos has been killed by Garland. With her death, her summoned warriors begin to fade from the world. Prishe vanishes first, urging the Warrior to remember his name. The Warrior attempts to get to Cosmos, but vanishes before he can make it.
Cid did not know what became of the warriors that vanished from this event, but none of them ever reappeared again, except for the Warrior of Light. Why he survived was unknown even to Cid.
12th cycle[]
At the beginning of the twelfth cycle, the Warrior meets up with Lightning, Jecht, and Kain to warn them of approaching enemies. Under Kain's advice, Lightning teams up with the Warrior to see if she is stronger than him. Traveling ahead, the Warrior and Lightning fight the waves of warriors of Chaos. After thinning out the enemies' ranks, the Warrior thanks Lightning for her help before going off on his own to deal to the remaining few enemies. During a discussion with Jecht and Kain afterwards, Lightning acknowledges the Warrior's strength and his position as the pseudo-leader of the warriors of Cosmos.
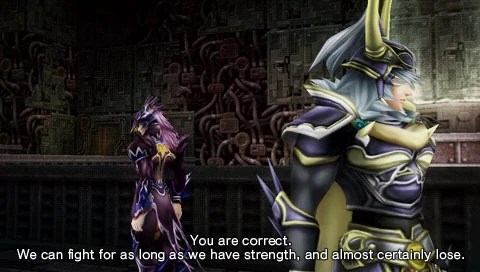
Warrior of Light and Kain discuss the manikins.
Having learned from Kain the cycle's true nature, the Warrior agrees that they cannot defeat the manikins and must accept their defeat to survive to the next cycle. Kain pursues the other warriors while the Warrior shields him from harm. When an encounter with Kain alerts Lightning to his actions, the Warrior listens to her telling Cosmos of Kain's "betrayal" before fighting her himself. Cosmos makes him reveal what he and Kain are doing, but the Warrior's reasons and intentions only further anger Lightning as Laguna, Vaan, and Yuna arrive. The four agree to remain awake to stop the manikin infestation, and the Warrior can do nothing but wish them good luck, remaining behind to protect Cosmos. The Warrior later witnesses Terra's conversion into a Warrior of Cosmos when she makes her way to the Sanctuary.
As Lightning and her group fall defeating a horde manikins to close the portal to the Rift they are emerging from, the Warrior battles a second army that is attacking Order's Sanctuary. When his strength wavers, Cosmos calls out to him by the name given to him by Prishe, and expends her power to destroy the remaining manikins and save him. The Warrior and the other warriors of Cosmos are transported into another realm where he sees Lightning and her group fade. The other warriors of Cosmos are purified by Shinryu to participate in the final cycle of conflict, and the Warrior is transported back to World B, unconscious.
13th cycle[]
Warrior of Light and Tidus.
Awakening and hearing Cosmos calling to him, the Warrior travels to Order's Sanctuary to find Cosmos weakened from her actions in the previous cycle. She appears to the other champions in a vision and instructs them to obtain their crystals to have hope of victory. The Warrior sets off to seek his, and comes across Garland, who questions his resolve. The Warrior defeats him, only for Garland to tell him he will know the truth of the conflict soon.
The Warrior meets Cecil and Tidus, who have been ambushed by Sephiroth. Firion pursues the swordsman alone to reclaim something stolen from him, and the Warrior tracks the two down. Sending Firion back to Cecil and Tidus, the Warrior engages Sephiroth in Firion's place. After the duel, Sephiroth asks why he fights, and the Warrior replies that it is for the crystals and for the war to end. Sephiroth says the fighting will not end, and the Warrior fights for the thrill of it, just as he does. Sephiroth departs to confront Cloud, leaving the Warrior of Light puzzled, but still determined.
The Warrior encounters Ultimecia, who taunts his resolve to end the war and claims it is ridiculous to risk his life for the crystals. The Warrior ignores her words and defeats her. Ultimecia warns his comrades are losing their faith in the crystals and questions his trust in them. Shortly after the Warrior encounters Squall, who is traveling alone. Squall declares he will fight and find his crystal on his own, and the Warrior questions if he is strong enough to follow his path in solitude. The two battle and Squall wins, telling the Warrior that while he travels alone, he still has his comrades' support and shows him Bartz's good luck charm. Satisfied with his strength and his trust in his allies, the Warrior continues on and leaves Squall to his chosen path.
Cosmos approaches the Warrior and tries to dissuade him from his journey. The Warrior insists on continuing, even when hope seems lost. Cosmos decides to keep believing in them until the very end. The Warrior arrives in Pandaemonium and faces the Emperor, who tries to sway the Warrior with a fake crystal. He sees through the ruse and destroys it, declaring the crystals are earned through their own strength, not by the mercy of an enemy. The Warrior defeats the Emperor, who disappears. Garland arrives and tells the Warrior to follow him if he wants to know the truth behind the war.

Warrior of Light faces Garland.
The Warrior pursues Garland to the Chaos Shrine, where Garland reveals they are trapped in an endless cycle. The Warrior swears he will break it and the two duel. The Warrior wins and earns his crystal, but Garland warns he will return. The other warriors of Cosmos arrive, and the ten return to Cosmos with their crystals. Bartz suggests getting the others to help think up a name to call the Warrior by, but he turns down the offer, as he does not want to bury the hidden memory of the name given to him by Prishe.
The heroes gather at Order's Sanctuary, but Cosmos tells them they are too late. Chaos arrives, transports everyone to his throne, and incinerates Cosmos. The heroes begin to disappear and find themselves in darkness. The last remaining strength of Cosmos's spirit within the crystals teleports them back to Order's Sanctuary, giving the group a chance to strike back against Chaos and his warriors.


Warrior of Light walks towards Castle Cornelia.
On their way to Chaos, the Warrior feels uneasy how the others are regaining their memories while he is not. Although the others assure him he will remember his past in time, Tidus tells the Warrior there is more to memories, and the Warrior promises he will remember his friends after the battle. After defeating the warriors of Chaos again, the warriors of Cosmos reach Chaos's throne and challenge the god to a final battle. Chaos is vanquished, and the warriors are teleported away as he is consumed in fire. They find themselves in World A and fade back to their own worlds one by one, while the Warrior remains and begins walking towards Castle Cornelia with his crystal in hand.
Confessions of the Creator[]
In a non-canon scenario in Dissidia 012, after the cycles ended, Shinryu punished Cid for intervening in the war in the thirteenth cycle, breaking their pact. Cid was trapped in an alternate dimension where he believed the cycles of war continued, and Chaos eventually went berserk and transformed into Feral Chaos. The Warrior of Light is mentioned by Cid as "the only one born in this realm" who was the last surviving warrior summoned by the other god, and perished trying to protect Cosmos from Feral Chaos after the twentieth purification.
Gameplay[]
The Warrior of Light's fighting title is Paragon. He is a well-rounded character specializing in close to mid-range attacks, and a handful of minor support magical attacks. His attacks cover most strategic needs for striking various horizontal and vertical distances, and he has several Bravery to HP links. His primary weaknesses are that many of his Bravery attacks have a bit of start-up to them, fair end lag, and most are low priority - this makes the Warrior easy to block or evade and punish. Ironically, the Warrior himself is a defensive character - aside from possessing HP attacks with Block effects, he has the second-highest base defense at 113, and his exclusive weapons and EX Mode can boost his damage resistance further.
Boss[]
In Dissidia, the Warrior of Light is fought in Destiny Odyssey VIII, Distant Glory, and Inward Chaos.
In Dissidia 012, he is fought in Decision and Resolve for Seclusion chapters of Story Mode.
Attacks[]
Bravery Attacks[]
| Move | Type | CP (Mastered) | AP | Priority | Effect | Damage type | Obtained | Image |
|---|---|---|---|---|---|---|---|---|
| Dayflash | Ground | 30 (15) | 90 | Melee Low | Wall Rush | Physical | Initial | 
|
| A short three-hit combo that knocks the opponent away. Quick execution, but low range. DamageNormal = 8, 8, 10 = 26 DamageEX Mode = 5 + 4, 5 + 4, 10 + 6 = 34 EX Force generated: 115 | ||||||||
| Red Fang | Ground | 20 (10) | 120 | Ranged Low | None | Magical | Initial | 
|
| Conjure a fireball that tracks the opponent. Damage = 15 EX Force generated: 2 | ||||||||
| Sword Thrust | Ground | 30 (15) | 180 | Melee MidShield throw Melee LowSword combo |
Wall Rush | Physical | Level 3 | 
|
| Throw shield forward, then charge in to attack the opponent with sword.
| ||||||||
| Blue Fang | Ground | 20 (10) | 120 | Ranged Low | None | Magical | Level 19 | 
|
| Conjure small ice shards that fall on top of the opponent.
| ||||||||
| White Fang | Ground | 20 (10) | 120 | Ranged Low | None | Magical | Level 24 | 
|
| Conjure a string of lightning bolts that tracks the opponent. Damage = 10 each EX Force generated: 2 per hit | ||||||||
| Ascension | Ground | 30 (15) | 90 | Melee Low | Chase Wall Rush |
Physical | Level 30 | 
|
| Throw shield forward, then attack the opponent with sword to launch them up into the air. DamageNormal = 1, 2, 7, 30 = 40 DamageEX Mode = 1 + 4, 2, 7 + 4, 30 + 6 = 54 EX Force generated: 40 | ||||||||
| Crossover | Aerial | 30 (15) | 120 | Melee Low | Chase Wall Rush |
Physical | Initial | 
|
| Hit the opponent with spinning shield, then attack with sword to launch them into the air. DamageNormal = 2, 2, 6, 30 = 40 DamageEX Mode = 2, 2, 6 + 4, 30 + 6 = 50 EX Force generated: 40 | ||||||||
| Rising Buckler | Aerial | 30 (15) | 120 | Melee Low | Chase Wall Rush |
Physical | Level 9 | 
|
| Throw shield above you to hit multiple times, then knock the opponent down with a quick sword strike. DamageNormal = 1 x 4, 6, 15 = (25) DamageEX Mode = 1 x 4, 6 + 6, 15 + 6 = (37) EX Force generated: 135 | ||||||||
| Shield Strike | Aerial | 30 (15) | 120 | Melee Low | Chase Wall Rush |
Physical | Level 13 | 
|
| Throw shield below you to hit multiple times, then knock the opponent up and away with a quick sword strike. DamageNormal = 1 x 4, 6, 15 = 25 DamageEX Mode = 1 x 4, 6 + 6, 15 + 6 = 37 EX Force generated: 135 | ||||||||
| Move | Type | CP (Mastered) | AP | Priority | Effect | Damage type | Obtained | Image |
|---|---|---|---|---|---|---|---|---|
| Dayflash (ground) |
Ground | 30 (15) | 90 | Melee Low | Chase | Physical | Initial |
|
| A short three-hit sword combo that knocks the opponent away. Damage = 3 (+4EX Mode bonus), 4 (+4EX Mode bonus), 15 (+6EX Mode bonus) = 22/36EX Mode EX Force generated: 90 | ||||||||
| Blue Fang | Ground | 30 (15) | 90 | Ranged Low | None | Magical | Initial |
|
| Summon several ice shards that descend from above the opponent. Damage = 7 each EX Force generated: 0 | ||||||||
| Sword Thrust | Ground | 30 (15) | 90 | Melee MidShield throw Melee LowSword combo |
Wall Rush | Physical | Level 4 |
|
| Throw shield forward, then charge in to attack the opponent with sword. Damage = 6, 3×3 (+4EX Mode bonus), 15 (+6EX Mode bonus) = 30/40EX Mode EX Force generated: 30 | ||||||||
| White Fang | Ground | 30 (15) | 90 | Ranged Low | None | Magical | Level 8 |
|
| Summon lightning bolts that travel towards the opponent. Damage = 6 each EX Force generated: 0 | ||||||||
| Ascension | Ground | 30 (15) | 120 | Melee Low | Chase Wall Rush |
Physical | Level 19 |
|
| Throw shield to drag the opponent closer, then attack with sword to knock them into the air. Damage = 4 (+4EX Mode bonus), 5 (+4EX Mode bonus), 11, 20 (+6EX Mode bonus) = 40/54EX Mode EX Force generated: 90 | ||||||||
| Red Fang | Ground | 30 (15) | 90 | Ranged Low | None | Magical | Level 32 |
|
| Conjure a fireball that flies toward the opponent. Damage = 15 EX Force generated: 0 | ||||||||
| Crossover | Aerial | 30 (15) | 120 | Melee Low | Chase Wall Rush |
Physical | Initial |
|
| Move toward the opponent while spinning shield, then knock them into the air. Damage = 5, 5, 10 (+4EX Mode bonus), 20 (+6EX Mode bonus) = 40/50EX Mode EX Force generated: 90 | ||||||||
| Shield Strike | Aerial | 30 (15) | 200 | Melee Low | Wall Rush | Physical | Initial |
|
| Throw shield downwards to hit the opponent multiple times, then slash and knock them upwards. Damage = 2 x 4 (+6EX Mode bonus), 6 (+4EX Mode bonus), 16 (+6EX Mode bonus) = 30/42EX Mode EX Force generated: 30 | ||||||||
| Rising Buckler | Aerial | 30 (15) | 150 | Melee Low | Wall Rush | Physical | Level 15 |
|
| Throw shield upwards to hit the opponent multiple times, then slash and knock them downwards. Damage = 2 x 4 (+6EX Mode bonus), 6 (+4EX Mode bonus), 16 (+6EX Mode bonus) = 30/42EX Mode EX Force generated: 30 | ||||||||
| Dayflash (midair) |
Aerial | 30 (15) | 90 | Melee Low | Chase | Physical | Level 25 |
|
| Short three-hit aerial sword combo that knocks the opponent away. Damage = 3 (+4EX Mode bonus), 4 (+4EX Mode bonus), 15 (+6EX Mode bonus) = 22/36EX Mode EX Force generated: 90 | ||||||||
HP Attacks[]
| Move | Type | CP (Mastered) | AP | Priority | Effect | Damage type | Obtained | Image |
|---|---|---|---|---|---|---|---|---|
| Shining Wave | Ground | 40 (20) | 180 | Ranged High | None | Magical | Initial | 
|
| Swing sword to summon bursts of light forward. Tracks the opponent and has a high reach into the air. EX Force generated: 100 | ||||||||
| Shield of Light (ground) | Ground | 40 (20) | 180 | Melee High Block Mid |
Block Wall Rush |
N/A | Initial | 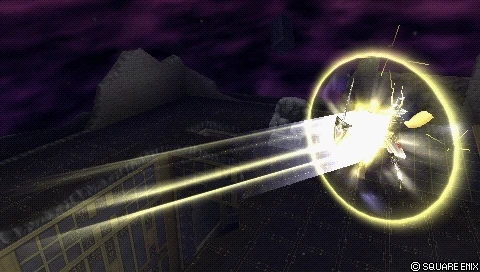
|
| Guard and hold out shield to unleash a short burst of energy, can block attacks if timed right. EX Force generated: 100 | ||||||||
| Shield of Light (midair) | Aerial | 40 (20) | 180 | Melee High Block Mid |
Block Wall Rush |
N/A | Initial |
|
| Guard and hold out shield to unleash a short burst of energy, can block attacks if timed right. EX Force generated: 100 | ||||||||
| Radiant Sword | Aerial | 40 (20) | 180 | Ranged Mid | Wall Rush | N/A | Level 38 | 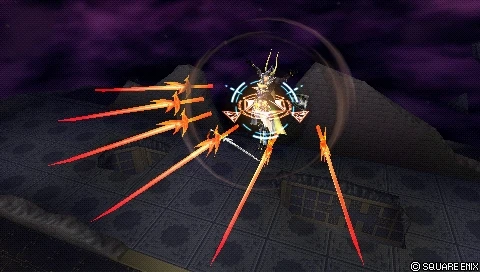
|
| Summon six swords of light which are fired at intercepting angles before flying towards the opponent. EX Force generated: 40 per hit | ||||||||
| Move | Type | CP (Mastered) | AP | Priority | Effect | Damage type | Obtained | Image |
|---|---|---|---|---|---|---|---|---|
| Shining Wave | Ground | 30 (15) | 130 | Ranged High | None | N/A | Initial |
|
| Swing sword to send a burst of light forward. Tracks the opponent and has a high reach into the air.br/>EX Force generated: 60 per hit | ||||||||
| Shield of Light (ground) |
Ground | 30 (15) | 130 | Melee High Block Mid |
Block Wall Rush |
N/A | Level 22 |
|
| Guard and hold out shield to unleash a short burst of energy. EX Force generated: 0 | ||||||||
| Ultimate Shield | Ground | 30 (15) | 130 | Melee High | Wall Rush | Physical | Level 28 | 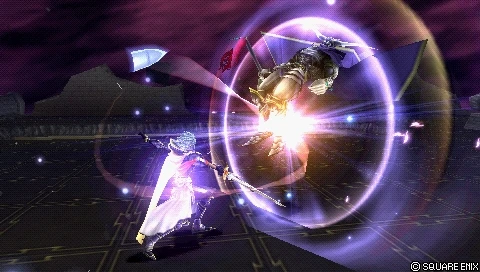
|
| Throw shield forward to pull the opponent closer, then strike them multiple times and knock them away. Can throw on an angle, including directly above. Damage = 4 x 3, 8 = 20 EX Force generated: 30 | ||||||||
| Shield of Light (midair) |
Aerial | 30 (15) | 130 | Melee High Block Mid |
Block Wall Rush |
N/A | Initial |
|
| Guard and hold out shield to unleash a short burst of energy. EX Force generated: 0 | ||||||||
| Radiant Sword | Aerial | 30 (15) | 130 | Ranged High | Wall Rush | N/A | Level 13 |
|
| Summon six blades of light that spread out and fly towards the opponent. EX Force generated: 0 | ||||||||
Bravery to HP Attacks[]
| Move | Type | CP (Mastered) | AP | Priority | Effect | Damage type | Obtained | Image |
|---|---|---|---|---|---|---|---|---|
| Rune Saber (ground) |
Ground | 40 (20) | 300 | Melee Mid | None | Magical | Ascension | 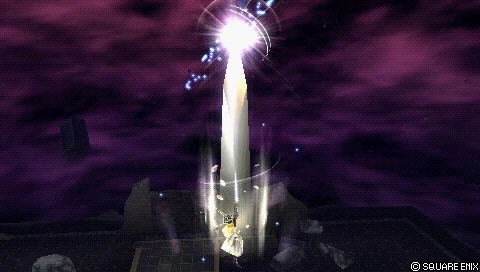
|
| Conjure a field of energy, damaging the opponent, before summoning a large sword of light that skewers them. Damage = 3 x 4 = 12 EX Force generated: 160 | ||||||||
| Rune Saber (midair) |
Aerial | 40 (20) | 300 | Melee Mid | None | Magical | Crossover |
|
| Conjure a field of energy, damaging the opponent, before summoning a large sword of light that skewers them. Damage = 3 x 4 = 12 EX Force generated: 160 | ||||||||
| Bitter End A | Aerial | 40 (20) | 300 | Melee Mid | None | Physical | Shield Strike | 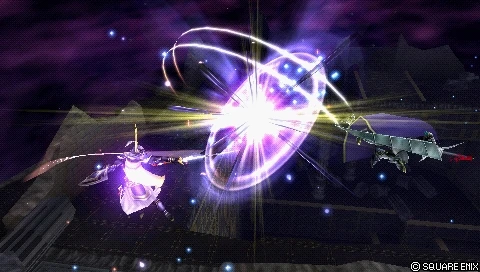
|
| Attack the opponent with a flurry of slashes, then knock them away. Damage = 1 x 6, 2 = 8 EX Force generated: 170 | ||||||||
| Bitter End B | Aerial | 40 (20) | 300 | Melee Mid | None | Physical | Rising Buckler |
|
| Attack the opponent with a flurry of slashes, then knock them away. Damage = 1 x 6, 2 = 8 EX Force generated: 170 | ||||||||
| Move | Type | CP (Mastered) | AP | Priority | Effect | Damage type | Obtained | Image |
|---|---|---|---|---|---|---|---|---|
| Rune Saber (ground) |
Ground | 30 (15) | 130 | Melee Mid | None | Magical | Ascension |
|
| Create a field of energy to damage the opponent, then stab upwards with an enormous sword of light. Damage = 2 x 3, 4 = 10 EX Force generated: 0 | ||||||||
| Rune Saber (midair) |
Aerial | 30 (15) | 130 | Melee Mid | None | Magical | Crossover |
|
| Create a field of energy to damage the opponent, then stab upwards with an enormous sword of light. Damage = 2 x 3, 4 = 10 EX Force generated: 0 | ||||||||
| Bitter End A | Aerial | 30 (15) | 130 | Melee Mid | None | N/A | Shield Strike |
|
| Strike the opponent with a combo of sword attacks, then knock them away. Damage = 2 x 6, 10 = 15 EX Force generated: 30 | ||||||||
| Bitter End B | Aerial | 30 (15) | 130 | Melee Mid | None | N/A | Rising Buckler |
|
| Strike the opponent with a combo of sword attacks, then knock them away. Damage = 2 x 6, 10 = 15 EX Force generated: 30 | ||||||||
EX Mode[]

The Warrior of Light's EX Mode is Class change, based on the Warrior's class change in the original Final Fantasy from Warrior to Knight. The Warrior of Light gains the bonuses "Mirror Attack," "Protect" and "Light's Blessing." Mirror Attack grants the Warrior Block Low priority when attacking, automatically reflecting lesser projectiles. Protect increases his DEF by 10, granting the Warrior 123 DEF at Level 100, the highest in the game without equipment. Light's Blessing summons swords of light to strike the opponent when the Warrior lands a successful combo, dealing additional damage and knocking them back further.
The Warrior's EX Burst is Oversoul, where he attacks the opponent with magical-infused sword blows. The player must press the directional pad commands shown on the screen as the Warrior dashes through his opponent to strike them several times. The Warrior ends the EX Burst by dashing through the opponent for a final strike that "detonates" the magical energy surrounding them, consuming them in an explosion of light. Failing to enter the pad commands will result in the Warrior skipping to the end of the attack and less Bravery damage done. In Dissidia Final Fantasy the final D-pad command is always left, while in Dissidia 012 Final Fantasy it will appear at random like the other commands.
")
")
")
")
Equipment[]
Warrior of Light can equip Swords, Greatswords, Axes, Shields, Gauntlets, Helms, Light Armor, and Heavy Armor. In Dissidia 012, the Warrior of Light can also equip Daggers, Katanas, Large Shields, and Chestplates.
Exclusive weapons[]
| Name | Level | Stats | Effects | Obtained |
|---|---|---|---|---|
| Flame Sword | 50 | ATK +36 | Defense +5%. | Trade: 15460 gil, Rapier, Spirit Stone x3, Protect Shard x2 |
| Braveheart | 92 | ATK +63 | Defense +10%. | Trade: 29570 gil, Flame Sword, Goddess's Magicite x5, Protect Crystal x3 |
| Barbarian's Sword | 100 | ATK +68 | Defense +15%. Minor Sneak Attack Effect. |
Trade: 31920 gil, Braveheart, Guiding Light x5, Protect Orb x5 |
| Name | Level | Stats | Effects | Obtained |
|---|---|---|---|---|
| Flame Sword | 30 | ATK +40 | Defense +5%. | Trade: 61000 gil, Rapier, Scarletite x1, Hero's Desire x5 |
| Braveheart | 90 | ATK +63 | Defense +7%. | Trade: 158,000 gil, Flame Sword, Electrum x1, Hero's Dream x5 |
| Barbarian's Sword | 100 | ATK +68 | Defense +10%. Minor Counterattack Effect. |
Trade: 182,800 gil, Braveheart, Guiding Light x1, Hero's Hopes x5 |
Behind the scenes[]
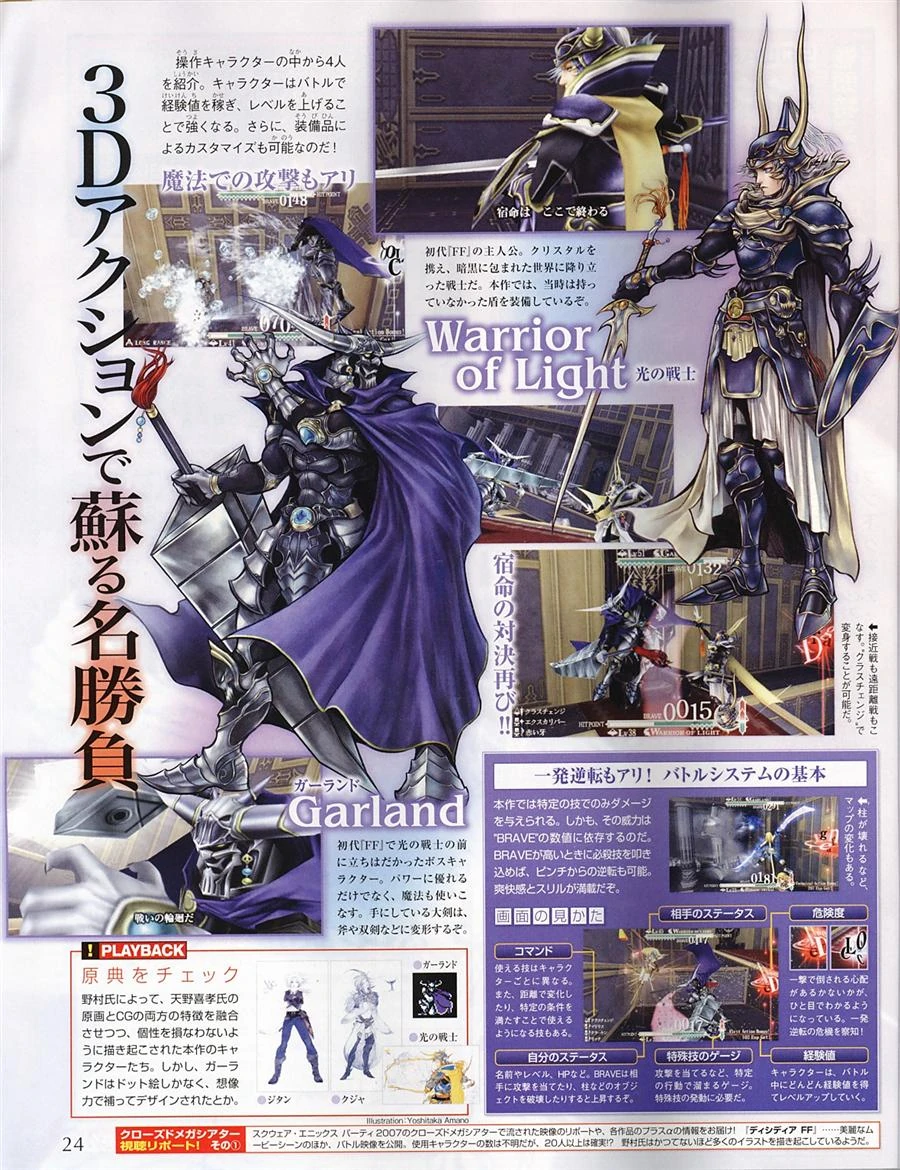
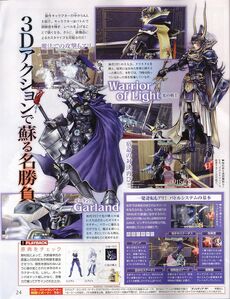
Magazine scan of early Dissidia coverage featuring the Warrior of Light and Garland.
The Warrior of Light, Garland, Zidane, and Kuja, were the first characters to be announced for Dissidia. The Warrior of Light is one of three characters (the other two being Zidane and Kuja) who have more than one intro line when facing their counterpart in battle; this is no longer the case in Dissidia 012.
The Warrior of Light's storyline has several unique aspects compared to others - he is the only character to fight the same boss twice in the same storyline, and he has the most boss fights, a total of five, while no other storyline has more than three. In the original Dissidia he was the only character who faced a boss in the middle of a stage instead of at the end, when he faced Ultimecia midway through Destiny Odyssey 3, and she was the only boss to grant a DP bonus; in Dissidia 012's equivalent gateway, this is no longer the case. His storyline is also the longest, beginning moments after Cosmos tells her warriors to retrieve their Crystals, and he does not obtain his until all the other warriors of Cosmos have.
Due to being used in cutscenes, the Warrior of Light's DLC outfit in Dissidia 012 is in the game files even if the player does not download the DLC; this may be why it was distributed for free.
In the ending of Dissidia and Dissidia 012, the warriors of Cosmos appear near Cornelia and they disappear save for the Warrior of Light, who begins to walk towards the castle. This mirrors the opening scene of the original Final Fantasy, and Dissidia Final Fantasy NT confirmed that at this time, the Warrior went on to take part in the story events of Final Fantasy. The Dissidia series is inconsistent if the Warrior of Light was one of four that participated in the plot of Final Fantasy, or if he was the only one.
Allusions[]
- The Braveheart is a weapon dropped by Yamatano Orochi in the Whisperwind Cove and Barbariccia in the Hellfire Chasm in the Dawn of Souls and later editions of Final Fantasy. The Barbarian's Sword is the strongest weapon available in the 20th Anniversary edition, obtained by defeating the strongest version of Chronodia in the Labyrinth of Time.
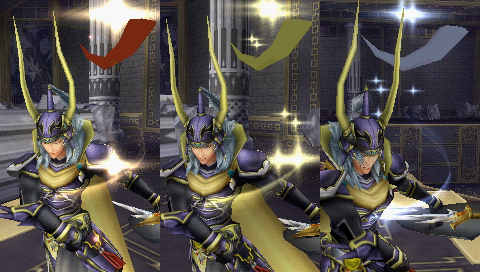
The three colored fang items.
- The Warrior of Light's Red Fang, Blue Fang, and White Fang attacks are named after recurring items that cast elemental magic when used in battle. When any of the three attacks are used, the Warrior reaches to his pouch and mimes throwing an item into the air as an appropriately colored fang rises from his body and vanishes. However, Dissidia gets Blue Fang and White Fang mixed up - the two items have varied on which deals ice and which deals lightning damage, but in the first Final Fantasy the Blue Fang dealt lightning damage and the White Fang dealt ice damage, while Dissidia reverses them.
- Before fighting Garland in Destiny Odyssey I-5, and when dealing the final blow in his EX Burst, the Warrior of Light makes the same pose as the one found on the original game cover
 , illustrated by Yoshitaka Amano.
 - The Warrior's EX Mode allows him to slash away magic projectiles while attacking. This may be a reference to the CGI cutscene from Final Fantasy Origins, in which he cuts through a Red Dragon's fireball.
- At the end of Destiny Odyssey 1-5 Warrior of Light states he will find a way to save everyone from the cycles, even Garland. This references the epilogue from Final Fantasy, which states that once the time loop was broken, the Warriors of Light returned to a Cornelia where Garland awaited them, having never turned evil.
- When using Shining Wave, the Warrior says "bathe in the Light", referencing the epilogue of Final Fantasy, which says that the four warriors used the elements that had destroyed the world "to bathe [it] in light".
- In Destiny Odyssey I, Warrior of Light faces Garland as his first boss, and again at the end of his story as his final boss. This is similar to the original Final Fantasy, where Garland, in various forms, is both the first boss and the final boss.
- In Dissidia 012, when the Warrior encounters the Bahamut summonstone in his storyline, who says "Long has it been since men of courage have stood before me. Come, I shall confer upon you my power!" The line is taken from the original Final Fantasy, which Bahamut said when granting the Warriors of Light their class changes as recognition of their power and bravery.
Gallery[]
")
")
")
")
")
")
")
")
")
")
")
")
Etymology[]
The Warrior of Light's fighting style is called Paragon. A paragon is a person or thing regarded as a perfect example of a particular quality. The title is often used figuratively to denote a model of excellence or perfection.