Cosmo Canyon is a town in Final Fantasy VII. First visited in "In the Land of the Study of Planet Life", Cosmo Canyon can be explored for a number of items, and is located directly above the Cave of the Gi dungeon. It is revisited for Huge Materia, Full Cure, and for Red XIII's ultimate weapon.
Locations[]
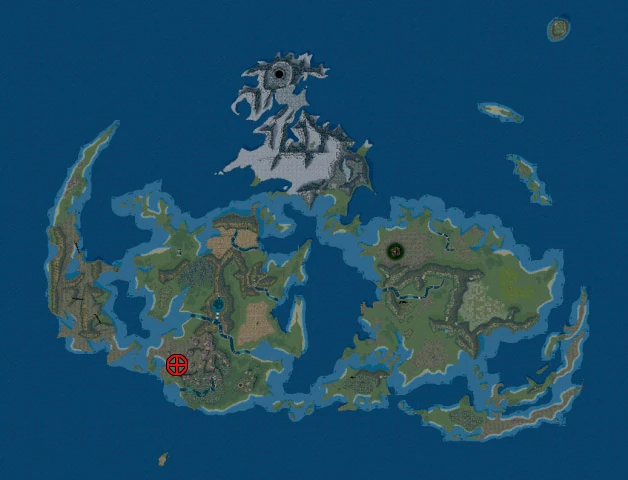
Location of Cosmo Canyon, indicated by crosshair.
Cosmo Canyon is located in the Cosmo Area of Gaia's western continent. It is located on the side of a canyon. The skies are always tinged red here, and the canyons and cliffs are barren. On top of a nearby lush plateau is the Ancient Forest.
Town[]
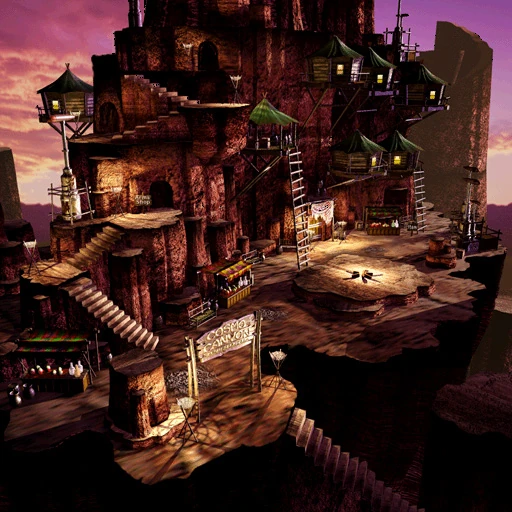
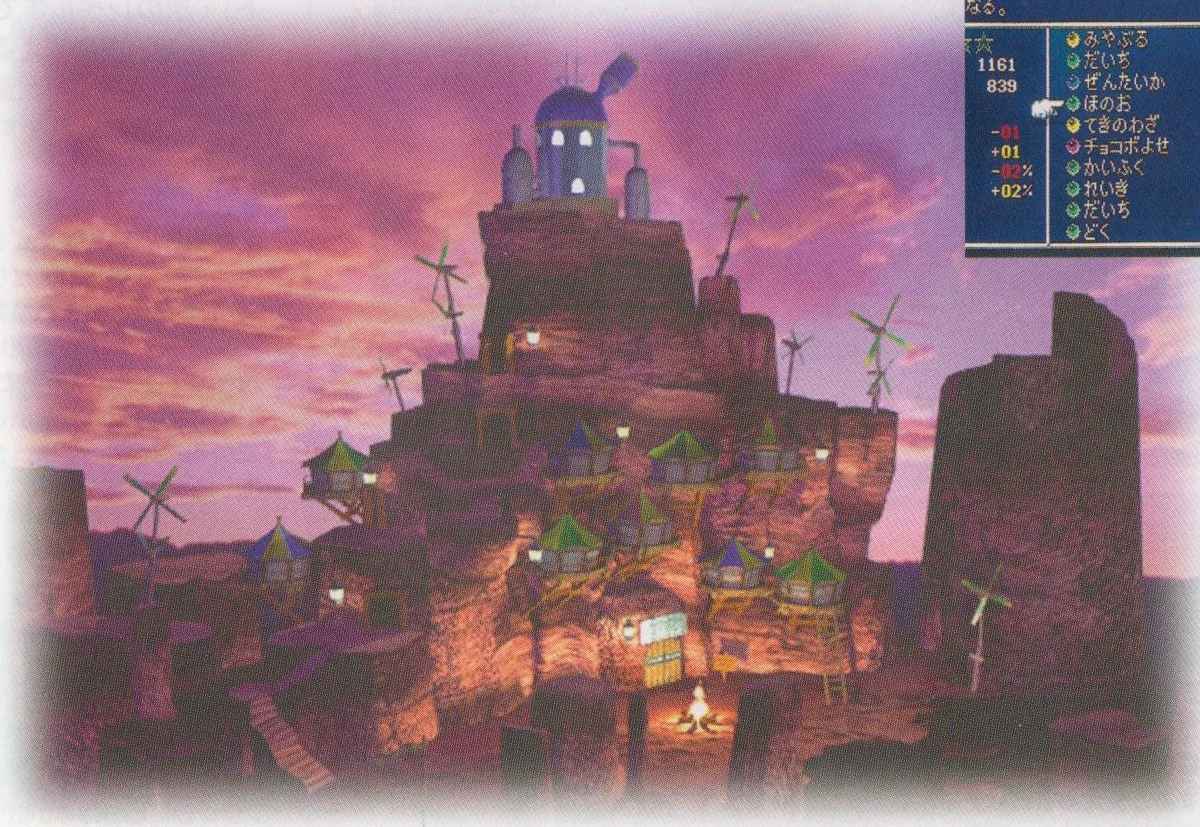
Town.
Exterior of the town at the bottom of the canyon has the entrance on the lower left corner. The Cosmo Candle is found here, a bonfire that never goes out.
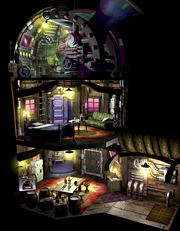
This location is split into three areas. The ground level is from where most areas are accessed. In the bottom left is the exit to the world map. In the top left there is a staircase up into the Tiger Lily Arms Shop. The sign outside reads "Arms Shop", though interacting with it gives the player dialogue advertising Pub Starlet and Shildra Inn. Further to the right is a door next to a ladder. The ladder can be climbed, although the hut it leads up to contains nothing. The door enters into Starlet Pub. In the top right is another ladder that leads up into the Item Store. Several other huts are visible, but cannot be accessed from this area, and not all of them correspond with rooms accessible from elsewhere. The ground level also has a bench and three stands stocked with various bottles, but none can be interacted with. A number of animated 3D wind turbines provide the town with electricity.
In the center of the area is the Cosmo Candle. At certain points the cast will gather around the fire, using its own close-up area. This occurs when the player visits before heading through the Gate of Naught, after completing the events at the Cave of the Gi, and later in Part 3 during the scenes involved in obtaining Red XIII's ultimate weapon.
A higher level exits from the Tiger Lily Arms Shop and leads up to the Gate of Naught. An elevated plateau connects to the Gate of Naught and allows a view over the entire canyon.
Above the town is the clifftop. This is accessed through a ladder in Gate of Naught.
Unused dialogue for this area indicates that a save point may have existed in this area at one point, but one is not present.
Tiger Lily Arms Shop[]

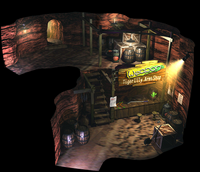
Tiger Lily Arms Shop.
The Tiger Lily Arms Shop (タイガー・リリー・アームズ・ショップ, Taigā Rirī Āmuzu Shoppu?) is the first inside area that branches off into a number of other areas. The area has a save point on the lower level and the Weapon Shop that sells weapons and armor. The letter to the player's left of the shop is the Turtle's Paradise Newsletter, Number 4.
The exit in the bottom left takes to the town onto the stairs descending to the canyon floor. On the upper level, the exit on the left leads into the ledge stairs leading to higher up buildings. The exit at the top leads into Elder Hargo's Room.
This area is referred to as Cosmo Canyon in the menu, and as 武器屋 (Buki Ya?, lit. Weapon Shop) in the Final Fantasy VII Ultimania Omega. The shop name is never referred to in dialogue, though the shop's name is written in English on the sign. The Japanese katakana for the sign is given in the Final Fantasy VII Ultimania Omega.[1]
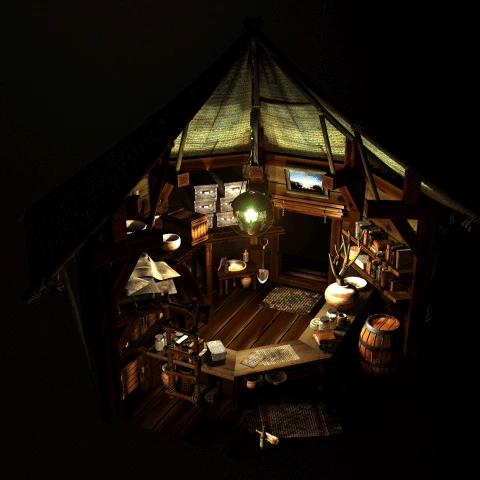
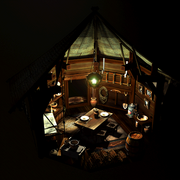
Elder Hargo's Room[]
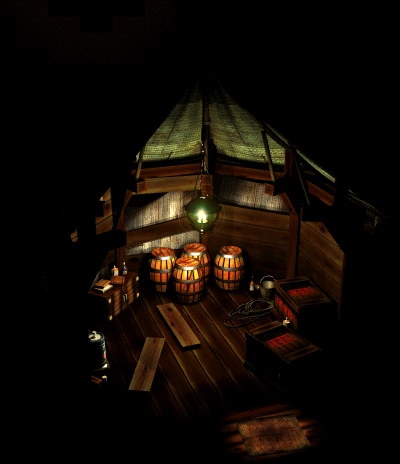

Elder Hargo's Room
Referred to as Elder's Room (長老の部屋, Chōrō no Heya?) in the menu, it is more fully titled as Elder Hargo's Room (長老ハーゴの部屋, Chōrō Hāgo no Heya?) in the Final Fantasy VII Ultimania Omega.[2]
Hargo is here, as is Barret when the party splits up. The room seems to be in an unusual state of disrepair, with boards fallen out of and been left strewn on the floor. The walls have been covered with cloth on the outside to provide insulation. Like the other huts, it is octagonal with a peaked cloth roof.
The room lacks the "lived-in" quality of the other huts, with the only hint that anyone lives there being some bottles and books on the lone cabinet and a mat near the doorway. The room is otherwise lined with various crates and barrels, and has a rope, oil can, and bucket tucked away in a corner. It is lit with a hanging lantern producing a greenish glow.
The only exit is back to the Tiger Lily Arms Shop.
Gate of Naught[]
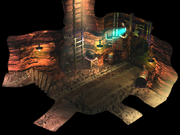
Gate of Naught (open)
Beyond the gate is the descent to the Cave of the Gi. The gate is only opened once during the plot.
The stairs to the left lead to an elevated plateau offering a view of the town. The path next to that leads back outside to the stairs down. The rightmost path leads to the Dining Hall. The final path leads to the Materia Shop. The ladder up leads to the Clifftop.
While there are a few containers tucked away in corners, the most prominent feature is the vault door leading to the caves beneath the town.
Starlet Pub[]
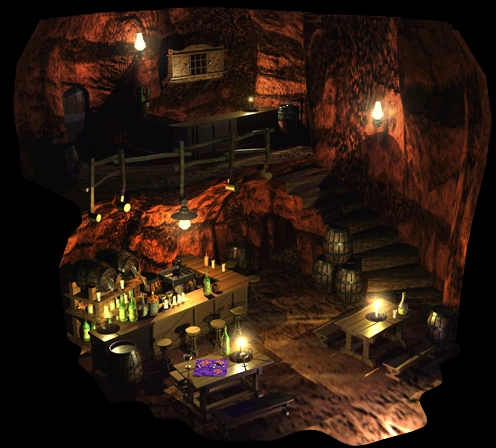

Starlet Pub
The counter for the Shildra Inn is on the upper level. If the player talks to the clerk when Tifa is the party leader, he will incorrectly refer to the inn as the "Shindra Inn". The innkeeper's desk has a potted cactus near the inn room's door, and a pigeon hole setup with two cabinets on the wall behind.
The bar is well-stocked with bottles and a pair of tapped kegs. There is a sink behind the bar. Additional kegs are stacked against the stairs up and tucked into corners. The bar has four stools and there are two picnic tables with candles. One table has a sake set, while the other has a wine bottle and glass on one side of a card game in progress.
Nanaki's Room is accessed from the ground floor using the door on the right and traversing a staircase in the Cave room.
There is a Turtle's Paradise poster near the door to the inn. The only inhabitants are the innkeeper, bartender, and one patron.
Cave[]
A small in-between Cave area linking the Starlet Pub to Nanaki's Room. It contains a staircase and a few storage containers.
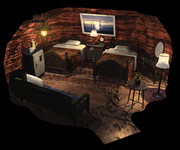
Materia Shop[]
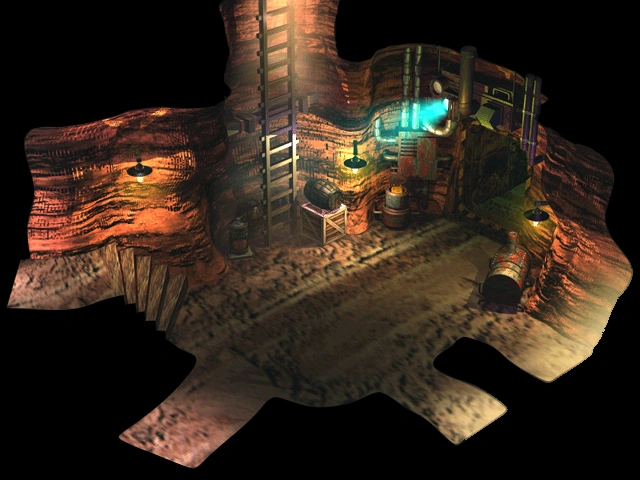
Materia Shop
The Materia Shop has one exit, to the Gate of Naught, and is a combined living space and shop. The owner sleeps behind the counter, as he gets so little business. His sleeping mat in the lofted area can reach using a ladder behind the counter. Other homey touches include a large frame containing what may be a promotional image of Rocket Town depicting a launch over the door, two shelves full of books, and a woody plant growing out of a round urn, though said plant lacks greenery and may be dead. A pair of bottles, one tipped over, on the floor close to where he is often found sleeping with his back to the counter might hint at how he spends his ample downtime. These bottles are not normally visible due to the camera mechanics and are likely an Easter egg.
The loft serves as additional storage space and there are several crates beneath it, including one that blocks the player from going behind the counter. A greenish glow from the hanging lamp illuminates the room. Like many of the other huts, it is octagonal and made of wood, save for the peaked cloth roof.
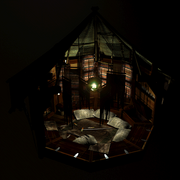
Dining Hall[]
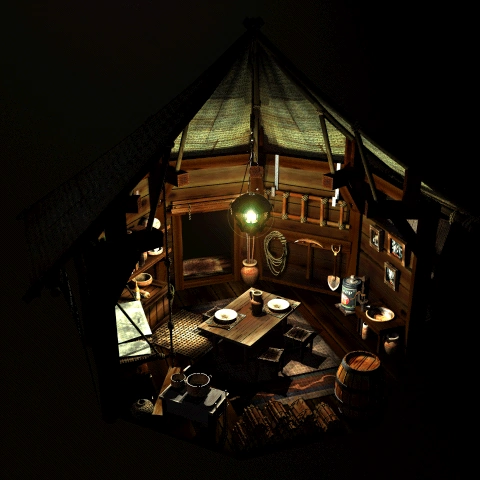
Dining Hall
An adult and child are found here. The room combines certain aspects of a living space and mess hall. There is a large table with three padded stools, set with a pitcher and a dirty plates with wooden spoons laid askew on the place mats on two opposite corners. A small boiler provides hot water to a pump and basin. There is a stove and many cords of wood piled next to it. Mining equipment including a rope, ladder, shovel, and rusty pick axe with one tip worn shiny hung on the wall.
There is also a hanging bed with a number of framed pictures on the wall opposing it. There is one barrel and numerous small pots and urns placed with care. A mat lies outside the door, and a patterned rug dominates the floor, with a drainage mat placed over one corner.
The room is unusually prim among the huts in town. It is an octagonal room made of wood with a peaked cloth roof, illuminated by a hanging lantern with a greenish glow. A slatted screen is tied above the door.
The only exit is back to the Gate of Naught.
Nanaki's Room[]
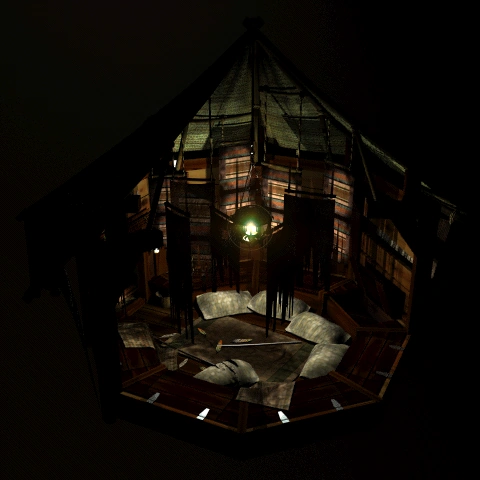
Nanaki's Room
A small octagonal room with cloth walls, a peaked cloth ceiling, and a ring of storage seats around the perimeter, excluding the doorway. A pair of metal bars and a few green and orange feathers are strewn about the floor over a dirty rug. Pillows are laid out inside the ring on the floor in minor disarray, and two additional smaller rugs are laid over the storage benches. From the ceiling hang four tattered black banners and a lantern with a greenish light. Despite the high level of detail, there are no obtainable items nor notable events in this room. When the party splits up, Red XIII can be found here.
Shildra Inn[]

Shildra Inn
An inn room can be paid for on the upper level of the Starlet Pub. There is a hidden Elixir in the futon.
The room is carved from the stone of the canyon and features two beds, a futon, and several modern amenities, including a standing lamp, refrigerator, bedside lamp, and alarm clock. It also features older amenities, including a hanging lantern, dressing table and mirror, and picture of a scenic sunrise. A standing table features a pot of flowers, while the bedside table has a book in the niche. There is a pitcher and two glasses atop the fridge and a barrel in the corner.
Item Store[]


Item Store
Accessible by climbing a ladder from the main part of Town, it is a unique two-hut location, and the only shop in town where the living quarters are not in the shop itself, when living quarters are visible. Initially, only the shop is accessible, or even visible, due to the area behind the counter being roped off. When the player has the Highwind, they can access the living quarters in the other hut via the bridge between them, and pick up the valuable Full Cure Materia.
The shop has numerous containers ranging from barrels and crates to small boxes. Several irregular sacks hang from the ceiling along with a lantern emitting greenish light. There is a large potted plant and a balcony outside used for additional storage.
The house contains a hanging bed and several bottles and small containers, as well as several framed pictures. A table set with a bottle, bowl, and wine glass stands at one of the walls facing the player. A greenish-glowing lantern hangs from the middle of the ceiling, with an orange-glowing device beneath it. Several pieces of junk are leaned against the far wall.
Both are octagonal rooms with wooden walls and peaked cloth roofs. The bridge between them is made of the same wood and has railings on both sides. It appears to branch off at an angle and may have been intended to indicate access to further huts, but no further rooms are accessible in that direction. A slightly lighter area implies the canyon wall, which this branch of the bridge ostensibly curves around, as it disappears behind the back wall of the shop.
Clifftop[]


Clifftop and Observatory
The area outside the Observatory is fenced off, but has an open gate leading to a small telescope on a stand. A ladder leads down to the Gate of Naught. The door leads to Bugenhagen's Room. The balcony is accessible from inside the building and represents the highest point in the canyon.
The gate is topped with multicolored illegible letters. The Planetarium is topped with a spinning satellite dish done in 3D mounted on a post in the background depicting the wire coiled around it. The Observatory itself has a giant telescope and what appears to be a crow's nest above the entrance to the balcony, which, while not accessible, supports a rod that holds a silver crescent moon aloft. There is also an animated 3D weather vane near the door.
Bugenhagen's Room[]

Bugenhagen's Room
A three-level house including the Observatory. The Planetarium is accessed through the door on the far wall. The doormat indicates the exit to the clifftop outside.
The ground floor contains a kitchen with a stove and sink, refrigerator and freezer, and a table with seating for four set with a mug and two bottles. Additional bottles are set on a crate nearby and there are several barrels set out of the way. A table on the other side has a lamp and book set on top. A large red and yellow rug dominates the floor.
A ladder leads to the bedroom, which has both a bed and a futon, a standing lamp, and a table set with a pitcher and bottles and two glasses. A rug matching the floor below dominates the floor here as well, but is turned so the corners oppose. The same ladder used to reach this floor can be followed further up to the balcony outside. A separate ladder leads to the observatory.
The observatory is dominated by the telescope, but also has a screen depicting another galaxy on the opposite wall.
Pipes, valves, and pressure meters permeate the whole building.
Planetarium[]
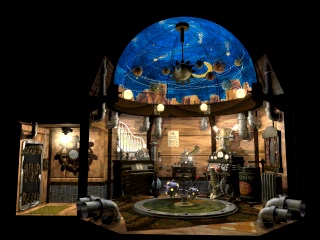

Planetarium
Accessible only from Bugenhagen's Room, with the exit back to the left, the room has two levels. The ground level has a large ship's wheel mounted on the wall near the door, a stylized pipe organ, and an old-style phonograph with a trumpet-style horn in the back. There is a black boiler barrel connected to a pipe leading down to a large radiator to provide heat to the room, though it is inactive. A charcoal gray machine controls the olive green platform in the center of the main part of the room, which has a gemini projector ball setup in the middle. Above the green circle is a cerulean dome with orange mountains around the lower rim and a large apparatus consisting of a sun, planets, and shooting stars connected by a number of circular supports. A wooden rim lined with globe lights separates the two.
Activating a red-balled lever raises the platform. Upon arrival to the upper level, the celestial accoutrements take on a more realistic appearance, moving around seemingly without support and able to respond to Bugenhagen's interactions. The physical objects may serve as holographic markers to a much more complex simulation, similar to augmented reality, or might otherwise move out of the way or themselves be a much simpler simulation. The lever will lower the platform when flipped again.
During the party's first visit to Cosmo Canyon, Bugenhagen will show Cloud and two other party members (excluding Red XIII, who has already seen it) his Planetarium. During the show, one of the non-Cloud party members will comment on it just before a shooting encircles him or her. This character depends on the priority of the current party members: it can be Barret, Tifa, Aeris, or Yuffie, with only Cait Sith guaranteed not to be the one.
- The shooting star will fly around Aeris regardless of who else is in the party with her.
- The shooting star will fly around Tifa if Aeris is not in the party with her.
- The shooting star will fly around Yuffie only if neither Aeris nor Tifa is in the party with her.
- The shooting star will fly around Barret only if none of the female characters are in the party with him, meaning only Cait Sith can accompany him.
Seto's Wall[]
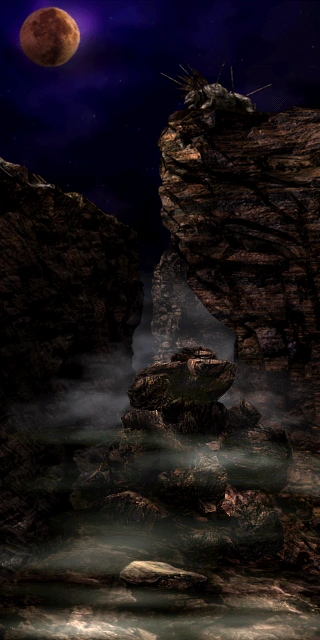

Seto's Wall
Seto's Wall lies beyond the exit of the Cave of the Gi. It is only visited once for one scene. Seto stands at the top of the area, petrified, while a red moon hangs in the night sky. Bugenhagen relates Seto's heroic sacrifice to the party. Red XIII promises to honor his father's name and to become a great warrior and save the planet, causing Seto to cry glinting tears. The party is returned to the Cosmo Candle.
Red XIII's promotional art ![]() depicts him standing beside his petrified father while the moon shines white. While this does not depict events in the game, the key art sometimes indicate the characters' desires. It may also indicate that Red XIII returns later to tell his father of his deeds, similar to his promise to return to tell Bugenhagen.
depicts him standing beside his petrified father while the moon shines white. While this does not depict events in the game, the key art sometimes indicate the characters' desires. It may also indicate that Red XIII returns later to tell his father of his deeds, similar to his promise to return to tell Bugenhagen.
Quests[]
Turtle's Paradise[]
There are two Turtle's Paradise flyers in Cosmo Canyon: number 4 in Tiger Lily's Arms Shop on a post of the shop, and number 5 in Starlet Pub next to the counter for the inn. Finding all flyers scattered around the game wins a prize in Turtle's Paradise bar in Wutai.
Hidden Elixir[]
A man near the bonfire is the one who will fix the player's broken buggy. If the player insists on paying him 1000 gil, he will tell that there is a treasure in the couch in the inn, which turns out to be an Elixir. The player can get the Elixir without getting the hint.
Date mechanics[]
Before the party's second storyline visit to Gold Saucer, various player choices play toward choosing who will be Cloud's date that night.
When entering Cosmo Canyon for the first time, the party will split. If the player had Barret in the party during this time, they can exchange dialogue about the formation of Avalanche in the room behind the weapon shop. Asking Barret to go on (+3 affection points) and tell more (+3 affection points) will give points toward getting Barret in Gold Saucer as a date.
The first question's affection points can be received an unlimited amount of times. After giving the first answer, respond with "Yeah, whatever..." and, due to a script error, the dialogue will reset when the player exits and reenters the room. In some versions of the game, it is possible to lock oneself out of the trophy for dating Barret by raising his affection level too high in with this exploit, even if Barret will be Cloud's date.
Hidden items in item shop[]
If the player returns in Part 2 after the Meteor has been summoned, they can get to the back room of the Item Shop to find a Full Cure, Elixir and a Magic Source.
Fort Condor[]
There is a battle at Fort Condor for a Megalixir after getting the buggy but before entering Cosmo Canyon, another one for five Hi-Potions when the party gathers around the fire but before entering the Cave of the Gi, and another for five Hi-Potions any time after Cave of the Gi, but before speaking to Shera in Rocket Town.
The second of these battles is easy to miss because the buggy will break down if is is taken near Cosmo Canyon and won't be fixed until after the Cave of the Gi events. To do this battle, the party must park the buggy before getting too close to Cosmo Canyon and travel the rest of the way on foot.
Mystery Ninja[]
There are no forests around Cosmo Canyon to fight the Mystery Ninja in, however, if the player exits to the world map during the events of Cosmo Canyon (after selecting the party around the fire, but before Cave of the Gi, before that and the player will be unable to leave anyway), they cannot encounter Mystery Ninja. This is one of the few times that she is unencounterable in forests.
Huge Materia[]
The Huge Materia the party captures from Shinra Electric Power Company are stored in the observatory. If the correct conditions are met, the player can obtain Master Materia from them. Master Magic is acquired by bringing at least one copy of all mastered Magic Materia to the green Huge Materia, whereupon the Materia merge. The player loses all individual Materia pieces, but all the spells will be contained in Master Magic. The process can be repeated were the player to master all the base Materia again.
The player obtains a Master Command Materia if they bring a mastered Steal, Sense, Throw, Morph, Deathblow, Manipulate and Mime Materia to the yellow Huge Materia. The Materia merge into a Master Command that has all the base commands from the merged Command Materia, as well as Coin. Pairing Master Command with Support Materia applies the effect to all commands, however, including Attack and Item.
If the player presents the Bahamut and Neo Bahamut Summon Materia to the blue Huge Materia, they will acquire Bahamut ZERO without losing Bahamut and Neo Bahamut.
Bringing all mastered Summon Materia to the red Huge Materia has them merge into a Master Summon. It is arguably the toughest to acquire, but the summons in it can be cast without restrictions.
If the player fails to obtain a Huge Materia, it won't be placed in the observatory. If the player misses out on one of them, the blue Huge Materia will not be placed in the observatory. If this happens, the player can still get Bahamut ZERO from Bone Village. If the player loses two Huge Materia, they miss out on the red and blue Huge Materia, and if they only save one Huge Materia, it will be the yellow one. It is possible to lose all four, and if the party arrives to Bugenhagen's observatory with no Huge Materia in their possession, the upper floor is inaccessible for the rest of the game.
Red XIII's ultimate weapon[]
If the player returns to Cosmo Canyon after the events in Midgar at the end of Part 2, Bugenhagen will give Red XIII his ultimate weapon, the Limited Moon.
Items[]
- Elixir (in the couch in the inn)
- Elixir (Part II in the Item Shop back room)
- Magic Source (Part II in the Item Shop back room)
- Full Cure Materia (Part II in the Item Shop back room)
- Limited Moon (Given after bringing Red to Bugenhagen on Part III)
- Bahamut ZERO Materia (only if all Huge Materia were saved and both Bahamut and Neo Bahamut Materia are held)
Shops[]
Weapon Shop[]
Store that sells weapons in the Tiger Lily Arms Shop area. The character at the counter in the lower-right of the screen is the shop keeper.
| Name | Cost |
|---|---|
| Butterfly Edge | 2,800 gil |
| Tiger Fang | 2,500 gil |
| Heavy Vulcan | 2,700 gil |
| Prism Staff | 2,600 gil |
| Silver Barrette | 2,500 gil |
| Pinwheel | 2,600 gil |
| Green M-phone | 2,400 gil |
| Silver Armlet | 1,300 gil |
Item Shop[]
| Name | Cost |
|---|---|
| Potion | 50 gil |
| Hi-Potion | 300 gil |
| Phoenix Down | 300 gil |
| Ether | 1,500 gil |
| Tent | 500 gil |
| Maiden's Kiss | 150 gil |
| Cornucopia | 150 gil |
| Soft | 150 gil |
| Hyper | 100 gil |
| Tranquilizer | 100 gil |
Musical themes[]
The background music to Cosmo Canyon is the eponymous song "Cosmo Canyon" (星降る峡谷, Hoshi Furu Kyōkoku?), which is similar to "Red XIII's Theme" (レッドXIIIのテーマ, Reddo XIII no Tēma?).
Behind the scenes[]
Early Cosmo Canyon design from the Japanese manual.
A form of Jenova was originally going to be fought in Cosmo Canyon.[3] Barret also mentions he had promised Jessie, Biggs, and Wedge they would go to Cosmo Canyon to celebrate one day.[4] The original script for Final Fantasy VII did include a scene where Barret and the other Avalanche members would talk about going to Cosmo Canyon, which was cut from the final version.[citation needed]
In the original game manual for the first Japanese release of Final Fantasy VII, there is an "early" screenshot of Cosmo Canyon. It exists as part of dummied content from the Honey Bee Inn, where TV screens would have displayed different game locations, the early Cosmo Canyon included. The differences between the two versions range from the presence of more rock formations in the foreground, to lamps, which were replaced with torches in the final game. The screen on the Wonder Square in Gold Saucer entrance in Final Fantasy VII also displays various scenes, one of them ![]() being the early concept art for Cosmo Canyon.
being the early concept art for Cosmo Canyon. ![]()

Bugenhagen's Alternate Final Scene - FFVII Unlocked
The game contains an alternate version of the scene where Bugenhagen bequeaths Red XIII his ultimate weapon. In the alternate version Cloud and the party don't leave Red XIII alone with Bugenhagen, but stand back to witness. After Bugenhagen tells Red XIII the latter should leave the valley and travel, he falls motionless. Red XIII panics, but Bugenhagen then presents the ultimate weapon, as if as an afterthought. Red XIII asks Bugenhagen to not scare him again like that. Bugenhagen tells the party they should not worry and that he will look after the planet's future, but if the player returns to his room after this scene, he will be gone for good. It is ambiguous whether Bugenhagen dies in this alternate version, and the party doesn't meet at the Cosmo Candle afterward.
Gallery[]
")
")
")
")
")
")
")
")
")
")
")