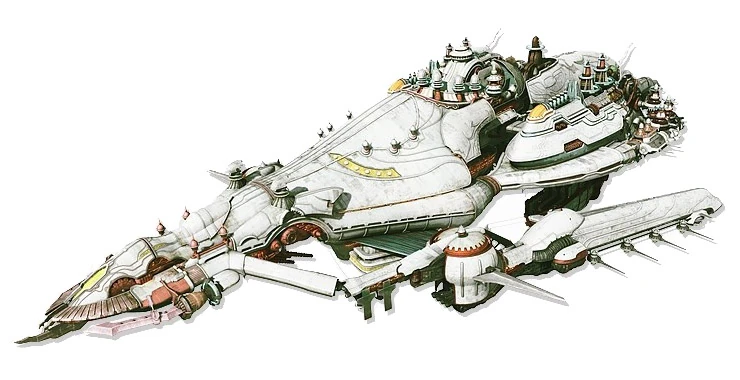
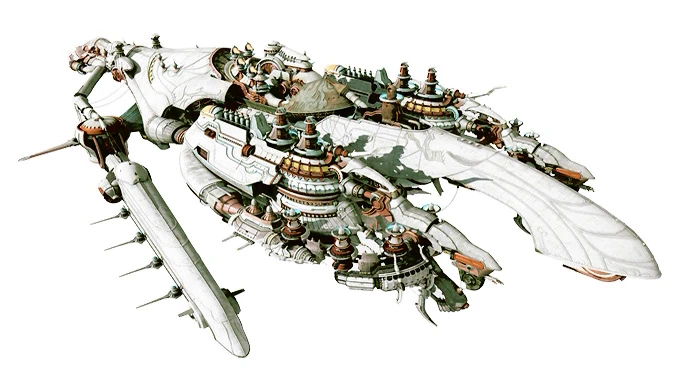
No. 1 Dreadnought class airship being the flagship of the 8th Fleet of the Archadian Imperial Army. The 8th fleet was assigned to the Galtea Tactical Force of the Western Armada, under the command of Judge Ghis. Fitted with a skystone made to resist the effects of jagd, the Leviathan was a linchpin of the Imperial Army's main force. Sunk in an explosion caused by the uncontainable reaction of the nethicite fragment known as the Dawn Shard.
Leviathan, Sage Knowledge
The Dreadnought Leviathan (戦艦リヴァイアサン, Senkan Rivaiasan?) is an airship that serves as an unrevisitable dungeon in the land of Ivalice in Final Fantasy XII. It is the flagship of the 8th Imperial Fleet of the Archadian Empire.
Story
Final Fantasy XII
Template:Sideicon
Dawn Shard in Leviathan's engine.
The Leviathan is the flagship of the 8th Imperial Fleet of Archadia, led by Judge Ghis. After the Resistance is caught trespassing the Royal Palace of Rabanastre, Princess Ashe is captured and taken aboard Leviathan. The player party is sent onboard the ship by Marquis Ondore to save her.
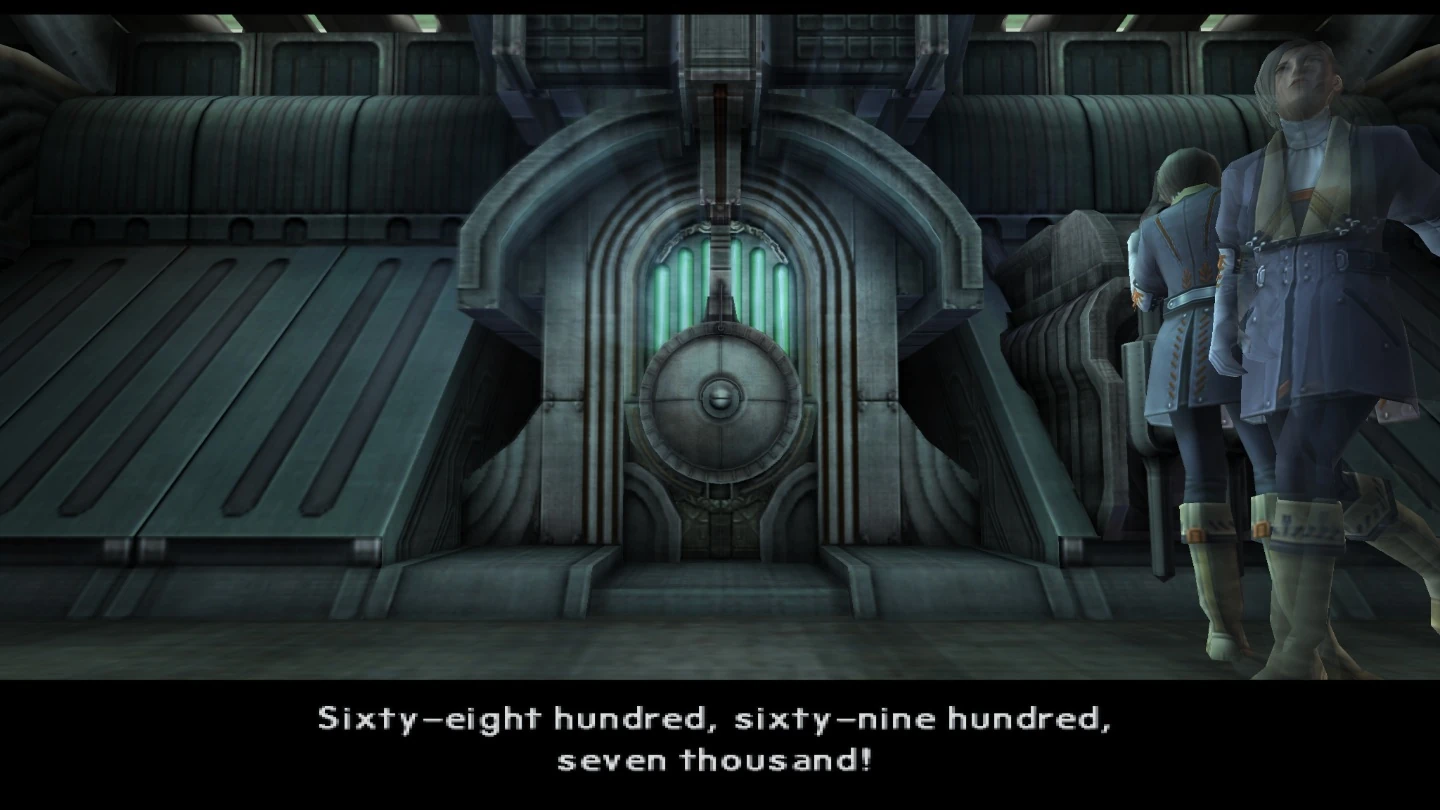
This is the only time the Leviathan can be explored. The Empire recaptures the party upon acquiring the Dawn Shard, and Ghis wants to test it by putting the shard in the ship's engine. At first the tests prove promising, but soon the shard reacts violently, compressing the Leviathan and incinerating the entire 8th Fleet in an explosion of mist.
Final Fantasy XII manga
Vaan, Basch, Balthier and Fran are sent aboard the Leviathan by Ondore, and the four meet with Ghis and Ashe, Ghis revealing Ashe's true identity. Ghis tells the party the cooperation of a royal family member would be valuable to Vayne, but Ashe has no proof of her lineage. Basch tells about the Dusk Shard of the Dynast King Raithwall, and ho he was instructed to deliver Ashe to it by Raminas if needed. The Goddess's Magicite—really the Dusk Shard—in the group's belongings reacts to Ashe's anger over Basch's willingness to cooperate, and reveals itself. Ghis seizes it and orders the group imprisoned, Ashe quartered separately.
As the Imperial soldiers escort the group away, Basch reminisces of a war in Landis against the Urutan-Yensa, when he fought full of youthful pride and was nearly killed for it due to his inexperience and ignorance. Vossler saves the group disguised as an Archadian soldier, and he and Basch ally to protect Ashe. The group flees to the airship deck and Penelo and Larsa arrive, Larsa surprised to learn both Ashe and Basch are alive. Larsa wishes to protect the Empire from a 'distortion' within that the news of their survival has aggravated, and gives Penelo a piece of manufacted nethicite to protect her.
Ghis arrives, and Vossler takes Larsa prisoner to stay the Judge's hand. Ghis attacks with a spell, declaring Larsa is prepared to die as an Imperial, but the spell is absorbed by the nethicite Larsa gave Penelo. Basch wounds Ghis and Balthier starts the airship. The group escapes the Leviathan, Larsa ordering Ghis to report the incident since the escapees have no proof of their identities, commenting there need not be a report of Larsa's capture and Ghis's reaction to it.
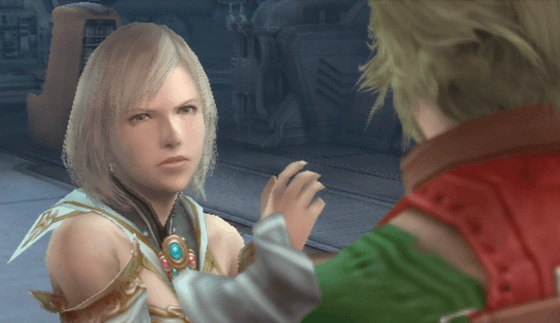
After Ashe's party is re-captured, they are brought on the Dreadnought Leviathan and Vossler hands the Dawn Shard to Ghis revealing Vayne has agreed that Dalmasca shall be restored with Ashe as ruler in exchange for the shard. Ghis orders the shard tested to verify its authenticity while Vossler takes the party to their quarters. He tries to explain himself to Ashe, but she refuses to listen. Fran goes berserk from the Mist spewed by the Dawn Shard during testing, and the group incapacitates their guards. Basch and Vossler duel as the party flees to the airship bay. When a group of Imperial gunners halts them, Ashe summons Belias, entering a trance-like rage.
Vossler gains the upper hand against Basch using Balance magic and shatters his sword, but through willpower and the Mist around them, Basch creates a blade of Mist from the hilt of his sword and continues to fight. The two clash and Basch impales Vossler, Balance not activating since Vossler did not make physical contact with Basch's incorporeal weapon. Vossler entrusts Ashe's protection to Basch, telling him she's currently too weak to hold the throne, and Basch must aid her in her mission. The Dawn Shard causes a chain of system failures and explosions through the airship. Ashe awakens from her trance and sees her arm where Belias glyph appeared has grown bulbous and deformed. She dismisses Belias, causing her arm to be cut to a stump below the elbow.
A wounded Ghis begins to climb and tries to deactivate the Dawn Shard's reactor, but Vossler stabs his sword into Ghis' hand to stop him, telling him they will die together. The airship explodes and obliterates the rest of the fleet as Ashe and her friends flee in an airship back to Dalmasca. An ending narration says that Dalmasca has taken the first step on its road to revival. Because the manga was cancelled, Chapter 19 serves as the ending to the adaptation.
Final Fantasy XII: Revenant Wings
Template:Sideicon A second Leviathan was built and is used by Ashe and Basch to join up with their friends. This Leviathan, though built by the Empire, was made as a Dalmascan flagship for its queen. It serves as a connection between Lemurés and Ivalice.
Treasures
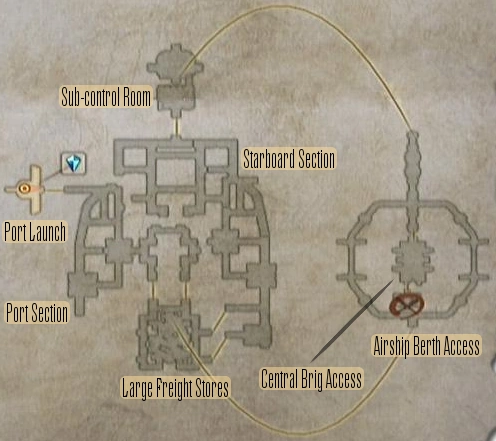
During the player's visit on the Leviathan the player can discover numerous treasures that have a chance of containing new weapons. Since the player visits this location before they can obtain the Diamond Armlet there are only normal treasures. The treasure in the southwest corner of the Port Section has a 90% chance of spawning, 60% to contain gil, but when it has items, it can be either a Reflectga Mote or Handaxe. A treasure in the northeast part of the Starboard Section can contain a Killer Bow. The other treasures have common items and a few gambits, unless they contain gil.
In the Sub-control room there are two treasures that always spawn and once claimed, will never respawn. The other can contain an Assassin's Dagger, and the other an Ancient Sword.
In the International Zodiac Job System version, the Diamond Armlet can be obtained much earlier, so it can be used in this location to obtain Meteorites and Knots of Rust. Most items are the usual mixture of healing items, magic motes, and attack Fangs. However, there are several weapons and armor. In the Port Section there is a Partisan and a Crossbow. In the Large Freight Stores there is a Ringmail and a Shepard's Bolero. Several pieces of Iron equipment such as Sword, Helm, and Armor can be found in the Starboard section. In the Sub-control Room there is a Vega and a Zwill Blade.
The chests that do not respawn in the International Zodiac Job System are a pair of chests in the Large Freight Stores that contain Reflectga Motes. Chest #11 and Chest #19, which contain Sleep and Infuse, respectfully also do not respawn. Opening those two causes two chests in the Ogir-Yensa Sandsea to disappear forever. Fortunately, those lost chests also contain Sleep and Infuse, so the player loses nothing.
Port Section
| Chest | Spawns | Holds Gil% | Gil | Normal Treasure | |
|---|---|---|---|---|---|
| 1 | 90% | 50% | ≤ 200 gil | Item 1 | Item 2 |
| Phoenix Down | Blue Fang | ||||
| 2 | 90% | 60% | ≤ 250 gil | Item 1 | Item 2 |
| Reflectga Mote | Handaxe | ||||
| 3 | 90% | 50% | ≤ 180 gil | Item 1 | Item 2 |
| Hi-Potion | G-Ally:status - HP Crit | ||||
| Chest | Spawns | Holds Gil% | Gil | Normal Treasure | Diamond Armlet Treasure | ||
|---|---|---|---|---|---|---|---|
| 1 | 80% | 20% | ≤ 320 gil | Item 1 | Item 2 | Common | Rare |
| Potion | Phoenix Down | Knot of Rust | Meteorite (B) | ||||
| 2 | 80% | 20% | ≤ 320 gil | Item 1 | Item 2 | Common | Rare |
| Potion | Hi-Potion | Knot of Rust | Meteorite (A) | ||||
| 3 | 80% | 20% | ≤ 320 gil | Item 1 | Item 2 | Common | Rare |
| Potion | Partisan | Knot of Rust | Meteorite (A) | ||||
| 4 | 80% | 20% | ≤ 320 gil | Item 1 | Item 2 | Common | Rare |
| Potion | Crossbow | Knot of Rust | Meteorite (A) | ||||
Large Freight Stores
| Chest | Spawns | Holds Gil% | Gil | Normal Treasure | |
|---|---|---|---|---|---|
| 4 | 90% | 50% | ≤ 350 gil | Item 1 | Item 2 |
| Hi-Potion | Onion Bolts | ||||
| 5 | 90% | 50% | ≤ 350 gil | Item 1 | Item 2 |
| Hi-Potion | Blue Fang | ||||
| 6 | 90% | 50% | ≤ 350 gil | Item 1 | Item 2 |
| Phoenix Down | Reflectga Mote | ||||
| Chest | Spawns | Holds Gil% | Gil | Normal Treasure | Diamond Armlet Treasure | ||
|---|---|---|---|---|---|---|---|
| 5[1] | 100% | 0% | N/A | Reflectga Mote | |||
| 6[1] | 100% | 0% | N/A | Reflectga Mote | |||
| 7 | 80% | 30% | ≤ 350 gil | Item 1 | Item 2 | Common | Rare |
| Potion | Gold Needle | Knot of Rust | Meteorite (A) | ||||
| 8 | 75% | 30% | ≤ 350 gil | Item 1 | Item 2 | Common | Rare |
| Echo Herbs | Alarm Clock | Knot of Rust | Meteorite (B) | ||||
| 9 | 80% | 25% | ≤ 350 gil | Item 1 | Item 2 | Common | Rare |
| Eye Drops | Ringmail | Knot of Rust | Meteorite (A) | ||||
| 10 | 80% | 25% | ≤ 350 gil | Item 1 | Item 2 | Common | Rare |
| Handkerchief | Shepherd's Bolero | Knot of Rust | Meteorite (A) | ||||
- 1 - Chest does not respawn.
Starboard Section
| Chest | Spawns | Holds Gil% | Gil | Normal Treasure | |
|---|---|---|---|---|---|
| 7 | 90% | 23% | ≤ 180 gil | Item 1 | Item 2 |
| Phoenix Down | Blue Fang | ||||
| 8 | 90% | 60% | ≤ 300 gil | Item 1 | Item 2 |
| Reflectga Mote | Killer Bow | ||||
| 9 | 90% | 23% | ≤ 300 gil | Item 1 | Item 2 |
| Hi-Potion | G-Ally: HP < 80% | ||||
| 10 | 90% | 23% | ≤ 360 gil | Ether | |
| Chest | Spawns | Holds Gil% | Gil | Normal Treasure | Diamond Armlet Treasure | ||
|---|---|---|---|---|---|---|---|
| 11[1][2] | 100% | 0% | N/A | Sleep | |||
| 12 | 75% | 40% | ≤ 350 gil | Item 1 | Item 2 | Common | Rare |
| Ether | Iron Armor | Knot of Rust | Meteorite (B) | ||||
| 13 | 75% | 40% | ≤ 350 gil | Item 1 | Item 2 | Common | Rare |
| Ether | Iron Helm | Knot of Rust | Meteorite (A) | ||||
| 14 | 75% | 35% | ≤ 350 gil | Item 1 | Item 2 | Common | Rare |
| Freezing Fang | Hi-Potion | Knot of Rust | Meteorite (C) | ||||
| 15 | 75% | 40% | ≤ 400 gil | Item 1 | Item 2 | Common | Rare |
| Potion | Reflectga Mote | Knot of Rust | Meteorite (A) | ||||
| 16 | 75% | 35% | ≤ 350 gil | Item 1 | Item 2 | Common | Rare |
| Hi-Potion | Iron Sword | Knot of Rust | Meteorite (A) | ||||
- 1 - Chest does not respawn.
- 2 - Opening this chest causes Chest #4 in the Ogir-Yensa Sandsea to disappear forever. Inversely, if Ogir-Yensa Sandsea chest #4 has been opened, this chest will disappear forever as well. However, both chests contain the same treasure.
Sub-control Room
| Chest | Spawns | Holds Gil% | Gil | Normal Treasure | |
|---|---|---|---|---|---|
| 11[1] | 100% | 40% | ≤ 550 gil | Item 1 | Item 2 |
| Reflectga Mote | Ancient Sword | ||||
| 12[1] | 100% | 40% | ≤ 550 gil | Item 1 | Item 2 |
| Phoenix Down | Assassin's Dagger | ||||
- 1 - Chest does not respawn.
| Chest | Spawns | Holds Gil% | Gil | Normal Treasure | Diamond Armlet Treasure | ||
|---|---|---|---|---|---|---|---|
| 17 | 80% | 40% | ≤ 400 gil | Item 1 | Item 2 | Common | Rare |
| Hi-Potion | Vega | Knot of Rust | Meteorite (B) | ||||
| 18 | 80% | 25% | ≤ 400 gil | Item 1 | Item 2 | Common | Rare |
| Potion | Phoenix Down | Knot of Rust | Meteorite (A) | ||||
| 19[1][2] | 100% | 0% | N/A | Infuse | |||
| 20 | 75% | 35% | ≤ 400 gil | Item 1 | Item 2 | Common | Rare |
| Hi-Potion | Zwill Blade | Knot of Rust | Meteorite (A) | ||||
- 1 - Chest does not respawn.
- 2 - Opening this chest causes Chest #2 in the Ogir-Yensa Sandsea to disappear forever. Inversely, if Ogir-Yensa Sandsea chest #2 has been opened, this chest will disappear forever as well. However, both chests contain the same treasure.
Monsters
- Imperial Gunner
- Imperial Magus
- Imperial Swordsman
- Imperial Hoplite
- Mastiff
- Judge (Event Boss)
- Judge Ghis (Boss)
Non-player characters
After the plot events on the Dreadnought Leviathan, the moogle Tetran will show up in Eruyt Village. He will appear regardless if the player let him out of the cage or not.
Shops
Tetran
Weapons
|
Armor
|
Accessories
|
Magicks |
Ammunition
|
Technicks |
Items
|
Gambits
|
Musical themes
Template:Listen
The background theme for Leviathan is called "Defying the Empire" (帝国への挑戦, Teikoku e no chōsen?).
Map
Other appearances
Final Fantasy Airborne Brigade
Template:Sideicon
Final Fantasy Record Keeper
Template:Sideicon
Gallery
")
")
")
")
")
")
")
")
")
Etymology
The airships in Final Fantasy XII are allusions to previous Final Fantasy games, the Archadian Imperial Fleets being named after summons. The Dreadnought was a battleship in Final Fantasy II, and Leviathan is a recurring aquatic summoned monster.
Dreadnoughts were a type of battleship popular in the first half of the 20th century before the advent of the aircraft carrier made them obsolete. They were gigantic heavily armored ships noted for an "all-big-gun" design that allowed for great firing range while being well-protected. The term "dreadnought" comes from the first major ship of this design, the 1906 HMS Dreadnought. The word means "fear nothing".
Leviathan (Biblical Hebrew לִוְיָתָן or לווייתן Liwyāthān) is a violent sea creature referred to in the Hebrew Bible as well as the Talmud and some other ancient Jewish texts. The Ugaritic equivalent being Lotan. During the golden age of seafaring, the term Leviathan became synonymous with any large sea creature, sometimes describing whales. Bible scholars interpreted Leviathan to be either a demonic sea creature and an enemy of God.
The Talmud and other ancient Jewish sources refer to Leviathan more specifically as a sea serpent, sometimes with multiple heads capable of breathing fire, that was made on the fifth day of Creation. It is said that during the end of days, God will make tents, or sukkah, out of the skin of Leviathan for the righteous to live in. Some have speculated that Leviathan was based on a real animal, the most popular theory being the Kronosaurus and the Nile crocodile.
Leviathan is also one of the seven princes of Hell associated with the deadly sin Envy and Hell's gatekeeper in Christian demonology.
In the Final Fantasy series, Leviathan is sometimes referred to as the King of the Seas. Its incarnation in the series appears to derive from the legends of the Shinto god Ryūjin or Owatatsumi, said to be the dragon god that reigns over the seas. It also resembles the Chinese dragon, mystical beings seen as the rulers of moving bodies of water, and the Dragon God as the dispenser of rain.
Trivia
- After rescuing Ashe, the alarm will go off and endless soldiers will come. This is a decent spot to grind levels. If one is near death, they can simply go back to the cell block and use the Save Crystal and repeat the process. Also, seeing that the only enemies that come are soldiers, this spot makes good use of gambits and Chaining.
Template:FFXII Template:XIIRW Template:Transportation