(Adding categories) |
Intangir Bot (talk | contribs) m (→Stats: class/genus fixing (swapped in TZA), replaced: class = → classification =) |
||
| (95 intermediate revisions by 21 users not shown) | |||
| Line 1: | Line 1: | ||
| + | {{DISPLAYTITLE:Chaos (''Final Fantasy XII'' boss)}} |
||
| − | {{FFXII Enemies |
||
| + | {{infobox enemy |
||
| ⚫ | |||
| − | | |
+ | | release = FFXII |
| ⚫ | |||
| − | |image = [[File:Chaos.jpg|230px]] |
||
| + | | name = Chaos |
||
| ⚫ | |||
| + | | image = Chaos-ffxii-battle.png |
||
| ⚫ | |||
| ⚫ | |||
| ⚫ | |||
| − | | |
+ | | romaji = Kaosu |
| + | | location = [[Necrohol of Nabudis]] (The Crucible); [[Trial Mode]] [[Trial Mode#84|Stage 84]] (''Zodiac'' versions) |
||
| ⚫ | |||
| + | | character = Chaos (Final Fantasy XII) |
||
| − | |HP = 208,966 |
||
| − | | |
+ | | aiscript = yes |
| ⚫ | |||
| ⚫ | |||
| − | |Mag = 47 |
||
| − | |M.Def = 34 |
||
| − | |Atk = 98 |
||
| − | |Vitality = 87 |
||
| ⚫ | |||
| ⚫ | |||
| − | |CP = 6,260 |
||
| ⚫ | |||
| ⚫ | |||
| ⚫ | |||
| ⚫ | |||
| ⚫ | |||
| ⚫ | |||
| ⚫ | |||
| ⚫ | |||
| ⚫ | |||
| ⚫ | |||
| − | |romaji = Kaosu |
||
| ⚫ | |||
| − | |Bestiary Location = Espers |
||
| − | |LP = 60 |
||
| ⚫ | |||
| ⚫ | |||
| − | |Rare Steal = High Arcana |
||
| − | |High Drop = None |
||
| − | |Medium Drop = None |
||
| − | |Low Drop = None |
||
| − | |Very Low Drop = None |
||
| − | |Common Poach = None |
||
| − | |Rare Poach = None |
||
| − | |Monograph = None |
||
| − | |Canopic = None |
||
| − | |Attack(s) = Can inflict [[Disable (Status)|Disable]] |
||
| − | |Abilities = Whirlwind, [[Aeroga]], [[Aero|Aeroja]], [[Fearga]], Enrage |
||
| − | |Innate = Safety, Null Knockback, Null VIT, Null Weather and Terrain Effects, Piercing Magic, Focus, Last Stand, HP Devour, Spellspring<br>If HP <50% - Null Evade, Attack Plus<br>If Enrage on - Attack CT 0 |
||
| − | |Immune to = [[Death (Ability)|Death]], [[Petrify]], [[Stop (Status)|Stop]], [[Doom (Status)|Doom]], [[Confusion|Confuse]], [[Sleep (Status)|Sleep]], [[Virus (Status)|Disease]], [[Reverse]], [[Disable (Status)|Disable]], [[Immobilize (Status)|Immobilize]], [[Silence (Status)|Silence]], [[Blind (Status)|Blind]], [[Poison (Status)|Poison]], [[Oil (Status)|Oil]], [[Lure]], [[Berserk (Status)|Berserk]], [[Warp]], [[Poach]], Fractional Damage, [[Sight Unseeing]], [[Osmose|Syphon]], [[Numerology]], [[Charm (Status)|Charm]], [[Achilles]], [[Power Break|Wither]], Addle, [[Gravity (Ability)|Gravity]] |
||
| ⚫ | |||
}} |
}} |
||
| + | '''Chaos''' is a [[boss]] in ''[[Final Fantasy XII]]'' fought alongside a quartet of chaosjets in the [[Necrohol of Nabudis]]. Chaos is also fought alongside the chaosjets in the ''Zodiac'' versions' [[Trial Mode]] in [[Trial Mode#84|Stage 84]], where the following items can be [[Steal (Final Fantasy XII)|stolen]] from him: [[Elixir (Final Fantasy XII)|Elixir]] (common), [[Glimmering Robes (Final Fantasy XII)|Glimmering Robes]] (uncommon) and [[Sage's Ring (Final Fantasy XII)|Sage's Ring]] (rare). |
||
| − | '''[[Chaos (Ivalice)|Chaos]]''' is a boss from ''[[Final Fantasy XII]]''. The party fights him in the [[Necrohol of Nabudis]]. |
||
| − | ==Bestiary |
+ | ==Bestiary entry== |
| ⚫ | |||
| − | '''Genus''': Esper<br/> |
||
| ⚫ | :''Tutelary deity of the sacred crystals fashioned by the gods at the time of the Great Making. Created in opposition to Mitron the Chastiser, scion of light. Upon entering the world of Man, he was enveloped in the turmoil rampant there. Lost, he died and was reborn countless times, a walker of life's wheel, eventually to rage against the gods that had so fated him. By sitting in meditation upon the Unrh Pedestal does he clear heart and mind until all that has order and reason and thought is made as nothing.'' |
||
| ⚫ | |||
| + | ==Stats== |
||
| ⚫ | |||
| + | {{infobox enemy stats FFXII |
||
| ⚫ | ''Tutelary deity of the sacred crystals fashioned by the gods at the time of the Great Making. Created in opposition to Mitron the Chastiser, scion of light. Upon entering the world of Man, he was enveloped in the turmoil rampant there. Lost, he died and was reborn countless times, a walker of life's wheel, eventually to rage against the gods that had so fated him. By sitting in meditation upon the Unrh Pedestal does he clear heart and mind until all that has order and reason and thought is made as nothing.'' |
||
| + | | name = Chaos |
||
| ⚫ | |||
| ⚫ | |||
| ⚫ | |||
| + | | classification = Esper |
||
| ⚫ | |||
| + | | level = 57 |
||
| ⚫ | |||
| + | | hp = 208966 |
||
| + | | mp = 999 |
||
| + | | strength = 52 |
||
| ⚫ | |||
| + | | magick power = 47 |
||
| + | | magick resist = 34 |
||
| + | | attack power = 98 |
||
| + | | vitality = 87 |
||
| ⚫ | |||
| ⚫ | |||
| + | | cp = 6260 |
||
| ⚫ | |||
| ⚫ | |||
| ⚫ | |||
| + | | lightning = Immune |
||
| + | | water = Immune |
||
| ⚫ | |||
| ⚫ | |||
| ⚫ | |||
| ⚫ | |||
| ⚫ | |||
| ⚫ | |||
| ⚫ | |||
| ⚫ | |||
| ⚫ | |||
| + | | status effect = [[Final Fantasy XII statuses#Disable|Disable]] |
||
| + | | status effect rate = 4 |
||
| + | | charge time = 25 |
||
| + | | magicks = [[Final Fantasy XII enemy abilities#Whirlwind|Whirlwind]], [[Final Fantasy XII enemy abilities#Aeroga|Aeroga]], [[Final Fantasy XII enemy abilities#Aeroja|Aeroja]], [[Final Fantasy XII enemy abilities#Fearga|Fearga]] |
||
| + | | technicks = [[Final Fantasy XII enemy abilities#Enrage|Enrage]] |
||
| + | | innate augments = [[Final Fantasy XII enemy abilities#Safety|Safety]], [[Final Fantasy XII enemy abilities#No Knockback|No Knockback]], [[Final Fantasy XII enemy abilities#Ignore Vitality|Ignore Vitality]], [[Final Fantasy XII enemy abilities#Ignore Weather & Landscape|Ignore Weather & Landscape]], [[Final Fantasy XII enemy abilities#Ignore Reflect|Ignore Reflect]], [[Final Fantasy XII enemy abilities#Full-HP ATK+|Full-HP ATK+]], [[Final Fantasy XII enemy abilities#Low-HP Def+|Low-HP Def+]], [[Final Fantasy XII enemy abilities#0 MP|0 MP]] |
||
| + | | conditional augments = When HP >50%: [[Final Fantasy XII enemy abilities#HP Attack|HP Attack]]<br/>When HP <50%: [[Final Fantasy XII enemy abilities#Ignore Evade|Ignore Evade]] and [[Final Fantasy XII enemy abilities#Normal Damage+|Normal Damage+]]<br/>After using Enrage: [[Final Fantasy XII enemy abilities#Attack CT0|Attack CT0]] |
||
| + | | libra immune = yes |
||
| + | | petrify = Immune |
||
| ⚫ | |||
| + | | doom = Immune |
||
| + | | confuse = Immune |
||
| + | | sleep = Immune |
||
| + | | disease = Immune |
||
| + | | reverse = Immune |
||
| + | | disable = Immune |
||
| + | | immobilize = Immune |
||
| + | | silence = Immune |
||
| + | | blind = Immune |
||
| + | | poison = Immune |
||
| ⚫ | |||
| + | | lure = Immune |
||
| + | | berserk = Immune |
||
| + | | haste = 100 |
||
| + | | regen = 100 |
||
| ⚫ | |||
| ⚫ | |||
| + | ==AI script==<!--info is from Split Infinity's guide: https://gamefaqs.gamespot.com/ps2/459841-final-fantasy-xii/faqs/42270--> |
||
| − | ==Side Quest== |
||
| + | {{Enemy AI FFXII |
||
| − | Before the player can fight Chaos, a side quest must be completed to obtain the appointed keys. The player must go to [[Nabreus Deadlands]] to trigger the scene with the [[Nu Mou]] Ma'Kleou, and then collect three fragments. |
||
| + | |magickname1 = [[Final Fantasy XII enemy abilities#Aeroga|Aeroga]] |
||
| + | |magickcond1 = HP <80% (100%)<br/>80% > HP > 50% after each next 8 commands (100%)<br/>HP <50% after each next 16 commands (100%) |
||
| + | |magickname2 = [[Final Fantasy XII enemy abilities#Aeroja|Aeroja]] |
||
| + | |magickcond2 = HP <50% (100%)<br/>HP <50% after each next 16 commands (100%) |
||
| + | |magickname3 = [[Final Fantasy XII enemy abilities#Fearga|Fearga]] |
||
| + | |magickcond3 = 50% > HP > 20%; used on opponent with most MP (25%) |
||
| + | |magickname4 = [[Final Fantasy XII enemy abilities#Whirlwind|Whirlwind]] |
||
| + | |magickcond4 = HP >20% (25%) |
||
| + | |technickname1 = [[Final Fantasy XII enemy abilities#Enrage|Enrage]] (Gain Attack CT0) |
||
| + | |technickcond1 = HP <20%; use once (100%) |
||
| + | |augmentname1 = [[Final Fantasy XII enemy abilities#Ignore Evade|Ignore Evade]] |
||
| + | |augmentcond1 = When HP <50% |
||
| + | |augmentname2 = [[Final Fantasy XII enemy abilities#Normal Damage+|Normal Damage+]] |
||
| + | |augmentcond2 = When HP <50% |
||
| + | }} |
||
| + | ==Sidequest== |
||
| − | ===First Medallion=== |
||
| + | {{Main|Three medallions sidequest}} |
||
| − | To get the first medal the player must collect three medallion shards: Blackened Fragment, Dull Fragment and Grimy Fragment. To get the Blackened Fragment the [[Wraith (Final Fantasy XII)|Wraith]], [[White Mousse (Final Fantasy XII)|White Mousse]], and [[Orthros (Final Fantasy XII)|Orthros]] hunts must be cleared, and the player will receive the Blackened Fragment as reward for the Orthros hunt. The Dull Fragment is hidden in the [[Garamsythe Waterway]]. After obtaining the Sluice Gate Key (reward from White Mousse hunt mission), the player can work the Sluice Gate Switches in the waterway. The player must first turn all the switches off (that means lights off) and follow the steps below: |
||
| + | Before the player can fight Chaos, a sidequest must be completed to obtain the appointed keys. |
||
| − | [[File:Medallion1.jpg|thumb|left|Dull Fragment on the floor.]] |
||
| − | *On No.11 Area Panel (that means light up the panel) |
||
| − | *On No.4 Area Panel |
||
| − | *Off No.11 Area Panel |
||
| − | *On No.3 Area Panel |
||
| − | *Off No.4 Area Panel |
||
| ⚫ | After obtaining the medallions, the player must head to the Cloister of Distant Song in the Necrohol of Nabudis, and use the Medallion of Bravery to open the Door of Horrors, and defeat the [[Humbaba Mistant]]. The player must also head to the Hall of the Ivory Covenant and use the Medallion of Love to open the Door of Loathing and bring down the [[Fury (Final Fantasy XII)|Fury]]. The player must defeat Humbaba Mistant and Fury (in any order) to change the Lusterless Medallion to the Medallion of Might, which opens the Door of Despair to fight Chaos in the central section. |
||
| − | After the last gate is closed a click is heard and south in the same semi-circle area, on the ground, there is a glittering object, the Dull Fragment. |
||
| + | ==Battle== |
||
| − | [[File:Medallion2.jpg|thumb|left]] |
||
| + | The [[Attack (command)#Final Fantasy XII|Attack command]] is disabled for the duration of the fight. Chaos tends to use [[Fear (ability)|Fearga]], which reduces the entire party's [[MP (stat)|MP]]. His special attack is [[Aeroja]], which inflicts [[Final Fantasy XII statuses#Confuse|Confuse]]. Chaos also inflicts [[Final Fantasy XII statuses#Silence|Silence]] often and his normal attacks inflict [[Final Fantasy XII statuses#Disable|Disable]]. Chaos himself can be inflicted with [[Final Fantasy XII statuses#Sap|Sap]] and [[Final Fantasy XII statuses#Slow|Slow]]. |
||
| − | To get the Grimy Fragment the player must return to [[Royal City of Rabanastre|Rabanastre]] Lowtown and go to Old [[Dalan]]'s place and speak to the Nu Mou known as Roh'Kenmou. In order for Roh'Kenmou to appear at Old Dalan's place the player must have first spoken to Ma'Kleou in the Nabreus Deadlands. [[Filo]] is around the South East area of Lowtown and mentions the kids are also looking for the medallion. In Rabanastre's central section, Southern Plaza, there is a "Curious Woman" looking at the fountain. After talking to the "Curious Woman" the player should walk to the Muthru Bazaar and speak to the merchants about the necklace to get the information, then head to the Magick Shop and speak to the "Sotted Imperial," the soldier sitting in the left corner, and choose the first option twice. Back in Lowtown the player should talk to Filo again, choose "Let's Go" with Filo for some events to get the last fragment, Grimy Fragment. |
||
| + | ===Strategy=== |
||
| − | Back in Old Dalan's place the player should to give all the fragments to Roh'Kenmou and he will disappear. |
||
| ⚫ | As there is no [[Save point#Final Fantasy XII|save crystal]] before the fight, it is best to ensure all party members are in top-notch condition. [[Windbreaker (Final Fantasy XII)|Windbreakers]] are helpful in mitigating damage, and the player can switch equipment when Chaos readies his special attack. |
||
| − | {{-|left}} |
||
| + | It is useful to place [[gambits]] to use [[Nu Khai Sand]] (Smelling Salts in the original version) or [[Remedy (Final Fantasy XII)|Remedy]] to deal with Confuse from Aeroja. It is also good to be stocked up on [[Echo Herbs (Final Fantasy XII)|Echo Herbs]]. [[Black Belt (Final Fantasy XII)|Black Belts]] can prevent Disable from being inflicted. |
||
| − | ===Second Medal=== |
||
| − | In [[Imperial City of Archades|Archades]] the player can find Roh'Kenmu within the Magick Shop, looking for a medallion. In the [[Old Archades]] the player can find the Proper Gent sitting on a side wall in the eastern side of the Alley of Muted Sighs. He is Otto and he will give the Moonsilver Medallion, which the player must pass on to Roh'Kenmu at the Magick Shop. |
||
| + | The player can use [[Souleater (Final Fantasy XII)|Souleater]], [[Telekinesis (Final Fantasy XII)|Telekinesis]], and [[Gil Toss (Final Fantasy XII)|Gil Toss]] to deal physical damage, or put up [[Reflect (Final Fantasy XII status effect)|Reflect]] and bounce [[non-elemental]] spells at Chaos. [[Knot of Rust (Final Fantasy XII)|Knots of Rust]] can be used to damage Chaos as well as the [[Elemental (enemy)|elementals]]. [[Drain (Final Fantasy XII)|Drain]] and [[Balance (Final Fantasy XII)|Balance]] can also be used. |
||
| − | ===Final Medal=== |
||
| − | After giving the first two medallions to the Nu Mous, the player must travel to Nabreus Deadlands and talk to Ma'Kleou, then head northwest and search for a [[Hidden Passage|hidden path]]. One can find it by going south from the [[Save Point#Final Fantasy XII|Gate Crystal]], following the section, and searching the northwest area of The Slumbermead for the path. This is also the place where [[Roblon]] is fought. At the end of the path there is a monument with the Nu Mous, and the player gets the Medallion of Bravery, Medallion of Love, and the Lusterless Medallion. |
||
| − | == |
+ | ==Other appearances== |
| + | ===''[[Pictlogica Final Fantasy]]''=== |
||
| ⚫ | After obtaining the medallions, the player must head to the Cloister of Distant Song in the |
||
| + | {{Enemy section|Pictlogica Final Fantasy}} |
||
| − | == |
+ | ==Gallery== |
| + | <gallery> |
||
| ⚫ | |||
| + | FFXII chaos.jpg|Bestiary entry (PlayStation 2). |
||
| ⚫ | |||
| ⚫ | |||
| + | Fearga-FFXII.jpg|Fearga. |
||
| + | FFXII Whirlwind.png|Whirlwind. |
||
| + | Trial-Mode-Stage-84-FFXII-TZA.jpg|Trial Mode. |
||
| + | </gallery> |
||
| ⚫ | |||
| − | Chaos can be inflicted with [[Sap]] and [[Slow (Status)|Slow]]. Chaos tends to use [[Fearga]], which reduces the whole party's [[MP (Stat)|MP]]. It is useful to place [[Gambits|gambits]] to use [[List of Final Fantasy XII Items#Smelling Salts|Smelling Salts]] or [[Remedy]] to deal with [[Confusion|Confuse]] from [[Aeroja]]. In addition, Chaos inflicts [[Silence (Status)|Silence]] often, so it is good to be stocked up on [[Echo Herbs]]. |
||
| ⚫ | |||
| − | |||
| ⚫ | |||
| − | The player can either go the physical route with [[Souleater]], [[Telekinesis]], and [[Gil Toss]], or put up [[Reflect (Status)|Reflect]] and bounce [[non-elemental]] spells at Chaos. Also, [[List of Final Fantasy XII Items#Knot of Rust|Knots of Rust]] can be used to damage Chaos. Knots of Rusts can be bought at the Clan Store in the Muthru Bazaar in Rabanastre. The Knots of Rust are useful against the elementals that are fought along with Chaos as well. Chaos's attacks can sometimes inflict [[Disable (Status)|Disable]], so it would be a good idea to equip [[List of Final Fantasy XII Accessories#Black Belt|Black Belts]]. Using the Nihopalaoa/Remedy trick to inflict Sap and Slow on him also helps. |
||
| ⚫ | |||
| − | |||
| ⚫ | |||
| − | ==Gallery== |
||
| ⚫ | |||
| − | {{Gallery |
||
| ⚫ | |||
| ⚫ | |||
| ⚫ | |||
| ⚫ | |||
| ⚫ | |||
| ⚫ | |||
| ⚫ | |||
| ⚫ | |||
| ⚫ | |||
| + | *[[Zodiark (Final Fantasy XII boss)|Zodiark]] |
||
| ⚫ | |||
| ⚫ | |||
| ⚫ | |||
| ⚫ | |||
| ⚫ | |||
| ⚫ | |||
| ⚫ | |||
| ⚫ | |||
| ⚫ | |||
| ⚫ | |||
| ⚫ | |||
| ⚫ | |||
| ⚫ | |||
| + | [[de:Chaos (FFXII Boss)]] |
||
[[it:Chaos (Final Fantasy XII)]] |
[[it:Chaos (Final Fantasy XII)]] |
||
| − | [[Category:Final Fantasy XII |
+ | [[Category:Bosses in Final Fantasy XII]] |
| − | [[Category:Chaos]] |
||
Latest revision as of 08:27, 15 March 2024
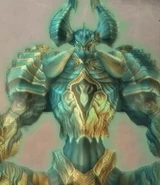
Chaos is a boss in Final Fantasy XII fought alongside a quartet of chaosjets in the Necrohol of Nabudis. Chaos is also fought alongside the chaosjets in the Zodiac versions' Trial Mode in Stage 84, where the following items can be stolen from him: Elixir (common), Glimmering Robes (uncommon) and Sage's Ring (rare).
Bestiary entry[]
Page 1: Observations[]
- Tutelary deity of the sacred crystals fashioned by the gods at the time of the Great Making. Created in opposition to Mitron the Chastiser, scion of light. Upon entering the world of Man, he was enveloped in the turmoil rampant there. Lost, he died and was reborn countless times, a walker of life's wheel, eventually to rage against the gods that had so fated him. By sitting in meditation upon the Unrh Pedestal does he clear heart and mind until all that has order and reason and thought is made as nothing.
Stats[]
AI script[]
| Abilities | ||
|---|---|---|
| Type | Name | Condition |
| Aeroga | HP <80% (100%) 80% > HP > 50% after each next 8 commands (100%) HP <50% after each next 16 commands (100%) | |
| Aeroja | HP <50% (100%) HP <50% after each next 16 commands (100%) | |
| Fearga | 50% > HP > 20%; used on opponent with most MP (25%) | |
| Whirlwind | HP >20% (25%) | |
| Enrage (Gain Attack CT0) | HP <20%; use once (100%) | |
| Ignore Evade | When HP <50% | |
| Normal Damage+ | When HP <50% | |
| Properties | ||
| Type | Property | |
| Targeting | ||
| Linking | ||
| Attacks | ||
| Pursuit | ||
Sidequest[]
Before the player can fight Chaos, a sidequest must be completed to obtain the appointed keys.
After obtaining the medallions, the player must head to the Cloister of Distant Song in the Necrohol of Nabudis, and use the Medallion of Bravery to open the Door of Horrors, and defeat the Humbaba Mistant. The player must also head to the Hall of the Ivory Covenant and use the Medallion of Love to open the Door of Loathing and bring down the Fury. The player must defeat Humbaba Mistant and Fury (in any order) to change the Lusterless Medallion to the Medallion of Might, which opens the Door of Despair to fight Chaos in the central section.
Battle[]
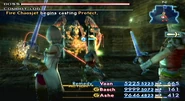
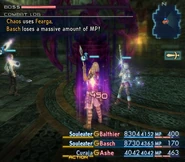
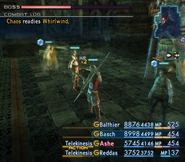
The Attack command is disabled for the duration of the fight. Chaos tends to use Fearga, which reduces the entire party's MP. His special attack is Aeroja, which inflicts Confuse. Chaos also inflicts Silence often and his normal attacks inflict Disable. Chaos himself can be inflicted with Sap and Slow.
Strategy[]
As there is no save crystal before the fight, it is best to ensure all party members are in top-notch condition. Windbreakers are helpful in mitigating damage, and the player can switch equipment when Chaos readies his special attack.
It is useful to place gambits to use Nu Khai Sand (Smelling Salts in the original version) or Remedy to deal with Confuse from Aeroja. It is also good to be stocked up on Echo Herbs. Black Belts can prevent Disable from being inflicted.
The player can use Souleater, Telekinesis, and Gil Toss to deal physical damage, or put up Reflect and bounce non-elemental spells at Chaos. Knots of Rust can be used to damage Chaos as well as the elementals. Drain and Balance can also be used.

